Where did you mount your Cellink Battery B?

Gollan

New Member
Joined
Jan 21, 2017
Messages
13
Reaction score
4
Country
Canada
Where did you mount your Cellink Battery B? I have a Ford Escape SUV. The fuses are under the glovebox on the passenger side. I'm not sure I want to put the Celllink Battery B on the floor, since there is not a lot of room in the passenger footwell and northern Ontario (Canada) weather can leave a lot of snow and slush in there. The glovebox has plenty of room (I don't use it for much), so I am thinking about attaching it in there with the velcro. I'm also going to check under the passenger seat, but I think there is a heat vent there. The cables that come with it are plenty long, so I can always move it around and try different places.

I'm curious to know where people mounted their battery and what kind of vehicle you have.
 
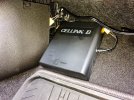
I got it all wired up and it is working! The glovebox doesn't have any openings, so I decided to try it on the front wall of the passenger footwell where there is a 45° slope covered with carpet. If it moves out of place, I will see about strapping it down. An alternate spot I found is just under the front of the passenger seat (this would require routing the wires under the interior carpet).
 
Here is a photo of the installation of my Cellink Battery B in the passenger footwell of my 2016 Ford Escape. After 10 days of driving on highways and rough, unpaved roads, it has not moved and my passengers have not kicked any snow onto it.

IMG_3853_2048w.jpg
 
I put mine in the cubby box in the centre console behind the gear stick, with velcro to stop it rattling around. This is on a Hyundai Tucson.

When the lid is closed, there's 1/8" gap for tthe wires to come out and a couple of stickly cable clips down the side of the console next to the passenger are enough to route the wires neatly to the cigaratte lighter.

I did consider passenger footwell but did not want it being kicked.
 
Late response but on my Fiesta there's actually enough room behind the glove box to place the Cellink
In our Prius we have it in the area under the front driver's seat. There's a hump on the floor where the seat bolts in and the Cellink fits nicely behind that hump, same for the Mazda 3.
Snow/water wouldn't get in there unless the passenger did it on purpose
 
I used to put my Cellink B in my central console front arm rest bin.

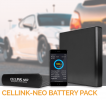
The Cellink B is now discontinued, and only the new Cellink Neo is on sale.

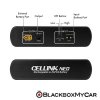
However, my new Cellink Neo is a good 1" wider and roughly 1 lbs heavier - probably due to aluminium heat sinks beneath a new aluminium outer cover - but this has also significantly increased its run time, despite being the same Watt-hour capacity.
Thus it doesn't fit well into the central console front arm rest bin anymore.
Now, I have to try fitting it under the front seat base, or the glove box.
The trunk is too far away and awkward with cabling.

NEO-banner.png
 
Last edited:
The space beneath my pair of air conditioned twin front bucket seats is too shallow for the Cellink Neo.
Thus, I ended placing the Cellink Neo in the glove box.
From the driver's seat, I had to stretch forwards and to the other side to reach the Cellink Neo's Low/Off/High button.
CellinkNeo_Map_1024x1024.jpg


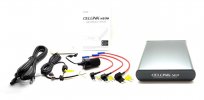
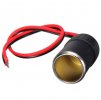
Thus, from the 1 m long 3-wire output cable provided by Cellink, 2nd from the left below, I had to solder a 12V DC Accessory Female Socket, so that the Socket could be placed in the Central Console Bin - a far more easily accessible location.
When soldering the wires to the 12V DC accessory female socket, only two of the three wires were needed to be soldered.
The third wire was left as is inside the base of the female socket.

2.jpg

0.3 Extend socket!.jpg


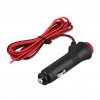
I then soldered a 12 V DC Accessory Male Plug with Single LED Switch to the 3-way Splitter stored in the Central Console Bin.
This enables me to switch On/Off with just the one button!
Thus, whenever I want to turn the Cellink Neo On/Off, I simply open the central console bin to switch on/off.
1.1 Winner.jpg


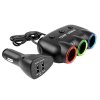
If I did not solder the 12V DC Accesory Male Plug to the 3-way splitter, then I would have to press two buttons on the 3-Way splitter to switch on both my front and rear dashcams.
3.1 Individual buttons.jpg
 
Last edited:
Back
Top