Garmin mount bracket modification

Outbacknomad

Active Member
Joined
Apr 7, 2021
Messages
202
Reaction score
137
Location
Sydney
Country
Australia
Dash Cam
4 x Garmin 56 plus 100Ah auxiliary battery
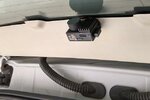
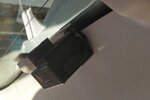
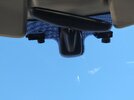
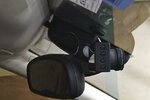
I wanted my Garmin 56 up behind the mirror. As small as the mounting bracket is, the camera was just a bit too much in the way of the mirror if I swing the mirror to its full extent no matter where I positioned the camera.

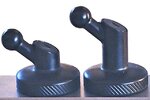
So I cut the Garmin bracket down so it is about 9mm shorter. I made two locating pins to fit two of the four segments with small pieces of aluminium and a file, you will clearly see this when you cut the bracket.

It's not difficult, just a bit if elbow grease, about 30 minutes to cut and make two small guiding/location pins/guides, whatever you like to call them.

Glued it together with 24 Araldite. 5 minute Araldite will not give you long enough setting time due to fiddling around and filling the internal space.

Sanded the joint with some 1200 wet and dry. Not perfect for the first prototype but good enough! All up with pre sanding to get each half reasonably square, about one hour of work. But about a week to think out this solution. But more importantly 24 hours patience to let the glue set!
Dashcam-mod001.jpg
The mirror still touches the camera at full extent but it won't knock it off. I never actually have the mirror swung to the side this much, but it is good to have a bit more clearance so the camera will not be swinging from its cable.
Dashcam-mod002.jpg
 
Thank you for your comments. I have a have a few other modifications which I will post.

Hopefully the modifications are of use, or at the very least help with other people's requirements, & improve upon! When a standard mounting bracket doesn't quite do the job.
 
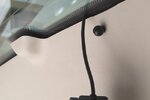
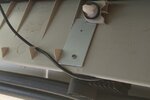
The rear mounted camera, I cut off the Garmin ball joint, tapped an M2 thread through the centre of the ball joint to screw it onto the car trim panel.

The trim panel was a whisker unstable so with some 3M VHB tape stuck to the back, I stuck a piece of aluminium to stiffen it up. There is also a screw under the trim panel clip mounting moulding, a bit hard to see, just to make sure the VHB tape doesn't start peeling away from the edge of the aluminium.

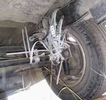
The Camera is tucked up as high as possible in the tailgate, I had some old heatsinks to help remove heat as the camera is tucked up in a corner. Should use some heatsinks a bit larger but that is what I had at hand.

(The camera has a polarising linear film taped to the lens)

Threading the USB cable through the rubber tube took a bit of patience and massaging, but in the end was easier than I thought it would be, due to the plug on the end of the USB cable. So not too difficult.
IMG_20210414_105822951_HDR.jpg
IMG_20210328_080818297_HDR.jpg
IMG_20210328_095058011.jpg
IMG_20210328_080850527.jpg

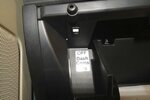
I have also added a master on/off switch so when the car is being serviced the cameras can all be turned off.

I will turn the cameras off in front of the service centre staff, so they can see they don't need to remove and put all the cameras in the glove box for privacy regulations.
IMG_20210328_081305922.jpg
 
I have also added a master on/off switch so when the car is being serviced the cameras can all be turned off.

I will turn the cameras off in front of the service centre staff, so they can see they don't need to remove and put all the cameras in the glove box for privacy regulations.
good luck with that, I would have cameras off and memory cards removed and the mechanics still pulled all the wires out and left them hanging, idiots
 
I have used the same mechanics for 30 years for all my new cars, I never taken a car to a dealer, dealer and warranties is BS, so you actually have people who know know what they are doing.
 
I have used the same mechanics for 30 years for all my new cars, I never taken a car to a dealer, dealer and warranties is BS, so you actually have people who know know what they are doing.
yeah it's only a problem I had at the Suzuki dealership when it was getting warranty services, my regular mechanic that does the rest of our cars couldn't care less about the cameras, with him I don't have to bother turning anything off, he has nothing to hide
 
Probably like a good number of people I bought cameras because of an incidence that was someone else's fault and I paid the price. Hence the side cameras. It's not happening again!

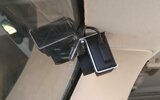
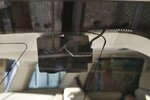
I wanted the side cameras up as high as possible so I folded up some 1.6mm thick aluminium to fit the cameras.

First prototype was a little out with dimensions, but got the size right for the second prototype and third for camera on the other side.

The bracket is bolted together with some M2.5 bolts and stuck on the glass with some 3M VHB tape.

The bracket has enough tension to hold the camera firmly but the camera can slide out of the bracket for memory card removal. A bit of black tape on the aluminium facing the glass.

Folding aluminium. It is best to heat aluminium with a heat gun for 30 second or so and then instantly fold the aluminium in a bench vise with say block of wood or bar. Heating aluminium before folding will reduce stress cracking.

I may at a later stage mount through the ceiling panel. I have taken the ceiling out about four times for other work, although I am quick at doing this now it is a real pain in the neck as you need to take half bthe car apart. I had to take the ceiling partly out to run the camera cables but at that stage had not worked out an above ceiling bracket solution. But for now the window brackets work well.

IMG_20210327_082731402.jpg
IMG_20210327_082757597_HDR.jpg
There is a polarising lineal optical film (1mm sheet) on the camera to reduce reflection on the bottom portion of the photo.
Left-side.jpg
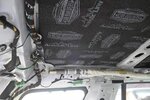
Above the ceiling lining airbag hardware.
normal_IMG_5305 (1).jpg
 
Second front camera added, no polarising filter, so a bit better for night and redundancy at the front. No modifications this time other than wire in another 12v socket for another Garmin USB adaptor. Ran the cable down the A column to the master switch.
6003529748971637848_2.jpg
 
I see you mounted the cam beside the rear view mirror fixing point, doesn't this interfere with the field of view?
 
There is a clear view. Even if there was a small amount of vignetting I would have still put it in this position. The camera has a FOV of 140° according to the manufacturer which horizontally is about 117° but the image on these sort of cameras is a bit curved so FOV is academic to some degree. I used Garmin live view to have a larger image on the mobile phone so I could see more precisely where to position it. It's also just out the way for the sun visors in my car.
 
Horizontal FOV from right camera, the camera data was cropped off the bottom edge.
1529120351851423961~2.jpg
 
There is a clear view. Even if there was a small amount of vignetting I would have still put it in this position. The camera has a FOV of 140° according to the manufacturer which horizontally is about 117° but the image on these sort of cameras is a bit curved so FOV is academic to some degree. I used Garmin live view to have a larger image on the mobile phone so I could see more precisely where to position it. It's also just out the way for the sun visors in my car.
Looks ok. I have a 66w and has a 180° lens, I'm thinking it would have to be lower. I wish I had a suction cup so I could try it before fixing
 
Have people become that useless?

A piece of coat hanger wire, some sticky tape and maybe some rubbers bands to temporarily position it. If desperate fold up breakfast cereal box templates!

Cable ties if necessary!
E9DF1DEE-1F84-4572-A486-C8E18C204036~2.png
 
Last edited:
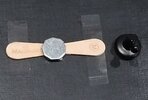
Buy an ice-cream and sticky tape the nonagon to the stick, then tape it to the windscreen.
IMG_20210709_213210458~2.jpg
 
Back
Top