Disaster

Dan Robinson

Member
Joined
Sep 30, 2015
Messages
63
Reaction score
26
Location
St. Louis
Country
United States
Have 4 SG cams:

1 front
2 rear
3 driver side
4 passenger side

Cams 1 and 2 had bad plugs due to tight fit. Went to Micro Center and bought 2 USB cables with angled plugs. Cut and spliced these into power cables of 1 and 2. Red to red and black to black, splice is about 3 inches from USB plug end of cable. Camera 4 has been spliced this way for years after plug went bad the same way.

Camera 2 powered up normally after splice. Camera 1 doesn't power up at all, not even any of the leds. Tried camera 2 on camera 1 plug, same thing. But now camera 2 does not power on. Tried plugging camera 1 and 2 into plug for still original unaltered cable for camera 3, neither power on. Plugged camera 3 back in and PCB socket connection broke off, taking down camera 3.

All told, lost over $600 worth of cameras in 20 minutes. What happened?
 
Last edited:
Red wire was spliced to red wire and black to black. Only 2 wires in the original cord, red and black. Identical splice on camera 4 has been working for years.
 
Assuming that the plug and the cord are both wired the same, did you check it beforehand?
 
Camera 2 splice was working, so it appears to be ok. The problem appears to be camera 1 splice which did something to the 2 cameras plugged into it. Camera 1 splice was done exactly like the other 2, red to red and black to black. I can't think of any reason camera 1 cord could be doing something to take out a camera. At this point I have to assume cable 1 is bad somehow though it doesn't make sense. Will just have to discard it. Is there an internal fuse or any other way to troubleshoot the 2 cameras not powering up?
 
I started at a "young" age modifying the power supplies in my computer.
First i took a whole steel case, and had it and a PSU stripped and then chrome plated.
That actually worked fine for a while until one night my PSU went boom, for no reason and gave me a almighty shock as it gave up working,,,,,, as i recall it did not take any of the PC hardware with it in the fall.
Then later as my modding skills strengthened and i became allergic to cables i of course started to do my own modified to length and sleeved cables, meaning not least with the ATX wire you have 24 wires you need to control.
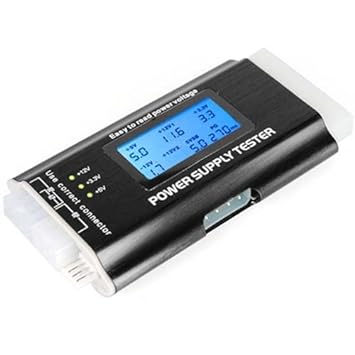
So one of my first investments was a power supply tester for PC cables, that can go the ATX and all of the other wires too.

41tgbEWJoeL._SY355_.jpg


Today while you can get modified PSU cables for PC, they are often not the right lenght, or you have to hide the surplus somewhere, but i am so "sick" that i have a hard time doing that as i know there is a hidden bird nest of cables in my computer.
 
Try the suspect cams with a home-type phone charger. If they work OK there it's going to be PS problems in the truck. If they don't work there, try a known good working cam there. If it works and the suspect cam's don't then the cams are the problem. One down-and-dirty PS test is to try a cheap USB powered fan (with a plug adapter if needed) noting the direction of rotation. These cheap fans draw a fair amount of current so if the fan works well the cam should be getting enough current too ;)

It seems the problem has to be where you soldered the connections. Those tiny wires can burn in two just past where the soldering heat was applied, and getting a good connection can be a problem with CCA (copper-clad aluminum) wires which are common in these types of cables. I've also seen other cabling which didn't follow standard color-coding to the terminals but which worked as the wires followed the terminal layout whatever color they were. TBH I've given up trying to solder such as this because of my old eyes and my not-so-good soldering equipment- I get more reliable results with good extension cables :rolleyes:

Jokiin makes robust cams, so unless there was current applied to the wrong terminal I doubt all the cams are dead, but #3 with the broken PCB might be a goner, or it may be something which a computer tech can solder back for you. I've had more problems with these d@#^ mini-USB plugs than anywhere else but it's the standard with dashcams :mad: so gotta live with it.

Phil
 
All four cables have the rectangular box with a red LED that is illuminated. So, all should be getting power to each camera.

I have camera 3 apart now. Soldering new leads on the board looks like it will be difficult but not impossible.

When the plugs broke previous to this incident, the two outermost USB contacts carried the power. So, the corresponding pcb locations would be the place to attach new wires.

The unknown is still whether there is some type of fuse to check on the pcb. It is possible the camera 1 and 2 point of failure may be a physical problem in the USB sockets instead of an electronics issue. Will wire up a couple of probes to run power right to the board.
 
I don't know that any cam has built-in reverse polarity protection or on-board fusing, but if any do it will be a SG feature. Jokiin can answer that best and possibly provide some diagnostic help if a board component has failed. If you get functioning with directly-applied power, a careful solder-reheat of the mini-USB socket may get you going again: those are a common trouble spot with all cams. Use a flux pen there if you have one to assist with the reflow; if not reheating will probably be enough.

Phil
 
The only way reverse polarity would have caused this is if the later versions of the Street Guardians reversed the polarity of the power connections. 1 and 2 are newer cameras. In fact, camera 1 is a V3 purchased in December to replace one with s failed pcb socket. The cable consists of a red wire and a black wire. That's it. I've *never* connected red to black or vice versa. Always red to red and black to black.

Inside the camera, the USB power socket has a black wire connected to the metal frame of the socket. Does this correspond to the black wire connection from the power cord? Which pins are hot (red)?

The only reason all of this is happening is the weakness of the SG power connections. The pcb socket separation is the second one to fail in a year. Two USB plugs failed this year moving from old vehicle to new, which is why I needed to splice in new plugs to begin with. USB plugs are in a tight position but not unreasonably so.
 
Last edited:
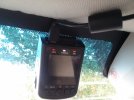
Just for documentation, here is the mounting position for all of the cameras. This is the front camera. Camera 4, my only working one now, has been moved into the 1 position. It is using the power cord from camera 3 now, the only one with an intact plug. . Side cameras are mounted the same except they use the thick mount for vertical windows.
20191006_121201.jpg

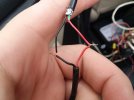
This is the splice for camera 1.

20191006_121505.jpg

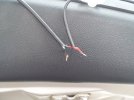
Splice for camera 2:

20191006_121634.jpg

The finished splices are individually wrapped with electrical tape, them bundled with another layer of electrical tape. A zip tie secures them.

How is it possible that the first one of these would have fried two cameras? Second cable was working.

Here is the plug failure that has occurred to 3 of my Street Guardian cameras. The metal part of the plug gets stuck in the camera socket while the rest of the plug pulls away.

20191006_121759.jpg

I fixed the first instance of this by splicing in a new plug as above. As I said before, it has worked for years.

To summarize, that is 3 plug failures and 2 pcb socket failures within about 2 years taking me yesterday from a 4 camera setup to 1. One was a V3 purchased in December. I'm obviously not happy.
 
Last edited:
It strikes me as a bit odd that three different USB mini-B plugs would get stuck in their ports like that. I'm wondering if something in your car's environment may be causing excessive corrosion. I never experienced anything like this with the SG9665GC I owned nor am I aware of anyone else reporting this issue, yet you say it happened with three of your units.

What actually happened with and how did you deal with the part of the plugs that got stuck in the camera? And could the ports have gotten damaged in some way when you went to remove the broken off part of the plugs?

Based on what you've described and the photo of one of the damaged plugs I hypothesize that the problem you've experienced "may" be related to your damaged plugs which might have caused some sort of short or perhaps there is a contact problem in one or more corroded pin-outs rather than any issue with the new spliced cables.

I always highly recommend the use of Caig DeoxIT products (especially D5) on dash cam ports and plugs. It can prevent and even repair all kinds of connectivity problems. In fact, it is possible that if corrosion/oxidation inside your camera's mini-B USB ports is the source of your troubles, perhaps preventing a proper flow of current to the camera and that a proper solvent/contact cleaner may fix the issue. It wouldn't hurt to try DeoxIT D5 or even some other good quality contact cleaner/corrosion dissolving product.

https://caig.com/deoxit-d-series/

deoxit.jpg
 
Last edited:
FWIW I've found there to apparently be two sizes of mini-USB connections :rolleyes: All my socket-equipped stuff prefers one size or the other including my cams, and the corresponding plugs follow suit in not fitting the other devices. Could probably force them together but I won't try that. My B1W is down and a crappy G1W clone in it's place because the usual HWK has a bad wire or plug at the end and the other pre-installed PS which reaches there will not fit the B1W but does fit the G1W. And all this stuff is advertised and specced as "USB mini" and not something else...

Phil
 
I unplug the rearmost 3 cameras 6 or 7 times a year for a full-day video archive. I can leave the front camera running on the circuit while the memory cards copy over, a process that takes about an hour.

The part on the plug that fails is rubber/plastic. The metal part has a tab that extends up into the plastic part. Over time the plastic shears off. When it fails, you have to use the tips of needle nosed pliers to pull the metal part back out of the socket. It is in there securely enough that I can't remove it with my bare hands even though there is about a quarter of an inch of plug sticking out of the socket to grab onto. There is no corrosion or rust on any of the plugs or sockets. Will post pictures.

I think it may be engineered for one or two plug/unplug operations. I would be interested to hear if there are any users who take their cameras inside daily or otherwise plug and unplug them more than just the initial installation.
 
...I would be interested to hear if there are any users who take their cameras inside daily or otherwise plug and unplug them more than just the initial installation.
I do it quite regularly. Every time there's a F/W upgrade to be installed as well as whenever I make a change to any of the user selected setup options. In either of those instances I either remove the camera from the vehicle and bring it into the house or take a power bank out the the car. Not a daily occurrence but once or twice a month on average would be my guess.
 
I think it may be engineered for one or two plug/unplug operations. I would be interested to hear if there are any users who take their cameras inside daily or otherwise plug and unplug them more than just the initial installation.
it's not engineered that way, people don't typically remove them often though I guess, we have had some that have broken like that previously, anytime they are reported we send a new power supply at no cost
 
I do it quite regularly. Every time there's a F/W upgrade to be installed as well as whenever I make a change to any of the user selected setup options. In either of those instances I either remove the camera from the vehicle and bring it into the house or take a power bank out the the car. Not a daily occurrence but once or twice a month on average would be my guess.
often we have found when people have broken them it has been from plugging or unplugging while the camera is still mounted
 
often we have found when people have broken them it has been from plugging or unplugging while the camera is still mounted
Only tried that once, long ago with a 'GC' V1. Much easier to 'dismount' the camera first. If nothing else makes it a lot easier to see the various sockets rather than trying to do it 'by feel'.
 
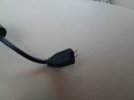
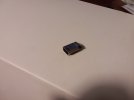
Plug after separation:

20191006_170145.jpg
20191006_170203.jpg

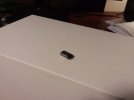
Socket:

20191006_170259.jpg

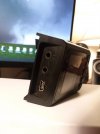
PCB socket separation view from disassembled camera:

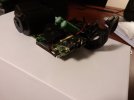
20191006_170339.jpg
 
Back
Top