FlashG75
New Member
- Joined
- Apr 17, 2018
- Messages
- 9
- Reaction score
- 1
- Country
- United Kingdom
- Dash Cam
- Nextbase 512GW with rear cam (x2), Blackvue 750S 2-channel
Its all to do with the dimensions.@Bokah how much bigger is the 400mah battery. Is there still plenty of room to install it?. I see there is a 450mah version as well but wondered if that would be too big.
He only has to make sure that the 450mah, is of the same dimensions as the 400mah. Any bigger, and I think it may cause problems.More power doesn't always mean a larger battery.
Look at AA and AAA rechargeables. All the correct size but vary in power.
Its exactly what I did. Except I did solder the tied pieces of wire together, before heatshrinking them.@Bokah So this looks like you didn't desolder but cut the wires on both batteries and then tied and heat shrunk them with some wrap?
Nextbase used to sell you the batteries. But with the new line of dashcams. Im not sure they still do. Give them a call.Do nextbase sell the batteries... Or best off buying from your link?
This sounds like you don't need to detach the screen perhaps like @Bokah did?Is it still working ok??
Mine has decided to play up now - so looking to replace the battery, as after a night's charge at home - it only stays on for about a minute before shutting down with a low battery...
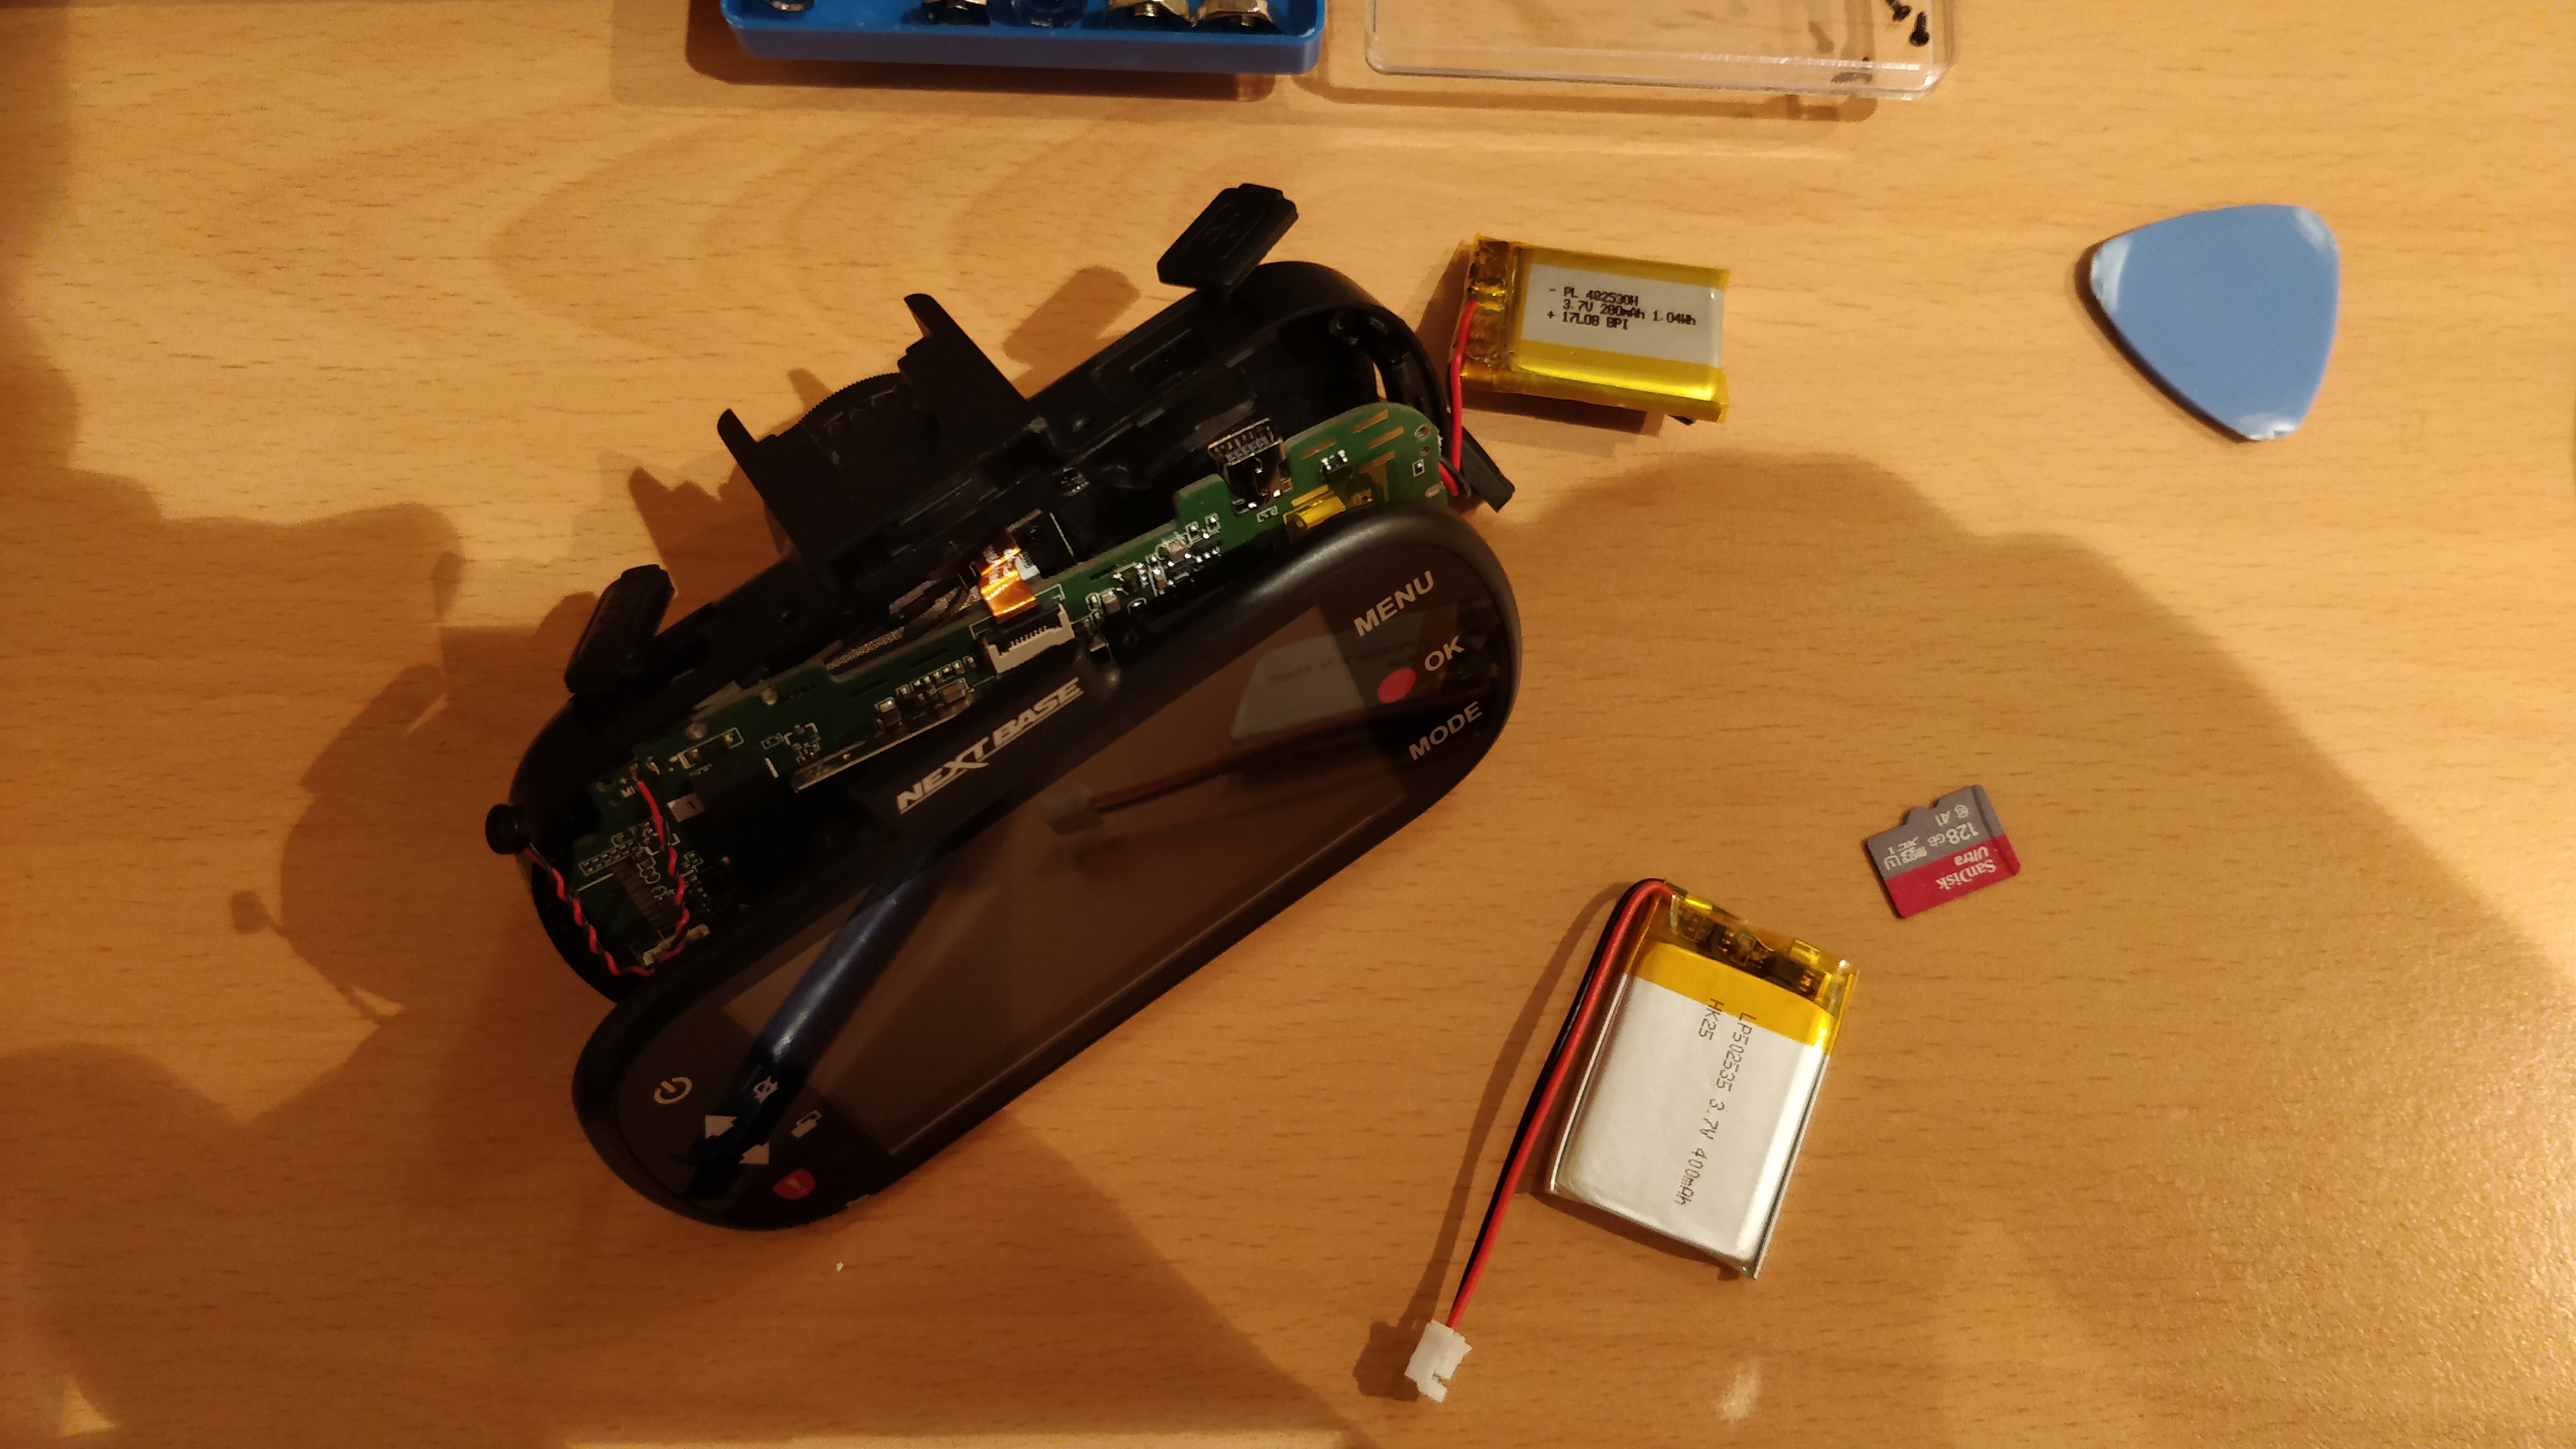
Found these instructions online:-
1: Remove the SD card
2: Remove the 4 small cross-head screws (all the same size) from the camera housing exterior
3: Carefully crack open the case - don't pull the rear housing away too much, there are some fine wires connecting this to the main circuit board.
4: Remove the 4 small cross-head screws from the corners of the circuit board (keep separately from the above screws, they are different.)
5: Remove the 2 small cross head screws from the magnetic mount / gps holder -not sure if this was necessary but I did it anyway to gain better access
6: Gently prise up the circuit board, it should unclip from the front housing (some small plastic lugs). This gives access to the battery inside the front housing.
7: Unsolder the battery connections and prise out the battery - Its held in place on the front housing by some sticky double sided rubbery stuff.
8: Fit a new battery (I used some strong double sided tape) and solder the connections.
9: Re-assemble the camera in reverse order - make sure the circuit board lies correctly in the front housing with all sockets and LED's aligned correctly before screwing down, otherwise the rear housing wont fit.
Its not really a big deal detaching the screen. You may still be able to leave it attached whilst replacing the battery, but it may get damaged..?This sounds like you don't need to detach the screen perhaps like @Bokah did?
Just mentally accepting the expensive delivery charges from cool components before I order. They don't seem to allow royal mail only Ups, likely as its a battery.
") ).
).Fair point. I might glue gun the twisted wire as well.Be aware that lithium batteries present a severe fire risk if shorted out. Be careful with the insulation that has to survive long term (well, until next year anyway
| Thread starter | Similar threads | Forum | Replies | Date |
|---|---|---|---|---|
|
|
Dashcam recording freezes (and some other issues) - Freezing Issue Solved (Replaced the SD card) | 512GW | 12 | |
| J | Anyone have to double press to manually protect recordings? Motion sensor too sensitive! | 512GW | 12 |