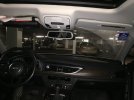
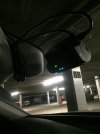
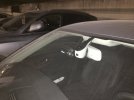
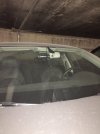
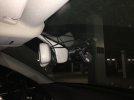
My S5 has lane assist, high beam assist and homelink so the 'bits' around the rear-view mirror will be different for cars which don't have these.
Tools needed
1) A driver with a T20 bit
2) Socket set
3) A trim removal kit
4) Cable-pulling kit
Additional items purchased
1) 2 'add-a-circuit' piggy-back fuse adaptors - standard size
2) 2 standard size fuses (I used 3A but I could have used smaller ones)
3) Extension cables with right-angle connectors for 'neater' cabling
Mounting the cameras
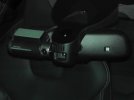
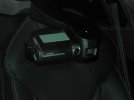
I decided to do this first thinking that it would be easiest to run the cables knowing how much slack is needed at the camera ends. I wanted to mount the main unit at the very top of the windscreen so that as little cabling is visible as possible. However if this is to the left of the rear-view mirror then the lens would be positioned quite off-centre and so some of the offside of the road is not visible in the videos. Similarly in parking mode there is an imbalance in what can be seen to the right. Since the objective of having a dashcam is to capture incidents, I decided that positioning the camera on the left was not a good idea (for me). To the right of the rear-view mirror was better in this respect, however I had the problem that the cover over the lane assist module was visible in the video unless I moved the dashcam further to the right until I started to get the same problem as it being on the left!
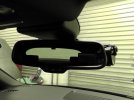
So in the end I decided that again, since the purpose of a dashcam is to capture incidents I should position the lens as close to the horizontal centre of the windscreen as possible and with an unobstructed view. Since my main beam assist has a camera at the end of the pod behind the rear-view mirror, and there is the photosensor behind the left-hand side of the rear-view mirror, my only option was to place the dashcam behind the right-hand side of the rear-view mirror. This has turned out to be a pretty good compromise. The downside is that the F750 is wider than that space so part of it is visible. However I have already got used to it being there and am starting to be able to ignore it whilst driving.
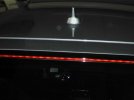
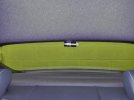
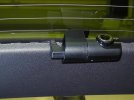
The rear camera was mounted at the very top of the rear window in the tailgate, right in the middle. Originally I thought that I would need to completely remove the tailgate trim to run the cable and the camera might be in the way when removing it. However then I found that the trim was very difficult to remove so I realised that I did not need to (see later) and could mount the rear camera first.
Removing trim
First I removed the lighting panel above the front console. This has a single screw which is revealed by opening the sunglasses holder. Then by gently pulling down the front end whilst levering on each side with a trim tool, the panel popped out. Then I removed the trapezoidal shaped plastic cover over the lane assist module. It came off easily by gently pressing the nearest end down and levering each side away from the windscreen with a trim tool.
Next I had to choose which side of the car the power connection will be made. I don't think it matters but I chose the passenger side (UK nearside). Then I removed the trim over the A-pillar on that side. With a trim tool I levered up the tiny plastic cover which is embossed with the word "AIRBAG". This revealed a screw which needed to be removed. Then I had to remove the trim, and this was not so easy. The spring clips are along its centre so it had to be firmly pulled outwards until they released. I pulled at the very top and used larger trim tools to gently but firmly prise the edges of the trim until it moved. Although I understand that it is possible to completely remove this trim it was not necessary. I just freed all the clips and left the trim fixed at the dashboard end. This left enough room to run the power cable.
Then I opened the panel to the fuses. There are 3 spring clips and again I used a trim tool is useful so that they could each be released without bending the panel too much.
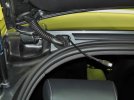
I opened the tailgate and released the two rubber cable grommets on the nearside. These were fairly easy to prize out of their respective holes.
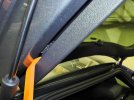
After trying in vain to release the lower trim of the tailgate (which has to be done before the upper trim can be released) I realised that I really didn't need to. Instead I realised that I just had to release the 'corner' of the upper trim by using trim tools to gently but firmly prize it up. This trim did not have to be released far, just enough so that it was possible to see that the spring clip had come out of its slot.
Running the cables
First I ran the power cable. Since there was just a small plug on the dashcam end but a sizeable fuseholder on the 'hardwire' end it was clear that I should run it starting from the fuse panel area. I used a cable-pulling tool from the top of the A-pillar and pushed it down until I could see the end in the fuse panel area then I hooked the power plug to the end and pulled it up. Next I inserted the tool into the hole created in the headlining by the removal of the lighting panel until the end protruded at the top of the A-pillar and again hooked the power plug and pulled the cable through.
With the rear camera cable in a coil on the passenger seat I joined one end of it with the power cable plug and pushed both via the large hole in the headlining and over the top of the thin piece of headlining at the top of the windscreen where I could then pull them out. Then it was a matter of running them over the lane assist module and tucking them over the top of the small piece of plastic trim which is between the lane assist module cover and the high beam assist module cover.
Now was the hardest part of running the cables. I inserted a cable-pulling tool into the hole exposed by releasing the lower cable grommet near the tailgate hinge. There is a small 'bulkhead' area and then another hole in the metalwork so I used a pen-light to see it. The tool then slid above the headlining, between it and the metal of the car roof. The fit was 'snug' so there was some, but not too much resistance. I pushed the tool (extending as required) until the end appeared at the front hole. I only once had resistance so pulled the tool back a bit, twisted it a few times (this moves the end slightly) and pushed again. This time it popped out above the hole.
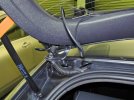
With this tool the other end of the rear camera cable could be pulled to the rear. Key to this operation was securing the cable to the end of the tool in such a way as to avoid a snag. A photo shows my method. I used string and then a small plastic zip-lock bag and finally wrapped it with insulation tape. In hindsight I should have done better because pulling the cable was perhaps a bit 'tighter' than I wanted and the cover I had made came loose before it reached the rear of the car. So I should have used a smaller plastic bag and wrapped the tape tighter.
With the cable end through the hole, I pulled enough cable through to reach the rear camera, plus a bit more to be sure. Next I ran the cable through the rubber conduit which joins the two grommets. This was tight but I managed it by squeezing the rubber and pushing the cable. Once the plug was through I carefully pulled more cable through - the rubber conduit obviously resisted this somewhat.
The plug now needed to be inserted through the upper hole (in the tailgate itself). The idea was to thread it through the small gap in the corner of the rear window created by partly releasing the tailgate trim. I used a stiff piece of wire (from an offcut of electrical cable) pushed from the window side until it appeared through the hole in the tailgate. Then I simply coiled the end of this wire around the camera cable and pulled it through.
Connecting the cables
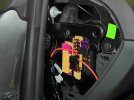
The hard work was connecting the other end of the power cable at the fuse panel. On the passenger side fuse panel there was a large unpainted nut which I unscrewed enough to allow the ground wire to be secured. Then I used the piggy-back fuse adaptors to connect the power wires. There were pink plastic covers over the fuse carriers and these had to be removed. The one over carrier A could only be removed after sliding the whole fuse panel down slightly (it is only secured by clips). I chose fuse 7 (light switch) on carrier B for my battery wire and fuse 7 (diagnostic) on carrier A for my accessory wire. The dashcam then powered up and worked as expected.
Tidying cables and replacing trim
Since there is an airbag on the A-pillar I used stick-on cable clips to secure the power cable wire to the pillar so that it was clear of the airbag. I left most of the slack in the cable tied up below the fuse panel but left a little bit of slack in the headlining in case I wanted to make some adjustments.
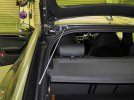
On the tailgate I easily tucked the rear camera cable behind the trim using only light leverage with a trim tool. I removed the slack so that I could replace the upper grommet into its hole. This left a bit of cable exposed but there is quite a lot of space in the other hole and I was able to thread it inside and replace the other grommet. Then I pushed the tailgate trim down again.
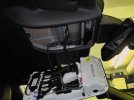
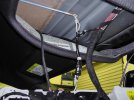
There was quite a lot of rear camera cable still hanging down in the car but there is plenty of space above the headlining to store it. So I coiled it up and put the coil in a large zip-lock bag and then stuffed this bag in the headlining area above the passenger seat. Finally I ensured that the cables to the front camera were tidy and replaced all the trim.


