Installing SG9663DC in a VW Mk7 Golf with DAP

WetMacula

New Member
Joined
Apr 16, 2015
Messages
25
Reaction score
8
Country
United States
Link to photos.

So far so good. Please consider the following firmware changes in the future:

Make the MENU background black with white text.
Make the MIC icon change colors (red for off, green for on) instead of putting a line through it.
Accessing the MENU is kind of pain. Wondering if it's possible to access it with one click.
 
Last edited:
Well you do have to stop a recording to enter the menu, so i guess you can not do that with one click.
The MIC icon i assume will make it more easy to see at the angle i assume most of us see the DC in, but personally i do not care if the sound is recorded or if i accidental disabled it.
Besides some the one of the LED's also indicate the MIC state, it do on the GC line at least.
Menu color dont bother me as much as my failing eyes do, i really do need to go get myself some glasses.
 
The icons we'll look at improving to make them easier to see, needs a graphic rather than just a colour change as that can also be hard to see

It is possible to do one touch to stop recording and access the menu but while that may seem convenient it's also too easy to do by mistake, not a fan of this method
 
How do I post a direct link to my imgur album on this forum?

Understand your concern about one click menu. Don't see why the MENU background should be transparent. Just makes it hard to see.
 
Click the insert image icon to the left of the smiley icons, then choose by URL and paste the link to your pic there, that should do the trick i think.
 
Transparent background is how it is in the SDK, it's a bit of a job to redo all the menu graphics, probably something we'll get to at some stage but there's higher priority stuff we need to do at this moment
 
Fixed it. You have to click insert URL and fill in the TEXT field.
 
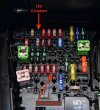
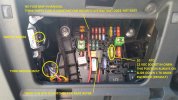
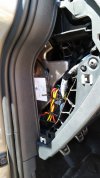
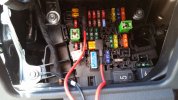
Installed hardwire kit today. Hardest part is removing the mirror trim and A-pillar trim for a second time. Easier if you order extra security clips in advance for the A-pillar trim. Top image is from internet for RHD car but layout is the same for LHD. Remaining photos are mine. Kit can be installed with 2 MINI ATO fuses.

DSC_0351-2000x1335.jpg

IMG_20180708_130140.jpg
IMG_20180708_130205.jpg
 
Last edited:
was it not possible to just tuck the wire with the plastic prying tool into A pillar without removing it ?

That's how I've did all the cars where I installed dash cams
 
was it not possible to just tuck the wire with the plastic prying tool into A pillar without removing it ?

That's how I've did all the cars where I installed dash cams
If there is an airbag in the A-pillar (most likely it is there) then for the safety reason it is not good idea to run any cables on top (in front) of the airbags. It is always recommended to remove an a-pillar cover and run cables behind airbag.

Sent from my VKY-L29 using Tapatalk
 
I managed to squeeze (pull) the cable from one side of the airbag to the other without removing the a-pillar trim.
Couldn't remove the trim, seemed to require too much force.
 
can't see in your picture but is the torx bolt you used a factory ground point?
Even if it isn't an official grounding point, if it's connected to the frame, it will suffice.
I used the mounting bolt of the fuse box in the rear of the car.
Keep in mind that we're using only less than half an amp.
 
Last edited:
Even if it isn't an official grounding point, if it's connected to the frame, it will suffice.
.

sometimes, a lot of the stuff that is mounted in cars is insulated for NVH reasons and can provide a ground, but not always a great one
 
See below. Does not appear to be a factory grounding point. I used an ancient DMM my father passed down "model TIF 200" to measure resistance at the 200 ohm scale. It read 0.2 ohms with just the leads. I disconnected the dashcam power. It read 0.8 when I touched one end to the stamped metal behind the bolt and the other end to the negative terminal on the battery. I assume 0.6 ohms is an acceptable loss?

This car has airbags in the A and B pillars. I wanted to see for my own eyes where the wire ended up. I tucked it behind the existing wiring and did not tie it down. Removing the A pillar trim the first time was a struggle. Second time is easier since the plastic clip slots get stretched a bit. I made sure to buy a dozen security clips so the existing ones can be mangled with a needle nose. Saves time.

IMG_20180708_112852.jpg
 
I managed to squeeze (pull) the cable from one side of the airbag to the other without removing the a-pillar trim.
Couldn't remove the trim, seemed to require too much force.

The VW A-pillar trim has (2x) 2-stage security clips at the top and a normal clip on the bottom. See photos from OP. You have to pop the trim out part way then slide the clips out of a slot in the trim, or mangle the clips and remove them from the car body. I suspect most cars with airbags do this so the trim doesn't fly into your face.
 
if you do have any problems I'd look at relocating the ground, there is often a factory ground point nearby the fuse panel in most vehicles, a lot of the brackets under dash even though they may be metal are rubber mounted to minimise noise and vibration
 
Hard-wiring my old GC in my friends car, i was unable to find a ground screw near there.
But fortunately the plastics of the fuse box was mounted to a hefty steel bracket that was grounded ( spot welded ) alright, so i drilled a hole tapped it with M3 thread and everything was operational.
 
For now I'll trust a 0.6 ohm loss is OK. If I have issues, will look for factory ground. The car stereo nerds seem to shoot for 1/2 ohm or less.

I think heat is the biggest challenge. On a hot day, the buttons on my camera can exceed the threshold of pain. Also burned my hand on the metal box that controls the camera behind the center mirror. This was with the car off. Before the hardwire kit, my camera once reset to default settings by itself. Has not happened since.
 
Back
Top