GWN21
New Member
- Joined
- May 5, 2015
- Messages
- 6
- Reaction score
- 11
- Country
- United States
- Dash Cam
- Street Guardian SG9665GC and CPUSB01 Hard wire kit.
Bought the SG9665GC and the CPUSB01 Hard Wire kit.
Installed into a 2015 Honda CR-V
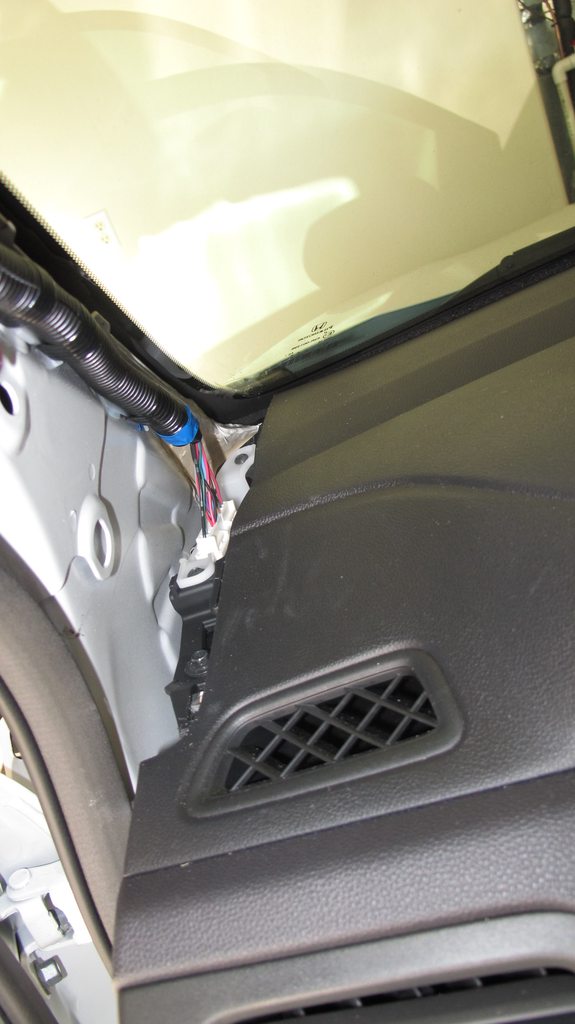
Removed the A-piller cover:
Where it "goes down" into the dash...
Used this PDF file from College Hill Honda (Steps 8-11) to find out how to remove the A-Pillar:
http://www.collegehillshonda.com/instructions/crv/2015/daynightmirror.pdf
This give you access from the Fusebox area on the Driver's side up to the ceiling header.
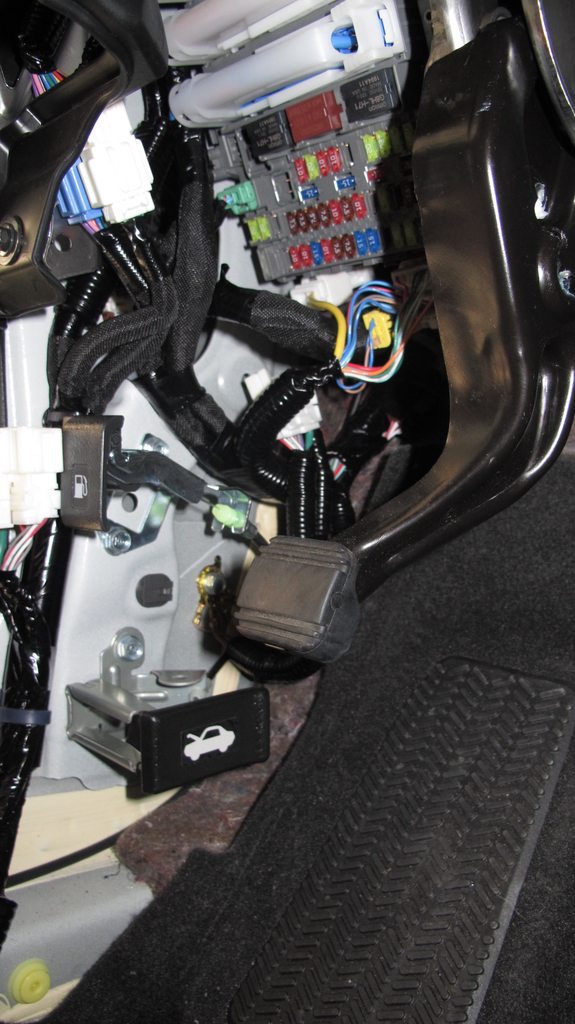
Removed the lower right "kick" panel:
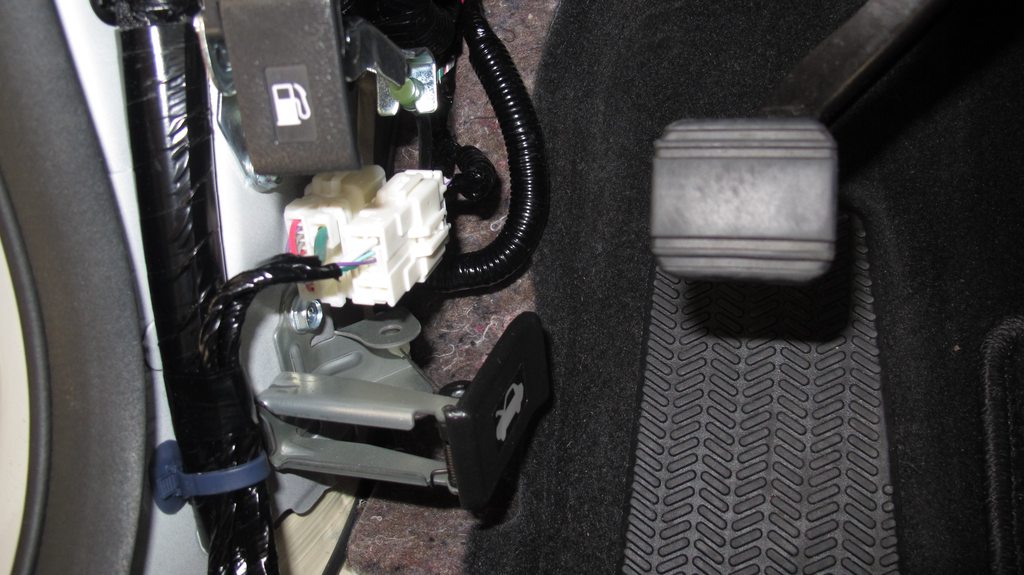
You will need to also move the two 'white' plugs so you can get to the "grounding screw".
Here's a pictures of the Fusebox and the Grounding Screw where the CPUSB01 "end" wires will need to plug into.
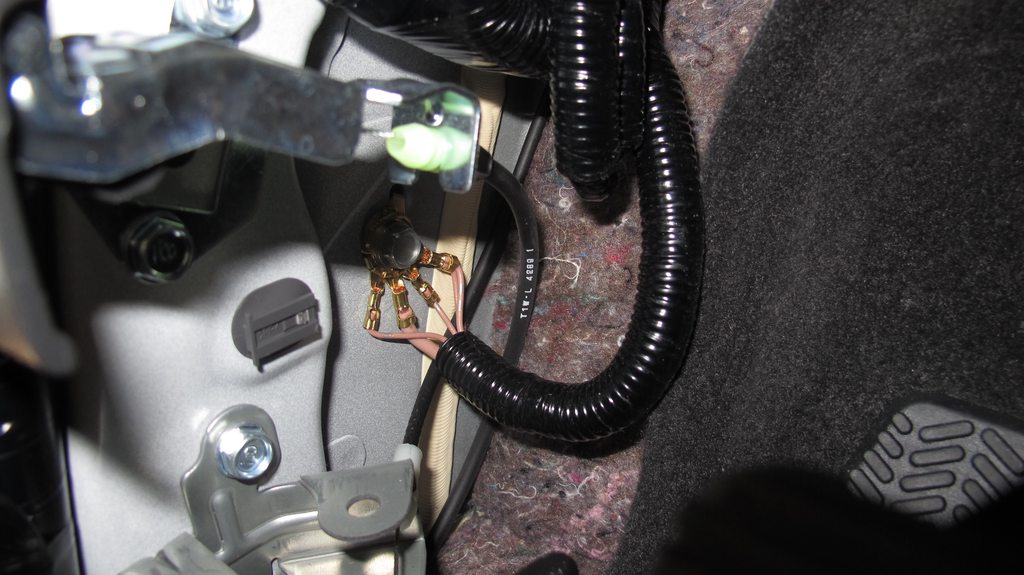
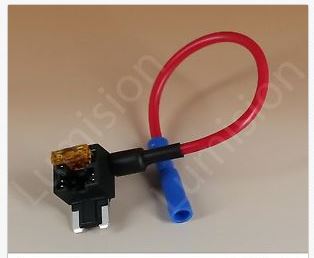
I used a Add-a-Fuse: ATM-Low Profile that I got off eBay.
Here you can see it all wired into the Fusebox and connected to the "grounding" screw.
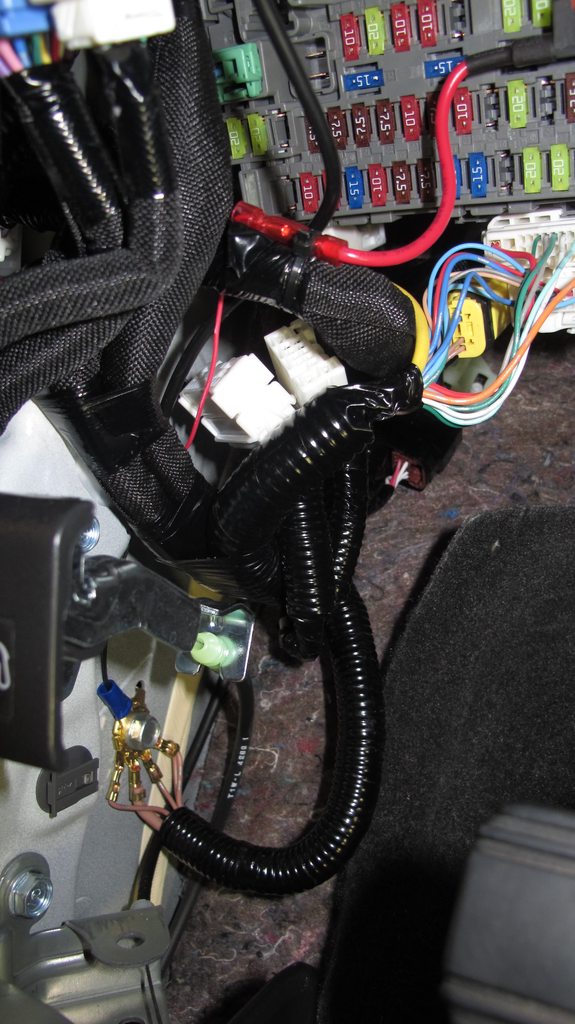
I originally used the Illumination Fuse #35, but that "turned" off after a few minutes during the day. Was "on" when I turn any of the light's "ON". I then moved it to the ACC Fuse #19, which is a switched "ON" fuse. I thought it was not going to fit with the Add-a-Fuse unit as it was near a "raised plastic" where I thought the Add-a-Fuse would not "fully" plug in. I gave it a try and it worked at that spot without any issues.
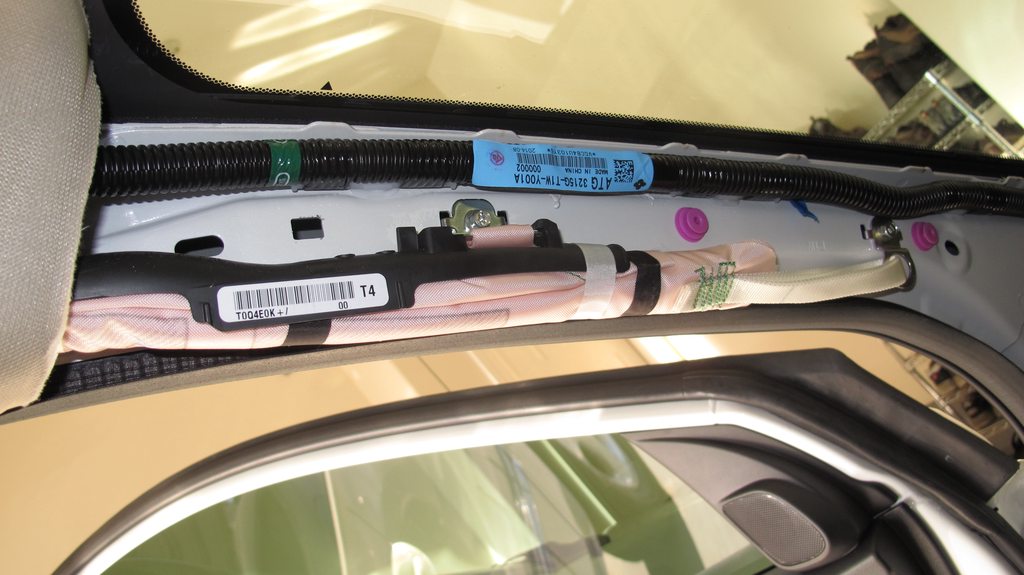
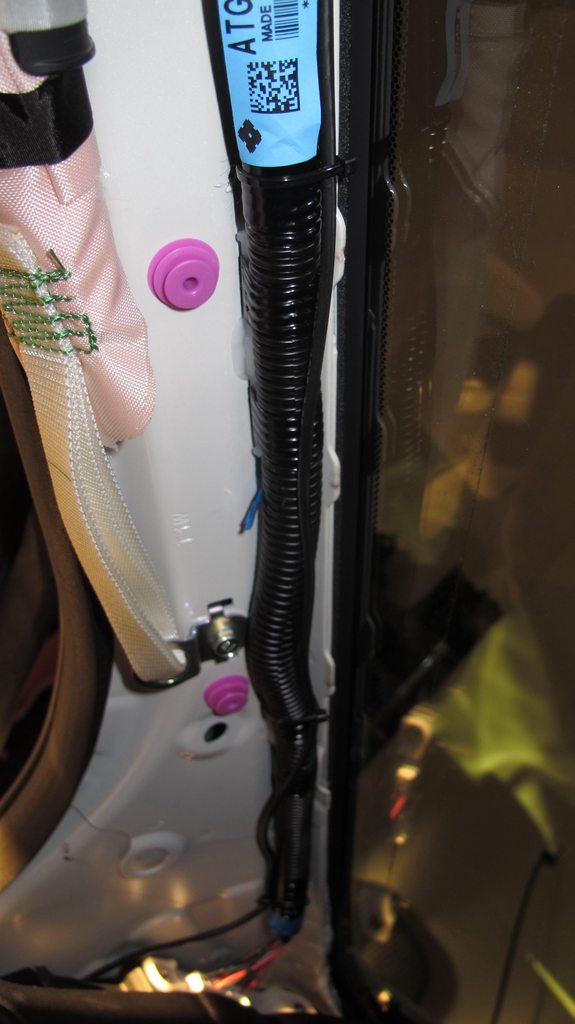
Wired it up the A-Pillar, avoiding the Curtain Airbag:
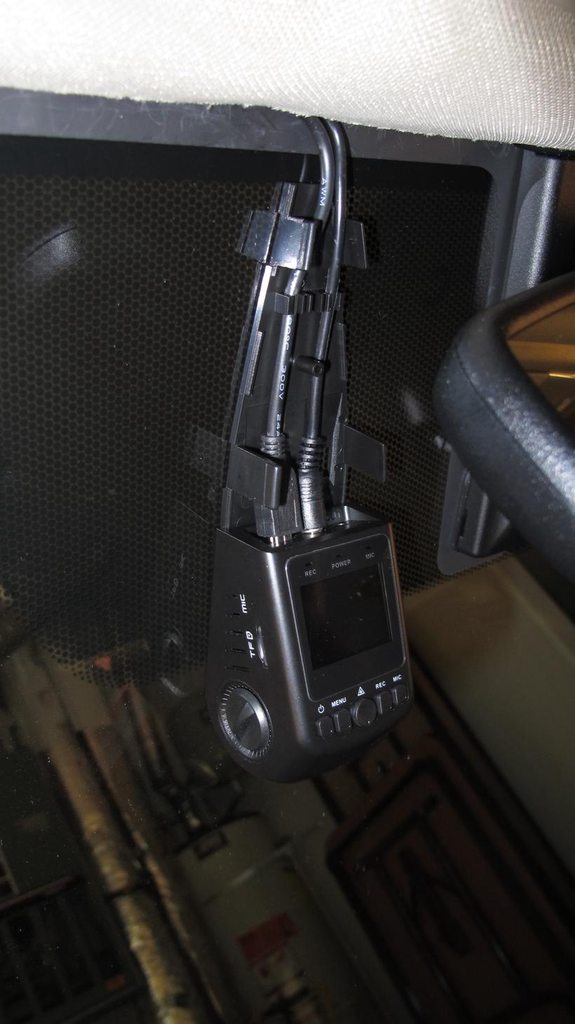
Tucked the cable all into the upper ceiling header and a look at how the camera is mounted on the windshield:
And where the GPS and Camera are mounted:
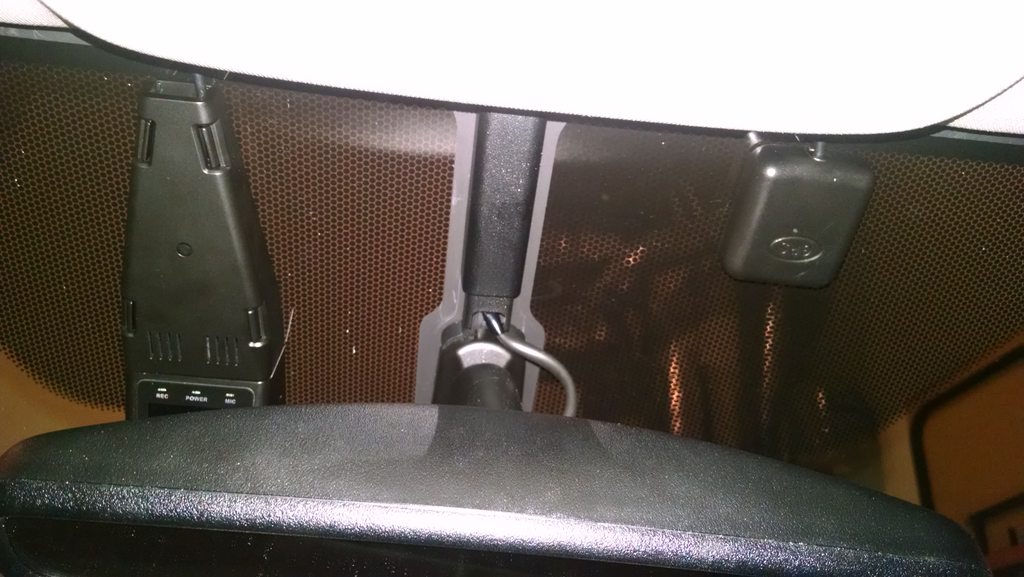
(GPS PCB Board is "flipped" so to mount it this way. Here's the here how video that Pier28 provided:
)
Over all I like the quality and the installation of the camera. I really like to thank Pier28 for their help as I received a "bad' CPUPS01 and they rush a new one out quickly.
Great Service and Support and a GREAT Dashcam!
GWN21
John
Installed into a 2015 Honda CR-V
Removed the A-piller cover:
Where it "goes down" into the dash...
Used this PDF file from College Hill Honda (Steps 8-11) to find out how to remove the A-Pillar:
http://www.collegehillshonda.com/instructions/crv/2015/daynightmirror.pdf
This give you access from the Fusebox area on the Driver's side up to the ceiling header.
Removed the lower right "kick" panel:
You will need to also move the two 'white' plugs so you can get to the "grounding screw".
Here's a pictures of the Fusebox and the Grounding Screw where the CPUSB01 "end" wires will need to plug into.
I used a Add-a-Fuse: ATM-Low Profile that I got off eBay.
Here you can see it all wired into the Fusebox and connected to the "grounding" screw.
I originally used the Illumination Fuse #35, but that "turned" off after a few minutes during the day. Was "on" when I turn any of the light's "ON". I then moved it to the ACC Fuse #19, which is a switched "ON" fuse. I thought it was not going to fit with the Add-a-Fuse unit as it was near a "raised plastic" where I thought the Add-a-Fuse would not "fully" plug in. I gave it a try and it worked at that spot without any issues.
Wired it up the A-Pillar, avoiding the Curtain Airbag:
Tucked the cable all into the upper ceiling header and a look at how the camera is mounted on the windshield:
And where the GPS and Camera are mounted:
(GPS PCB Board is "flipped" so to mount it this way. Here's the here how video that Pier28 provided:
Over all I like the quality and the installation of the camera. I really like to thank Pier28 for their help as I received a "bad' CPUPS01 and they rush a new one out quickly.
Great Service and Support and a GREAT Dashcam!
GWN21
John
Last edited:
")