VIOFO A129 Pro Duo: Buffered Parking Mode Good as Anti-Prowling Method?

The SG camera i first got to try parking guard with was supplied with fuse adapters with bullet connectors, so a tool less install.
The new HW kit i just installed for my Viofo A139 camera it came with bare ends on the two +12V wires ( meant to be crimped together with the add a circuit fuse adapter ) and then the GND wire did have a eye crimped on to it so easy to bolt to a ground connection.

In general i prefer to solder things together also what i did with the viofo HW kit as i just soldered the two 12 V wires to the corresponding ones on the taps i did the the SG camera last year.
So i am pulling a dual and a triple systems now on the 5A fuses i have on the two 12 V connections, but i do only use parking guard on the viofo camera at the moment, the SG camera will be relocated to side camera duty when summer show its face and i can work on my car in my friends field.
How did you know to connect the fuse adapters to the 5A fuses? Does the HW Kit have an upper current rating you have to match the the fuse limit? I have access to crimping tools through my workplace so I don't think that will be an issue.
 
No the dashcams use pretty little power, so you could even do with a even smaller fuse for 1 camera, remember the fuse is there to protect your car from the additional gadget, not the other way around.
I was going to buy a set of different fuses for my car, but then i thought to hell with it 5A fuses must be fine.

The fuse i tap into are 10 A fuses, but really you could tab into any of the fuses, though it is recommended to stay clear of fuses for "big" stuff like airbags / engine management ASO
I cant recall what the fuse are for i piggyback on, but nothing big ( airbags being the smartest part in my bottom of the barrel 2012 car )
 
The purpose of the fuse is to protect the wire. So in case of a short (or another kind of overload) the fuse should blow before the wire starts to melt.
So for thin wires use small fuses.
 
yeah i know, i was 9 or so when i put a 6V bicycle headlight bulb to a wall socket and flipped the switch, and cut power for all 6 apartments + some of the attic rooms where i was in one go.
Though electrician are not one of my educations :) but i am also not a engineer, but every chance those lazy bastards get they will let me do their work, while they sit on their ass in a nice air-conditioned control room.

Just remembered putting extra High beams on my pickup in the early 00s, made a boo - boo and to remember me of it a nice burn mark on the carpet in the driver side footwell of my Mitsubishi L200 pickup.
I then stopped smoking week for a hour, and proceeded to wire the switch and the relay up correct with no fires or blown fuses.

Those lights was OMG,,,,, i instantly nicknamed them my instant daylight lights :) and they was wired up illegally ( as i recall ) so they could be on alongside the cars own high beams too, so just to be safe i took them off for every inspection of the car.
 
The fuse taps use the existing fuse for the existing circuit being tapped into. The fuse you add is to protect the dashcam...as long as you put the fuses in the correct slots on the fuse tap. The new fuse should be the lowest amp that is sufficient for the dashcam. As long as the fuse being tapped into has a higher rating than is required to the dashcam...no problems. I think most, if not all, fuses on the fuse panel are 5 amps or above, which is fine.
 
Oops...yes, all fuses are to protect the car.

What I meant was that if the fuse being used on the tap is rated for higher than the original circuit being tapped into, then that circuit is not protected. If you put a 5 amp fuse on a circuit that is being protected by a 2 amp fuse then if/when the power draw is at say 4 amps, the 5 amp fuse will not blow. The circuit being protected by the 2 amp fuse is no longer protected by the 2 amp fuse, though, since both old and new circuit are getting power from the live side of the original circuit.

I think that makes sense.
 
Fuse should come as close to the load of the equipment being fused as possible, maybe 50% more at best. That way you'll catch the equipment malfunctioning the soonest. I try to fuse my dashcam taps with 2A fuses but they're mythical in the local parts shops (but DDPai HWK supplies 2A fuses all-round!). The lowest I can get locally it 5A so that's what I use to fuse other add-on equipment. Ideally a 1A fuse would be really great. My toll reader and GPS tracker each consume less than 5w peak.
 
The fuse amp rating does not have to be close to the connected equipment. It depends on the wire gauge. So if you use a heavy duty wire 20 amps is ok. But the wire blackvue includes are just about as thin as my hair. So I would stick with 2A -like the fuses supplied by blackvue.
 
No the dashcams use pretty little power, so you could even do with a even smaller fuse for 1 camera, remember the fuse is there to protect your car from the additional gadget, not the other way around.
I was going to buy a set of different fuses for my car, but then i thought to hell with it 5A fuses must be fine.

The fuse i tap into are 10 A fuses, but really you could tab into any of the fuses, though it is recommended to stay clear of fuses for "big" stuff like airbags / engine management ASO
I cant recall what the fuse are for i piggyback on, but nothing big ( airbags being the smartest part in my bottom of the barrel 2012 car )
Hello again Kamkar, I am following some of the hardware installation guides on youtube as I put the camera in my car. This How to Hardwire Install a Dash Cam Front + Rear with Parking Mode seems like a pretty good guide. The English gentleman in that video recommends using a 5amp tap. Inside the footwell fuse box, there are a number of fuses I have the option to pull from.
Fuse Diagram.png
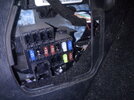
...here are the actual fuses in my footwell:
IMG_20210417_115005 (1).jpg

I have a DMM to test the open fuses to find the permanent 12V when the car is off - for the ACC ignition activated fuse from the hardware kit, I think I might pull the left blue 15amp fuse which I believe is in slot 5. This is my F.OUTLET according to the 2016 Scion iA fuse diagram, and is given the description "accessory socket". I believe I have gathered that the A129, even with both cameras, draws very little power so that it does not matter what the fuse amperage is? That is what I am taking from your comment and others.

Today I mounted the front and rear cameras on my windshields, and ran the connecting USB cabling under my Headliner and selectively behind some of the A and B Pillar trim pieces. Prior to doing this I had installed and formatted the microSD card this forum had recommended, updated the camera firmware and installed the VIOFO app. I also crimped the recommended Low-Profile Mini fuse adapters onto the free wires from the HW Kit.

I had a very difficult time removing the A-Pillar Trim Panel from my 2016 Toyota Scion iA. I found tutorials for other Toyotas - but not the Scion itself. The rule seems to be that Toyotas have two clips which hold on the A pillar. You seem to be able to remove the A-Pillar about an inch then you have to use needle-nose pliers to disconnect the clips from the body. Most of the videos I have seen show the A-Pillar coming off with just hand strength which was not my experience. I believe this clip illustrates this well. I was not able to accomplish what is shown in the video.The A129 Duo comes with a plastic panel removal tool which is not very effective. I realize there is not a universal guide, but does anyone have tips for removing this A-Pillar and routing the cable down through the dashboard and into the footwell panel? I would like to do this all myself, but I am getting nervous. I disconnected my car battery while manipulating the A-Pillar because I was not sure if it had an airbag in the A-Pillar. Are there common places others are finding guides to do this A-Pillar installation - I have not seen any for my particular 2016 Toyota Scion iA.
 

Attachments

  • 1622434120952.png
    1622434120952.png
    5.2 KB · Views: 2
What I would say is don't remove trim unless you absolutely need to. I pushed my cables in with the trim tool along the edges. It seemed to go far enough in so that it was secure. I was also worried about removing the trim as there are airbags in mine as well.

For the B pillar, when routing the cable to the rear, I was also doing the same thing, pushing the cable in with the trim tool, until I realized it was easier to keep routing it under the headliner instead of worrying about the B pillar...not sure if that makes sense.

For the fuse taps, remember that there are two ways to insert the fuse tap...one way is correct. There are good videos on YouTube that discuss and show this. When testing the fuse panel with your DMM, you can find the correct orientation by testing each side of the fuse leg. It shows this in the YouTube videos. This is a good one:

 
For the fuse taps, remember that there are two ways to insert the fuse tap...one way is correct. There are good videos on YouTube that discuss and show this. When testing the fuse panel with your DMM, you can find the correct orientation by testing each side of the fuse leg. It shows this in the YouTube videos. This is a good one:

Thanks for mentioning the fuse tap orientation and my first video on that topic.

I created a couple of other videos on that topic, but the most recent one goes into the anatomy of an automotive fuse tap. It shows an "easier" way to figure out which side of the fuse socket provides the power by using the fuse tap itself with only a full uncut fuse in the top fuse tap fuse socket (for testing) rather the using the half fuse approach I show in that video.

 
Back
Top