- Joined
- May 1, 2013
- Messages
- 10,668
- Reaction score
- 6,561
- Location
- Dublin
- Country
- Ireland
- Dash Cam
- Street Guardian UK / EU / EEA Distributor
One of my local customers whom I had installed over a year ago Street Guardian SG9665GC v2 asked me to re-install / hardwire dashcam into his brand new Skoda Octavia MK3 2017.
Because this car has start-stop function I had to test-n-try suitable fuse to power dascham to avoid any surprises for later use, hence I want to share my experience with hard wiring into this car.
1. This is the final result after dashcam has been installed..jpg")
2. Access to the fuse box was a little bit tricky because it was not quite straight forward as on previous Skoda / VW models I had installation experience with in the past and also some steps were not matching Maintenance Manual of this Skoda.
- pull away side cover
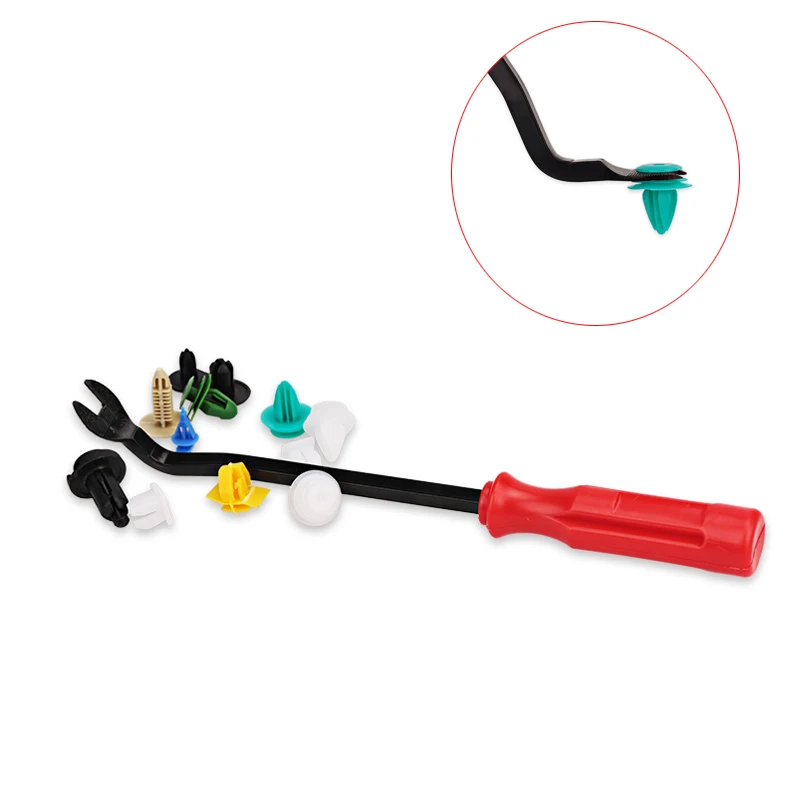
- use a flat screwdriver, or in my case, I used plastic trim removal tool (red color on the picture, black color you get with SG9665GC set), push it through side panel holes and lift glove box lever which is clipped to the "shaft". The installation process is vice versa, you need to guide glove box slower-lever hook to the "shaft" position and then just press from the top so it will clip into the place.
.jpg")
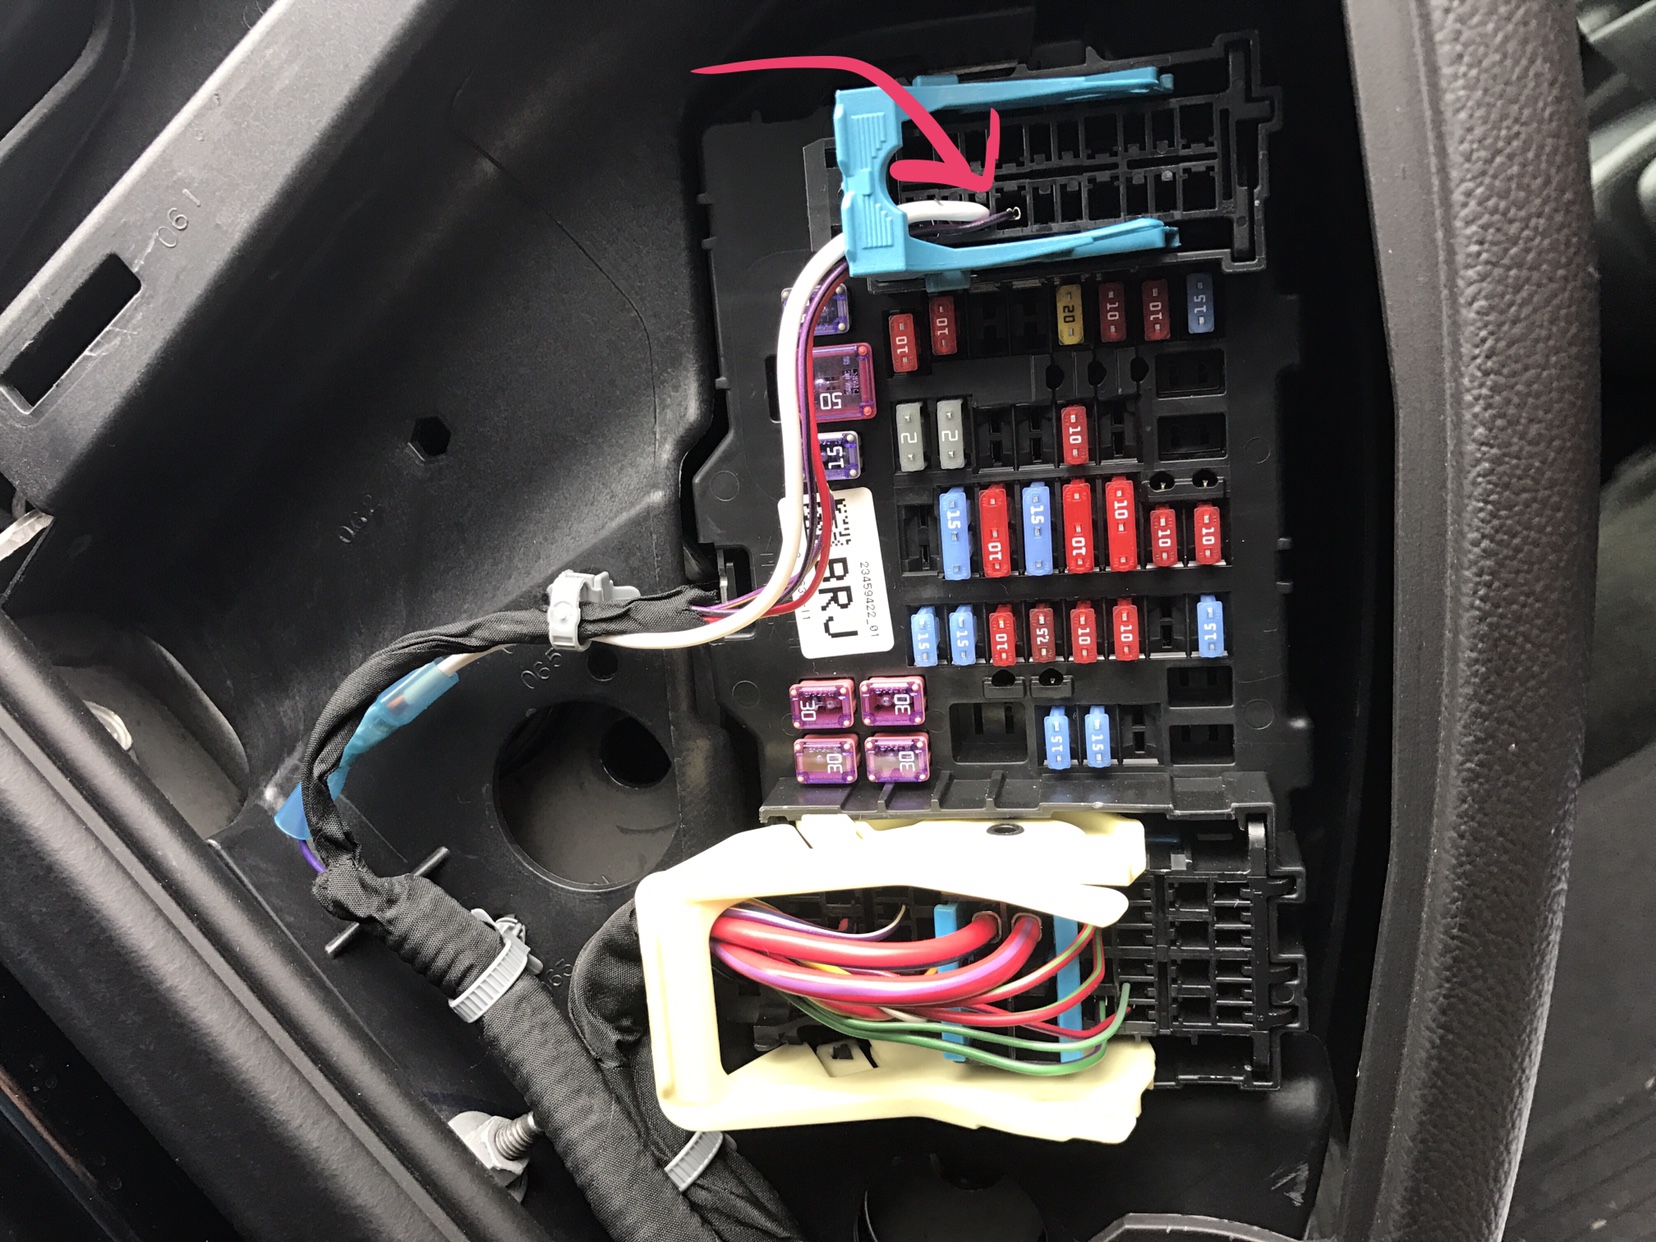
3. This is what you see behind the glove box.
.jpg")
4. In that car unused fuse port was nr.48 which is "Assist system for blind spot monitoring". I hooked up my multimeter, we made few test drives, tested start-stop to make sure this fuse remain powered. All was good.
.jpg")
5. This is full-size ATO / ATV fuse.
.jpg")
6. For proper installation, I have used ATO/ATV piggy back, add-a-circuit..jpg")
7. ran power and GPS antenna cables behind A-pillar.
.jpg")
8. I am using cable-clips to keep cables behind air-bag. Do not run cables in front of airbags!
P.S. - SG9665GC V2 version had GPS antenna with longer cable and no pre-flipped GPS receiver module, so it is initially meant to be mounted on the dash, what I did in this case. Do not confuse with SG9665GC V3 which comes with shorter GPS antenna cable and pre-flipped GPS received which is meant to be mounted on the windshield.
.jpg")
Final result.
.jpg")
.jpg")
Because this car has start-stop function I had to test-n-try suitable fuse to power dascham to avoid any surprises for later use, hence I want to share my experience with hard wiring into this car.
1. This is the final result after dashcam has been installed.
2. Access to the fuse box was a little bit tricky because it was not quite straight forward as on previous Skoda / VW models I had installation experience with in the past and also some steps were not matching Maintenance Manual of this Skoda.
- pull away side cover
- use a flat screwdriver, or in my case, I used plastic trim removal tool (red color on the picture, black color you get with SG9665GC set), push it through side panel holes and lift glove box lever which is clipped to the "shaft". The installation process is vice versa, you need to guide glove box slower-lever hook to the "shaft" position and then just press from the top so it will clip into the place.
3. This is what you see behind the glove box.
4. In that car unused fuse port was nr.48 which is "Assist system for blind spot monitoring". I hooked up my multimeter, we made few test drives, tested start-stop to make sure this fuse remain powered. All was good.
5. This is full-size ATO / ATV fuse.
6. For proper installation, I have used ATO/ATV piggy back, add-a-circuit.
7. ran power and GPS antenna cables behind A-pillar.
8. I am using cable-clips to keep cables behind air-bag. Do not run cables in front of airbags!
P.S. - SG9665GC V2 version had GPS antenna with longer cable and no pre-flipped GPS receiver module, so it is initially meant to be mounted on the dash, what I did in this case. Do not confuse with SG9665GC V3 which comes with shorter GPS antenna cable and pre-flipped GPS received which is meant to be mounted on the windshield.
Final result.


 The dealership charges a small fortune for parts like this. At least my mechanic has been able to get them for me cheaper.