A229 Pro 2ch issue with power or hardwire kit

Pandasonik

New Member
Joined
Dec 30, 2020
Messages
11
Reaction score
9
Location
QLD
Country
Australia
Hi All / @VIOFO-Support

I have a A229 Pro 2ch installed by a auto electrician with the HK4 hardwire kit. Camera came with the latest firmware V1.0_230928. Car is a Lexus Hybrid, Viofo 256gb SD card.

When it was installed yesterday, everything was working fine. I checked that everything was working, before the installer left. Upon car ignition, the dashcam turned on and stayed on. When the ignition was off, parking mode started. Then I went for a 15min drive, same behavior. Everything was working fine.

Today while I was driving to work, the dashcam lost power, turned on and off and then went into parking mode recording while I was driving.

I stopped the car and then turned the dashcam on and off and turned the car on and off, but dashcam wasn't turning on anymore.

Then I did reset to factory settings and reformatted the SD card.

Now the dashcam doesn't turn on after I start the car, but if I press the power button on the dashcam, it stays on. When I turn off the car, the camera just stays on and doesn't go into parking mode (parking mode is enabled).


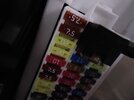
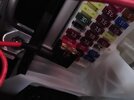
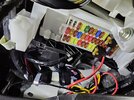
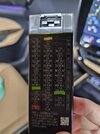
My first though was that the installer messed up the fuse tap between battery and ignition cables, but yesterday everything was working properly as intended.

Any thoughts on this issue?

Thank you everyone.
 
While you’re waiting for your official response from Viofo Support.
1.) Test camera in house (out of car) for normal operation
2.) Check Yellow / Red Wires of hardwire kit are correctly routed.
Yellow: Ignition Switched
Red: Constant Battery Power
3.) Confirm & verify your hardwire kit is the latest “upgraded” version.
Check the writing on the hardwire cable, (Type-C connector end).
24AWG = Old
20AWG+24AWG = Upgraded
4.) Take it back to the installer
 
Thanks Panzer.

Driving back from home, same issue. Camera wasn't turning until I turned it on. Constant power until 20 mins, then I heard '2 channel recording started' twice.

Viofo asked me if my car has stop-start function, it doesn't. All the times the cam said 'recording started', I was driving.

Funny thing is, back at my house without changing anything, I turned off the car and parking mode started. Then I tried a couple of times, no issues. Camera starts when car starts and parking mode starts when car is off. I tried this 5-6 times over 15 mins and everything is ok. Only exception is I did this while parked and not moving.

To your points above:
1. Tested camera with cigarette lighter and out of car with a portable batter, no issues camera starts when powered.
2. I am no electrician, but I did check the power with my multimeter. ACC yellow wire is tapped to the Fuse marked 'TAIL', multimeter only got power when car was on. Battery red wire is tapped to the fuse marked 'Fuel OPN No.1', multimeter read constant power.
3. Hardwire kit power cable says 20AWG+24AWG

Really not sure what is going on. I might wait and see what happens the next time I drive to work again.

Could it be something to do with a hybrid car? Maybe some of those fuses get different power depending on how charged the battery is?

If the issues come back again, I might try moving the fuse taps to the ones marked in Green in the fuse diagram. It seems someone with my same car model used those without issues.
 

Attachments

  • ACC fuse tap.jpg
    ACC fuse tap.jpg
    169.3 KB · Views: 25
  • Battery fuse tap.jpg
    Battery fuse tap.jpg
    222.7 KB · Views: 25
  • Fuse cover v2.jpg
    Fuse cover v2.jpg
    390.6 KB · Views: 26
Are the add a fuse things installed in the correct orientation? I may be incorrect but I seem to recall it being mentioned and I remember having to check this when I did the HH on my A119 V3 (and will do the same when I get around to installing the A229 Pro)
 
1. Tested camera with cigarette lighter and out of car with a portable batter, no issues camera starts when powered.
You need a second hardwire kit, and 12 volt power supply to check for proper parking mode & normal recording mode function.

If the issues come back again, I might try moving the fuse taps to the ones marked in Green in the fuse diagram. It seems someone with my same car model used those without issues.
Sounds like this is worth a shot.
 
Same issues, but I am seeing a pattern. I drove 40 mins last night to do some errands and camera behaved properly, this was around 6pm.

This morning, I drove to work and the 10 mins into the drive, same issue happened. Camera went into parking mode recording mid drive, around 9am.

I recorded both videos around 5:30pm, still had the same issue. Back at home, 6:30pm and the camera seems to be working properly while car is parked.

For the dashcam to go into parking mode mid drive, could it be that the ACC fuse lost power mid drive triggering parking mode or there is something wrong with the hardwire kit.

I will try moving the fuse taps to another slot and test again next week.


@VIOFO-Support

Rear camera going into parking mode mid drive. Announces 1 channel recording? Bug?

Front camera going to parking mode mid drive.
 
Are the add a fuse things installed in the correct orientation? I may be incorrect but I seem to recall it being mentioned and I remember having to check this when I did the HH on my A119 V3 (and will do the same when I get around to installing the A229 Pro)

Markus might be right. ACC fuse tap was facing the wrong way, as in the terminal furthest from the cable was in the side without power. I watched a thinkware hardwire installation video and the guy was saying that fuse prong furthest from the cable fuse tap should be on the side with power.

If the ACC fuse tap wasn't getting power due to wrong orientation, this might explain why the camera was going into parking mode mid drive. ACC fuse losing power and reverting to the Battery fuse, thus triggering parking mode.

Anyways, I have moved the fuse taps to empty fuse slots, making sure ACC/constant power and orientation are all correct. Tested it for 15 mins and everything was ok. But again last 2 nights, everything was ok too.

Fingers crossed this has fixed the problems. Will report back after further driving and testing.

@VIOFO-Support
 

Attachments

  • ACC fuse tap.jpg
    ACC fuse tap.jpg
    169.3 KB · Views: 16
  • New fuse tap config.jpg
    New fuse tap config.jpg
    432.4 KB · Views: 15
The power delivered to the new device/accessory by the fuse tap will not "turn off" because of the fuse tap's orientation in the fuse box fuse socket.

The orientation of a fuse tap in a fuse box fuse socket is an issue that gets much debate as to which way is correct. The "correctness" of that debate is centered on how the power flows through the fuse tap to the fuses in the fuse tap.

"In Parallel" power routing

1699552269669.png

The left leg (leg furthest away from the wire) when inserted into side of the fuse box fuse socket that provides power, routes power up the left side of the fuse tap to both fuse tap fuse sockets. The allows each fuse to act independently in protecting the device/wiring receiving power from the fuses in the fuse tap. This fuse tap orientation has the potential to overload the wiring that provides power to the fuse box fuse socket if the installer is not careful in selecting the appropriate fuse box fuse socket or if the newly added device consumes far more power than is truly available through the wiring providing power to the fuse box fuse socket.

Since most all dash cameras (or accessories drawing similar amounts of power) draw 1 amp or less, using the "In Parallel" power routing method through the fuse tap is perfectly safe if the fuse box fuse socket has an amp rating of 7.5 amps or higher (assuming the wiring providing power to the fuse box fuse socket has the ability to provide at least 10% additional power than the original fuse box fuse's amp rating).

This is the power routing method that should be used when the fuse box fuse socket being used for the fuse tap did not have a fuse in it. There is zero need to have a fuse in the lower fuse socket of the fuse tap when the fuse box did not originally have a fuse in it. Adding a fuse to the lower fuse tap fuse socket might start to provide power to things in the vehicle that never had power before the installation of the fuse tap. Auto manufacturers will often use the same fuse box in multiple vehicle models or the same model with different equipment configurations. The internal routing of power in the fuse box may or may not provide power to things that did not originally have power provided to when a fuse is inserted into an "empty fuse box fuse socket". You should only have a fuse in the lower fuse socket of the fuse tap when the fuse box fuse socket had a fuse in it before the installation of the fuse tap.

"In Series" power routing

1699552309749.png

The right leg (leg on the same side as the wire) when inserted into the side of the fuse box fuse socket that provides power, routes power up the right leg of the fuse tap and then through the lower fuse in the fuse tap. The power must go through the lower fuse in the fuse tap to make it left side of the fuse tap. The left side of the fuse tap then provides power up to the upper fuse tap fuse socket and down the left leg of the fuse tap back into the fuse box fuse socket. This will often be called the "safest" configuration because the total power draw of the original device/circuit plus the draw of the new device/accessory will be routed through the fuse in the lower fuse tap fuse socket. If the total load of the original circuit plus the new device/circuit is more than the original fuse amp rating, the fuse in the lower fuse tap fuse socket will blow. This stops power to both the original device/circuit and the newly added device/circuit.

The only reason the power would turn off to the new device/accessory is:
  • The fuse in the bottom fuse tap fuse socket blows ("In Series" orientation)
  • The fuse in the top fuse tap fuse socket blows ("In Parallel" or "In Series" orientation)
  • The power provided to the fuse box fuse socket is turned off
 
The power delivered to the new device/accessory by the fuse tap will not "turn off" because of the fuse tap's orientation in the fuse box fuse socket.

The orientation of a fuse tap in a fuse box fuse socket is an issue that gets much debate as to which way is correct. The "correctness" of that debate is centered on how the power flows through the fuse tap to the fuses in the fuse tap.

"In Parallel" power routing

View attachment 69056

The left leg (leg furthest away from the wire) when inserted into side of the fuse box fuse socket that provides power, routes power up the left side of the fuse tap to both fuse tap fuse sockets. The allows each fuse to act independently in protecting the device/wiring receiving power from the fuses in the fuse tap. This fuse tap orientation has the potential to overload the wiring that provides power to the fuse box fuse socket if the installer is not careful in selecting the appropriate fuse box fuse socket or if the newly added device consumes far more power than is truly available through the wiring providing power to the fuse box fuse socket.

Since most all dash cameras (or accessories drawing similar amounts of power) draw 1 amp or less, using the "In Parallel" power routing method through the fuse tap is perfectly safe if the fuse box fuse socket has an amp rating of 7.5 amps or higher (assuming the wiring providing power to the fuse box fuse socket has the ability to provide at least 10% additional power than the original fuse box fuse's amp rating).

This is the power routing method that should be used when the fuse box fuse socket being used for the fuse tap did not have a fuse in it. There is zero need to have a fuse in the lower fuse socket of the fuse tap when the fuse box did not originally have a fuse in it. Adding a fuse to the lower fuse tap fuse socket might start to provide power to things in the vehicle that never had power before the installation of the fuse tap. Auto manufacturers will often use the same fuse box in multiple vehicle models or the same model with different equipment configurations. The internal routing of power in the fuse box may or may not provide power to things that did not originally have power provided to when a fuse is inserted into an "empty fuse box fuse socket". You should only have a fuse in the lower fuse socket of the fuse tap when the fuse box fuse socket had a fuse in it before the installation of the fuse tap.

"In Series" power routing

View attachment 69057

The right leg (leg on the same side as the wire) when inserted into the side of the fuse box fuse socket that provides power, routes power up the right leg of the fuse tap and then through the lower fuse in the fuse tap. The power must go through the lower fuse in the fuse tap to make it left side of the fuse tap. The left side of the fuse tap then provides power up to the upper fuse tap fuse socket and down the left leg of the fuse tap back into the fuse box fuse socket. This will often be called the "safest" configuration because the total power draw of the original device/circuit plus the draw of the new device/accessory will be routed through the fuse in the lower fuse tap fuse socket. If the total load of the original circuit plus the new device/circuit is more than the original fuse amp rating, the fuse in the lower fuse tap fuse socket will blow. This stops power to both the original device/circuit and the newly added device/circuit.

The only reason the power would turn off to the new device/accessory is:
  • The fuse in the bottom fuse tap fuse socket blows ("In Series" orientation)
  • The fuse in the top fuse tap fuse socket blows ("In Parallel" or "In Series" orientation)
  • The power provided to the fuse box fuse socket is turned off
Excellent explanation, I just bookmarked this info to be able to show others.
 
I drove 40 mins in the morning to do an errand and dashcam was behaving properly. No power loss and no going into parking mode while driving.

I will report back after a week before I call victory.

The only reason the power would turn off to the new device/accessory is:
  • The fuse in the bottom fuse tap fuse socket blows ("In Series" orientation)
  • The fuse in the top fuse tap fuse socket blows ("In Parallel" or "In Series" orientation)
  • The power provided to the fuse box fuse socket is turned off
Thanks for the detailed explanation. I checked all fuses and none are blown, so that leaves loss of power.

If orientation is not a factor, then maybe that ACC fuse doesn't like to be tapped or it powers some kind of car part that doesn't need constant power after ignition?

Anyways, it seems to be working properly now tapping into the empty fuse slots.

Thank you all for the input.
 
Hi All, happy to report that dashcam is behaving properly for 2 weeks.

Must have been an issue with the fuse slots. I initially tapped red and yellow slots which had existing fuses and was getting all kinds of issues.

Tapping the green empty fuse slots since has fixed the issues.

However, a small bug remained. When the dashcam went into parking mode, the camera announces parking mode started and 1 ch recording started. I checked the parking videos and both front and rear videos are present, so it is just a bug in the voice announcement? Anyways, I did a factory setting reset and SD format again and that seems to have fixed the bug.

All good now. Enjoy your A229 Pros!
 

Attachments

  • Fuse cover v2.jpg
    Fuse cover v2.jpg
    390.6 KB · Views: 20
Yeah in modern cars it can be a issue choosing the right fuses to use, not a big issue for the DIY person though, just something to be mindful of if you have issues.
 
Yeah in modern cars it can be a issue choosing the right fuses to use, not a big issue for the DIY person though, just something to be mindful of if you have issues.
I have to say that BMW are the most annoying cars to pick the right fuses. They don't really have a generic ignition.
Other cars I have hardwired were way easier.
 
Back
Top