All wired up the PWM to the motor

For a long time i have been thinking on making a motorized gondola like a cable car, then i could put a long steelwire between 2 things and have a camera ride along it.

With the camera on a 3 axis gimble it should make for cool footage

For somthing short you can allso get fairly small worm drive spindles by the meter or you can proberly allso get Metric thread on long rods, i found some M12 ones thats about 1 M long left by the ppl that had my apartment before me.
 
I know what you mean, like we can see being used in F1 in the pit lane, an overhead camera on a wire with a motor, I can’t remember which track it’s at but the camera can travel a bit faster then the pit lane speed limit of 60mph

when I was looking in to making a motorised slider rail, If I was got to be making my own slider, my plan was to use a worm screw to move the camera on the slider, but when I looked in to the parts needed to make the slider, I found it less time consuming and cheaper to buy a no name one from China
 
now that I’ve sourced a new batteryI’ve restarted my project of making a DIY motorised slider rail,

before I start cutting up aluminium in to the required shapes/parts I’m fabricating the parts out of plastic/fiber-glass

here are a few images of the motor on my slider rail and how it will work


image hosting adult


the belt will be static and the motor will pull itself from side to side by pulling in the belt, with the battery being heavy, it will now stay at one end of the slider and the motor travels across the slider, with the mote will be the PWM, the coiled cable is long enough for this, I also have to fabricate an angle platform for the motor to rest the PWM on it and also to fit micro switches at either end of the platform, so when the platform reaches the end of the travel, it will stop and I have no need to be near the slider to watch for it to reach the end, then once that is completed I think I can say I’ve finished the project, but will also make a side project for this which will be a setup that once the motorised platform reaches the end of travel, instead of stopping, will revers and return the platform backwards

here is a short clip on its test run

 
It’s been some time since I added more to this project, been a bit busy with things and let it slip, so thought I’d bring it up to date with only one final thing to add before its fully working

I got all the parts to convert my slider rail to a motorised one ages ago and it worked OK, the first motor I got had a speed of 30 RPM (revolutions per minute), and with my speed controller I could bring that down to approximately 6 RPM

with the diameter pulleys @12.25mm meant its radius was Pi 3.14 = 38.46mm, so the slowest travel I could get it to go was around 230mm per minute

so I got myself another motor which had a speed of 3.5RPM at full speed so with the speed controller I could get it down to a travel of approximately 9mm per minute

now if I wanted the travel to take only a few minutes I could wait and just sit next to it till the time elapsed

but the whole point of this exercise was to have long time laps photography/movies so I didn’t want to be sitting next to it for hours on end or having to keep popping out to see it had not got to the end yet or the motor would rip through the belt

so this is what I came up with (from researching the net) an auto revers


a micro switch at either end so when the camera reachers the end it will revers and co back, and it will keep on doing this tis I stop it or the battery dies. I’ve already made the circuitry with the micro switch that when it gets to the end it will cut the power to the motor and the motor will stop

I’m there clicking the micro switches as I have yet to make a platform for the micro switches to fix to, but that is the easy part


these are the two micro switches

P1170629_SMALL_.jpg


P1170630_SMALL_.jpg


the revers controller

P1170634_SMALL_.jpg


in its box

P1170636_SMALL_.jpg


P1170637_SMALL_.jpg


the box is a VHSC cassette case, I’d loved to have got hold of a proper one but they come in all sizes but the size I wanted, and after weeks searching for one found this VHSC cassette did the job
 
Holy Moses, talk about resurrecting the dead, just over 4 years ago, where has all that time gone, I see some of my previous images have had their link cut, sorry about that, all to do with my host not me, anyway

I thought it best to tag this at the end of my last DIY motorised slider rail than starting a new thread

Well I have been using the slide rail for some time-lapse and found it fun around the garden, I don’t think I’ve ever took the slider rail past my garden, due mostly to weight, DSLR + lenses but most of all the battery for the slider for location used is a right pain in the a$$ due to it’s weight

So taking out a full DSLR kit with lenses and the 12v DC battery was enough to put me off

For some time now I’ve been using my iPhone 6s for still, time-lapse and even movies, I find there are a few limitations with the iPhone but the weight I would otherwise be taking with me with the DSLR and the slider + battery I’ll put up with it, after all these images and movie clips are only for my pleasure not commercial

So to this end, I am now in the process of making a new motorised slider rail but from scratch this time

Right now I’m waiting for the postman to bring me orders I’ve made from Aliexpress:

The iPhone and one of my motorised panoramic heads are USB (5v) charged, I’m making this system run on 5v DC, the motor I managed to get is rated at 6v DC but this will work in my favour as it will slow down the rpm by around 16%

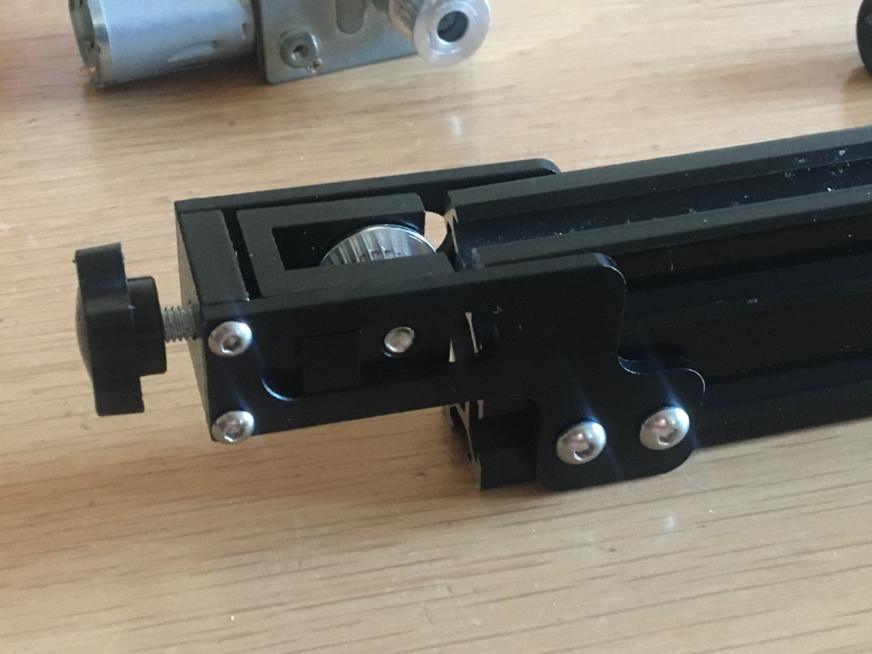
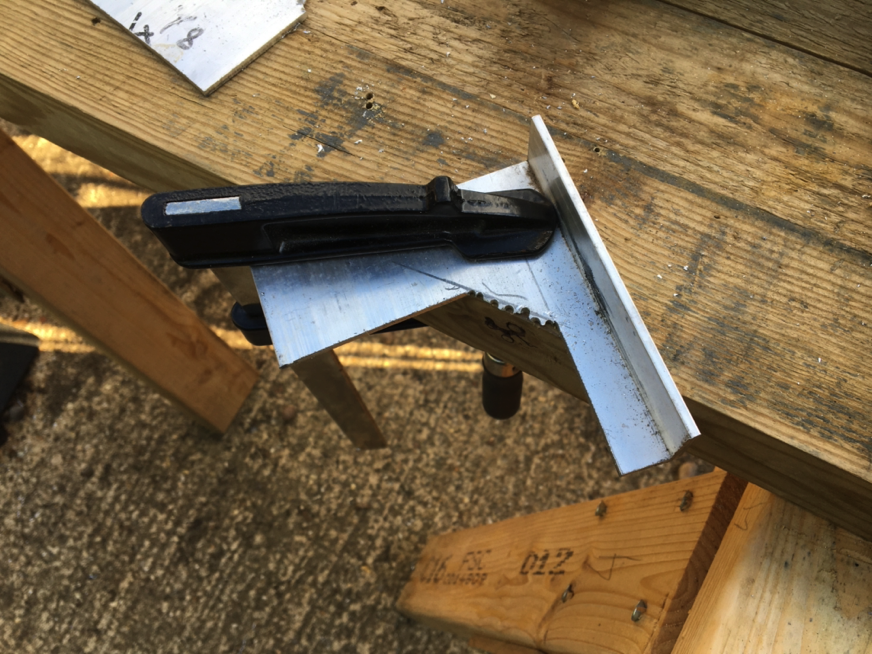
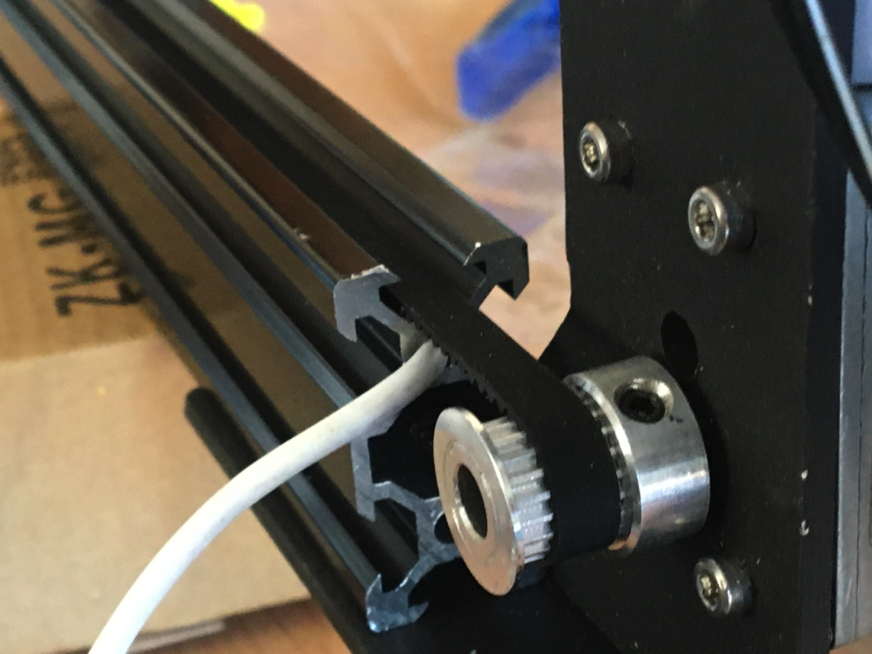
For the rail I’ve ordered a 1M length of black anodised 2040 v slot rail


The orientation of the rail is as shown in the 2nd and 3rd image, narrow (20mm) across and long (40mm) deep

Then a gantry plate with the wheels to be used on the 20mm side


One thing I had issues with on my old slider, was having to get out the screwdriver every n ow and then to tighten up the belt, so this time I’ve ordered an end tensioner for the belt so a turn or two of the dial is all that’s needed to tighten up the belt


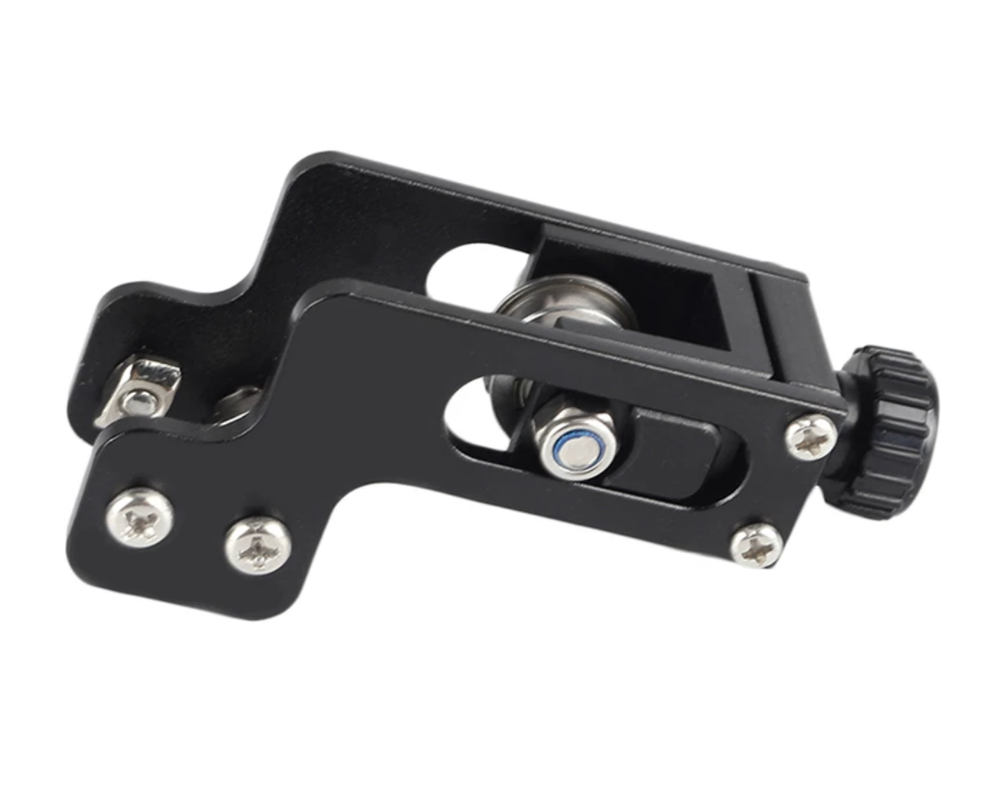
As I could only find a tensioner for a 6mm GT2 belt I had to discard my left over GT2 10mm belt from my previous slider and buy a few more meters of the 6mm GT2


The 6v DC motor I bought is a 5rpm (-the 16%) in the blurb it says “Torsion Turbo Gear Motor 5RPM Micro Electric Gearbox Reducer”. What I gathered is that if the motor isn’t running, the belt isn’t going to move


I think for most time-lapse photography 5 rpm is way too fast so as before I’ve also bought a 5 volt PWM motor speed regulator to get repeatable results in controlling the motor speeds


The. Two motorised panoramic heads I already have and this first one is charged by USB, sadly the second one is powered by 12v DC only


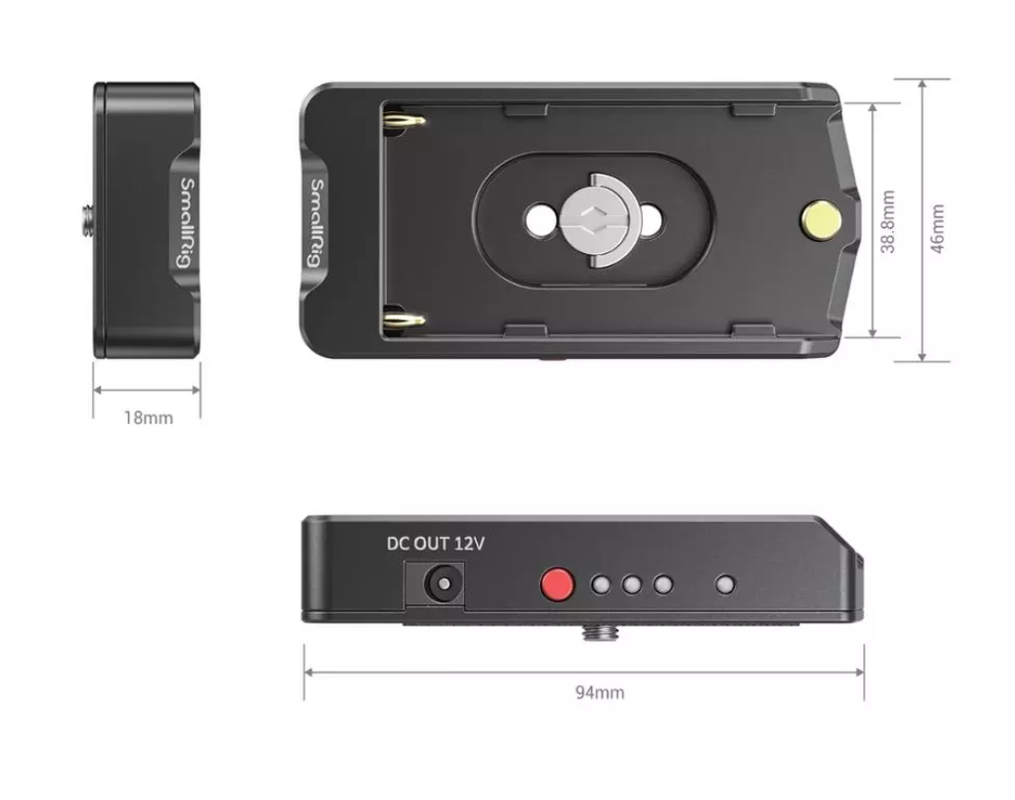
And the 12v DC one, I have seen on Amazon there are these voltage converters, USB 5v to 12v step up, I’ll have to take a look at this if I plan own still making use of this 12v DC motorised panoramic head


I have around 5 or 6 10,000 mAh USB power packs

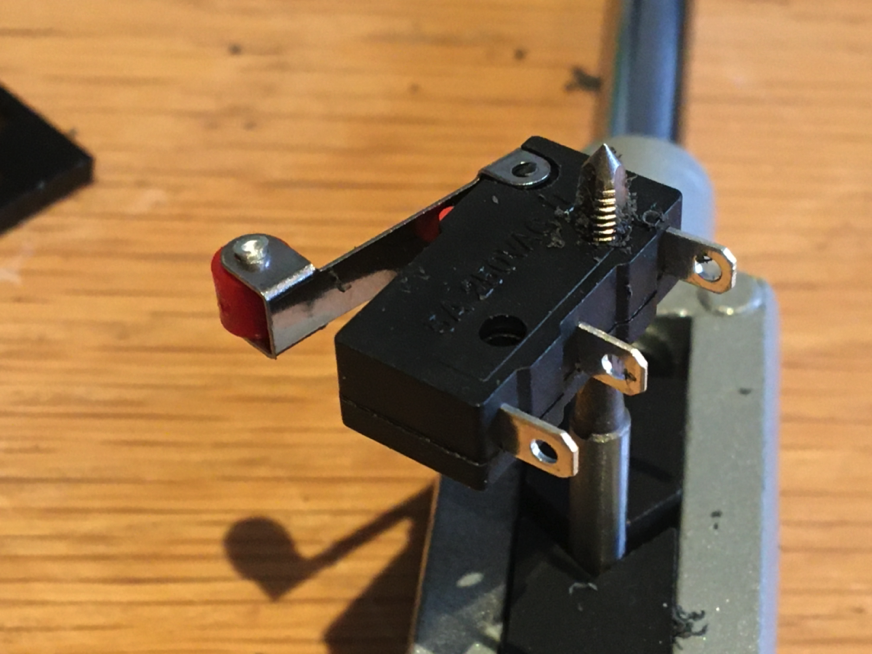
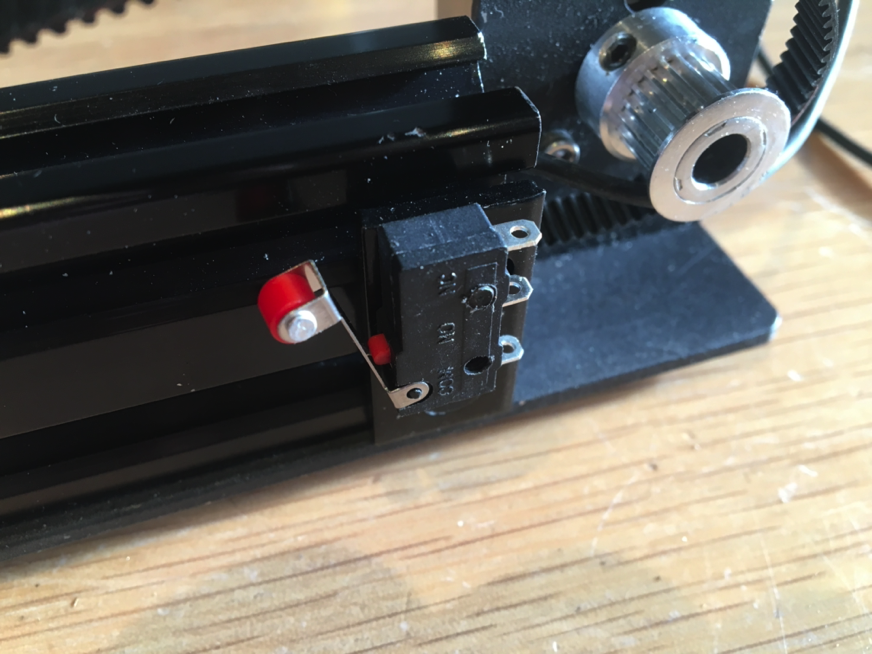
The final thing is the reverse polarity for the motor with end limiters, what I have now works great but as far as I’ve been able to find out so far (before I test it out for myself) my present relay is good 12v but not sure for 5v, plus it’s rather bulky


This time round not only keeping weight down but also the bulk of the total slider and accessories

I was thin king of replacing my old rely wiring for one of these smaller relays


And while at it I was thinking of doing away with the micro switches and replacing them with proximity sensors


I’ve read there are a few different types of proximity sensors but one that might fit my requirements is a capacitive proximity sensor. If I do do-away with the micro switches for these proximity sensors, I’m not been able to discover the wiring setup needed, any one here knows?

I’ll add more when the items arrive
 
I have been thinking about putting a camera on the G - scale train in my friends field, and then try and do a night time lapse as it drive a round, only problem is the tunnel.
But maybe just do part of the track as it is after all 20 - 30 M long.
Just not sure i can get my train to run slow enough for it to work, unlike my RC cars i can not change the gearing.
 
I’m having a thought, my Canon cameras are powered by the BP 511 batteries, over the years I’ve amassed quit a few of these

[img=800x729]https://i.postimg.cc/Zqq4CKCD/Screenshot-2021-03-27-at-6-58-33-am.png[/img]

[img=800x651]https://i.postimg.cc/15xmJQjf/Screenshot-2021-03-27-at-6-57-58-am.png[/img]

These won't be used much from now on, so I was wondering, if with the battery attached to the charger, the battery charger could be used/modified to also power things, as these new chargers use USB 5v (not 240AC) to charge the BP 511 batteries my USB power packs could re charge the BP 511


This one has struck me (if it can be made to work)
[img=800x777]https://i.postimg.cc/T30TdWYD/Screenshot-2021-03-27-at-7-04-12-am.png[/img]

[img=800x692]https://i.postimg.cc/RVcMYDkG/Screenshot-2021-03-27-at-6-57-32-am.png[/img]

[img=800x783]https://i.postimg.cc/PqFhZsDf/Screenshot-2021-03-27-at-7-00-14-am.png[/img]

There are more basic ones to

[img=800x556]https://i.postimg.cc/qv4kHG0r/Screenshot-2021-03-27-at-7-01-03-am.png[/img]


[img=800x661]https://i.postimg.cc/d0DcJHxb/Screenshot-2021-03-27-at-7-07-16-am.png[/img]

These batteries are stated 7.4v but are 8.4v, if getting the volts down to 5v - 6v is there a way I could add or modifiy the charger to provid power, used as more or less a docking for the battery?
 
To my surprise two items ordered from Aliexpress came this afternoon, I wasn’t expecting them till at least the 16th of April

One item was the belt tensioner


And the other was the 6v DC motor


It didn’t take me long to put together the belt tensioner and fir it to the v slot rail


Using the BP511 battery I see it will drive the 6v motor


As for my power pack to power the motor and to maybe supplement the iPhone battery and rotating hear for long time lapse, `I think ~I may have found what I’m looking for, it will mean having to use new LPE6 batteries but the package looks good,

Here is a video clip on Aliexpress showing it’s features


Part one

It’s been some time since I last posted but I’ve not been idle,

Regarding the source of the power, I came across this Ziaty NP-F battery


The spec for it say:

Ziaty New Designed Battery, Sony NP-F970-980-F550 with Dual DC Ports and Type C USB Ports Fast Charging Compatible with Sony NP-F

10500mAH large capacity, strong endurance

Brand new coding, really powerful


For the mounting plate I’ve opted for this one


Both these should arrive sometime end of May

In the meantime, the other items ordered from Aliexpress have arrived,

The PWM controller arrived, it has 3 features I wasn’t aware of, it has a minimum Low setting


A maximum High setting (here sowing 00)


And a Fréquence range from 0 to 100


I’ve read some information from the net, but still haven’t got my hear round how best to use this feature and help would be most welcome

An issue was finding hard to overcome was a mounting plate for my belt motor, hundreds of options for stepper motor mounts and others of that shape but I just couldn’t find one that would fit my type, so in the end I decided to make my own, out of 3mm aluminium

I took measurements and the location of where the spindle needs to be to have the belt Clare both top and bottom of the V-Slot rail


I wasn’t confident in managing a large circle cut so went for a (approx)45 degree angle cut


By the time I used my polishing wheel it got rid of all the sharp edges and I marked where the holes for the spindle and screws needed to go


Part two

After a lot of trial and error I got it in the right location


Then after going over the aluminium mount with liberal amount of de greaser I left it in room temperature over night, The following morning I sprain a good four or five coats of black paint and in between each coat I placed the mount in the oven for 20 minutes each time, the oven was was set to 50c (electric oven)


As for the belt, I wasn’t please how the setup was supposed to be fitted, but I went with it for now, but I’ve already ordered a 3D item for how I want the belt to be fitted to the camera platform

The way it’s made to fit is by making a loop if the belt round a location on the camera plate then tie the belt with cable ties


It works but not to my liking


Just enough clearance for the belt


Then the last items to arrive were the two end limiter switches, before I could fit these on to the V-Slot I had to tap them with a 3mm tap, didn’t take long


Then on to the slider rail


Regarding both the PWM controller and the SALON D-262 revers polarity relay, for now both work to my expectations

Here’s a clip showing the forward reverse motor directions once a plus is sent by one or the other wires leading to the end micro switches, here in this clip the end switches weren’t yet wired so this backwards and forward direction was by me momentarily connecting the two wires trigger pulse wires which when wired up will be made by the micro switches, I have also placed a 2 way polarity switch so I cam move the camera platform where I want it to start from


I came across some information regarding USB PD (power distribution). I was wondering, as I’m after power and not date distribution would I be better off using a USB PD as opposed to a USB C, and would a recently purchased USB C cable be able to handle the extra votes and amps? This is a graph from the Belkin website


As always any help is much appreciated
 
Last edited:
Back
Top