wibbly
Active Member
In the interests of full transparency I was offered a Vantrue N4 Pro for review by Vantrue, and allowed to keep the product in exchange for an honest description of my experiences here on the Dashcamtalk.com forum. I’m in the UK (so a right hand drive car). I have been researching dashcams, but this is the first one I will have fitted. The products supplied were the N4 Pro camera kit (which at time of writing lists at £304 on Vantrue’s website) together with a hardware kit and 128GB Vantrue Micro SD card, both of which are sold separately.
The N4 Pro features the Sony IMX678 chipset which supports Starvis 2.0 technology for the main forward facing camera. There are also cabin facing (attached to the main forward facing) and rear facing cameras. There's a large ~3" screen (non touch) and an intuitive menu system for set up on the camera, driven by 4 physical buttons.
Unboxing and initial impressions - Vantrue’s design choices
Products are well packaged - as are many are these days. Boxes have a premium and rigid feel to them, there are boxes within the boxes and you ‘explore’, digging deeper and deeper, discovering more bits and pieces they have provided. For example,
The main/front camera(s) unit feels very well built, with nice design choices. It’s attached to its mount magnetically, which feels solid. Even the cover for the Micro SD card (which is also the power/'emergency recording' button) attaches with a reassuring magnetic click - much better than a grommet kind of cover. The main power is connected at the mount, not the camera, so the camera is easy to remove. The rear facing/cabin camera rotates very smoothly to adjust its position.
But, unfortunately, the rear camera cable is plugged directly into the main/front camera unit, not its mount. Why? This means you still have to worry about plugging cables when removing or attaching the main camera via its elegant magnetic mount. This seems to defeat one of the benefits of having a mount with the main power cable connected to the mount. Also the front/rear cable for the rear camera is provided with straight USB-C connectors, which exit the main camera upwards. This prevented mounting the camera as high up on the car windscreen as I wanted to. I needed to buy a right angle Micro USB adapter. Much better if the cable could also have just plugged into the mount like the power cable, as I mentioned above.
The main camera mount is mounted with a 3M sticker that's attached to a large electrostatic sticker that's applied to the windscreen first. This is intended to ensure you don't end up with a sticky mess on the windscreen if you have to remove the mount later. I found the edge of the electrostatic sticker was visible on a recording in my case. However removing the excess was simple enough with a knife and the excess electrostatic sticker was easily removed.
The main camera isn’t exactly stealthy due to the size required as a result of integrating both the large screen and a rear/cabin facing camera into it. And positioning of the cabin camera and main power/'emergency recording' button have clearly been designed for left hand drive cars. This makes positioning challenging, but not impossible, in right hand drive cars. In the UK dashcams should be fitted less than 40mm into the area of the windscreen swept by the wiper blades.
Super capacitors rather than a lithium polymer battery are used to give the camera power for a short period if external power is lost, to ensure it can still shut down without corrupting the SD card. The use of super capacitors is a good choice as lithium polymer batteries have a short service life in the extremes of temperature often found in a car and thus need users to periodically replace them (if that's even possible).
The rear camera is small and simple enough to mount with a 3M sticker. Not clear if I was supposed to use an electrostatic sticker with it or not. Its vertical rotation/adjustment is not nearly as smooth as the main camera, but fortunately should not have to be done more than once anyway.
The front to rear camera cable seems quite thick and I expected it to add to the challenge of routing it neatly from the front to the back of the car. At least a trim tool was included with the camera bundle. In the event it was ok, and I was happy with the cable's apparent robustness, but where in entered/existed trim wasn't as neat as it would have been if it had been thinner.
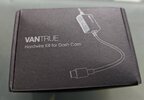
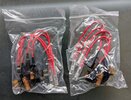
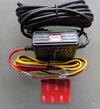
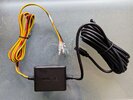
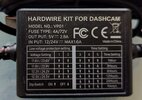
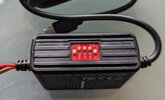
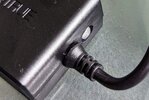
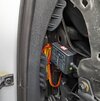
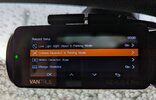
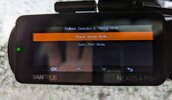
The 2 level adujstable hardwire kit has many piggy back fuse options supplied to accommodate what you might find in your car's fuse panel. The low voltage cut-off can be set at 11.6V or 12V. Whilst either of these settings might leave enough in the battery to start the car, car batteries aren’t generally designed to be significantly discharged regularly, so I believe setting either of these voltages will have a detrimental effect on the car battery’s overall service life. I would prefer to have the option of a higher cut off voltage. But more importantly there should be a software option to have the camera’s other parking modes automatically switch to the lowest power consuming Collision Detection parking mode after a set amount of time. Or at least be able to set a delay before parking mode starts, after leaving the car. This would give the best protection for shorter parking periods without having to manually think about and set the desired parking mode every time the car is left. That is currently not possible, forcing users like me to always use Collision Detection mode if they regularly leave the car undriven for days at a time. Collision Detection parking mode has no pre-capture and a significant start up time, so events are more likely to be missed completely, but it's the only option for those that fear reduction in the car battery's service life with the other options.
There is also a 5 level adjustable hardwire kit that I was subsequently able to test below https://dashcamtalk.com/forum/threads/vantrue-nexus-4-pro-review.49252/post-599815
The CPL filter screws onto the forward facing camera rather than just pushing on. This adds to feeling of product and design quality. It can then be rotated to maximize its effect.
The Vanture Android app seems capable at first use. It successfully upgraded the firmware in the cameras and is an easier way to set up all the camera options than using the camera itself (not that that's bad). It can connect over 5GHz Wifi and so far works fine for viewing files, setting up the camera, and looking at a live view. For some reason the app excludes the list of voice commands that can be used on the camera. These can only be viewed within the camera's own menu.
I do frequently have a number of problems downloading files to my phone using the app. They would either fail to download or the app would just wait interminably for them to download. Smaller file sizes seem more reliable. Also choosing to download files from the file overview screen is more reliable than from the playback screen, Reformatting the camera's card or switching to 2.4GHz Wifi did not help. I presume this is a bug that will ultimately be fixed. I was using a Pixel 6 (Android 13). Beware there is also a Vantrue Dash Cam app in the Google Play store, which is not the app aligned with N4 Pro. Without the app, you can remove and directly connect the camera to your laptop/PC with a supplied cable connected to the camera's rear camera cable connector, and transfer the files that way.
I have also noticed if I set HDR to off in the app, the setting does not persist on the camera. If I set it on the camera, it works as intended.
Photos are available here (I can't attach more than 10 in-line in a post)
The N4 Pro features the Sony IMX678 chipset which supports Starvis 2.0 technology for the main forward facing camera. There are also cabin facing (attached to the main forward facing) and rear facing cameras. There's a large ~3" screen (non touch) and an intuitive menu system for set up on the camera, driven by 4 physical buttons.
Unboxing and initial impressions - Vantrue’s design choices
Products are well packaged - as are many are these days. Boxes have a premium and rigid feel to them, there are boxes within the boxes and you ‘explore’, digging deeper and deeper, discovering more bits and pieces they have provided. For example,
- The cameras protected by high density foam
- Spares of 3M camera attachment and other stickers
- Trim removal tool
- Lens cleaning cloths
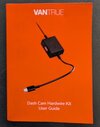
- Multilingual manual (called a Quick User Guide) that, for English at least, is understandable and for the most part clear - which is not always the case for product originating out of China. This doesn't seek to walk you though all the options available to you, instead concentrating on what you need to know that isn’t obvious from what you discover playing with the product on your own. I like this. https://www.vantrue.net/manuals/pdf...anuals/Vantrue N4 pro User Manual English.pdf
The main/front camera(s) unit feels very well built, with nice design choices. It’s attached to its mount magnetically, which feels solid. Even the cover for the Micro SD card (which is also the power/'emergency recording' button) attaches with a reassuring magnetic click - much better than a grommet kind of cover. The main power is connected at the mount, not the camera, so the camera is easy to remove. The rear facing/cabin camera rotates very smoothly to adjust its position.
But, unfortunately, the rear camera cable is plugged directly into the main/front camera unit, not its mount. Why? This means you still have to worry about plugging cables when removing or attaching the main camera via its elegant magnetic mount. This seems to defeat one of the benefits of having a mount with the main power cable connected to the mount. Also the front/rear cable for the rear camera is provided with straight USB-C connectors, which exit the main camera upwards. This prevented mounting the camera as high up on the car windscreen as I wanted to. I needed to buy a right angle Micro USB adapter. Much better if the cable could also have just plugged into the mount like the power cable, as I mentioned above.
The main camera mount is mounted with a 3M sticker that's attached to a large electrostatic sticker that's applied to the windscreen first. This is intended to ensure you don't end up with a sticky mess on the windscreen if you have to remove the mount later. I found the edge of the electrostatic sticker was visible on a recording in my case. However removing the excess was simple enough with a knife and the excess electrostatic sticker was easily removed.
The main camera isn’t exactly stealthy due to the size required as a result of integrating both the large screen and a rear/cabin facing camera into it. And positioning of the cabin camera and main power/'emergency recording' button have clearly been designed for left hand drive cars. This makes positioning challenging, but not impossible, in right hand drive cars. In the UK dashcams should be fitted less than 40mm into the area of the windscreen swept by the wiper blades.
Super capacitors rather than a lithium polymer battery are used to give the camera power for a short period if external power is lost, to ensure it can still shut down without corrupting the SD card. The use of super capacitors is a good choice as lithium polymer batteries have a short service life in the extremes of temperature often found in a car and thus need users to periodically replace them (if that's even possible).
The rear camera is small and simple enough to mount with a 3M sticker. Not clear if I was supposed to use an electrostatic sticker with it or not. Its vertical rotation/adjustment is not nearly as smooth as the main camera, but fortunately should not have to be done more than once anyway.
The front to rear camera cable seems quite thick and I expected it to add to the challenge of routing it neatly from the front to the back of the car. At least a trim tool was included with the camera bundle. In the event it was ok, and I was happy with the cable's apparent robustness, but where in entered/existed trim wasn't as neat as it would have been if it had been thinner.
The 2 level adujstable hardwire kit has many piggy back fuse options supplied to accommodate what you might find in your car's fuse panel. The low voltage cut-off can be set at 11.6V or 12V. Whilst either of these settings might leave enough in the battery to start the car, car batteries aren’t generally designed to be significantly discharged regularly, so I believe setting either of these voltages will have a detrimental effect on the car battery’s overall service life. I would prefer to have the option of a higher cut off voltage. But more importantly there should be a software option to have the camera’s other parking modes automatically switch to the lowest power consuming Collision Detection parking mode after a set amount of time. Or at least be able to set a delay before parking mode starts, after leaving the car. This would give the best protection for shorter parking periods without having to manually think about and set the desired parking mode every time the car is left. That is currently not possible, forcing users like me to always use Collision Detection mode if they regularly leave the car undriven for days at a time. Collision Detection parking mode has no pre-capture and a significant start up time, so events are more likely to be missed completely, but it's the only option for those that fear reduction in the car battery's service life with the other options.
There is also a 5 level adjustable hardwire kit that I was subsequently able to test below https://dashcamtalk.com/forum/threads/vantrue-nexus-4-pro-review.49252/post-599815
The CPL filter screws onto the forward facing camera rather than just pushing on. This adds to feeling of product and design quality. It can then be rotated to maximize its effect.
The Vanture Android app seems capable at first use. It successfully upgraded the firmware in the cameras and is an easier way to set up all the camera options than using the camera itself (not that that's bad). It can connect over 5GHz Wifi and so far works fine for viewing files, setting up the camera, and looking at a live view. For some reason the app excludes the list of voice commands that can be used on the camera. These can only be viewed within the camera's own menu.
I do frequently have a number of problems downloading files to my phone using the app. They would either fail to download or the app would just wait interminably for them to download. Smaller file sizes seem more reliable. Also choosing to download files from the file overview screen is more reliable than from the playback screen, Reformatting the camera's card or switching to 2.4GHz Wifi did not help. I presume this is a bug that will ultimately be fixed. I was using a Pixel 6 (Android 13). Beware there is also a Vantrue Dash Cam app in the Google Play store, which is not the app aligned with N4 Pro. Without the app, you can remove and directly connect the camera to your laptop/PC with a supplied cable connected to the camera's rear camera cable connector, and transfer the files that way.
I have also noticed if I set HDR to off in the app, the setting does not persist on the camera. If I set it on the camera, it works as intended.
Photos are available here (I can't attach more than 10 in-line in a post)
Last edited:

