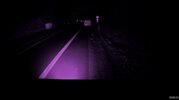
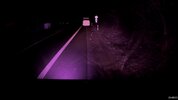
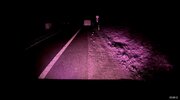
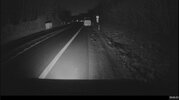
Viofo A139 pro // 1ch // stock-lens // focus issues // refocusing/IR-enabling

Müller

Active Member
Joined
Feb 13, 2023
Messages
105
Reaction score
73
Location
Stadt
Country
Germany
Hello.

During removing the IR-cut i noticed the lens can deliver a better focus > sharpness/details then the factory-one. The interested person might take the effort:

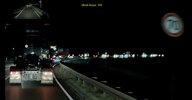
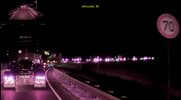
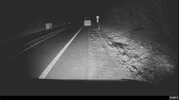
Results first:

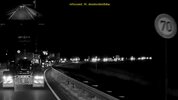
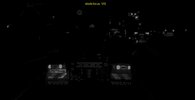
dct_05_VIS_stockfocus.jpg

dct_05_IR_refocus.jpg

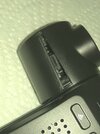
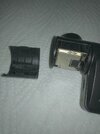
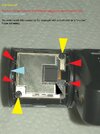
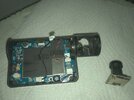
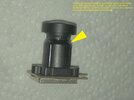
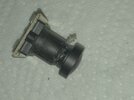
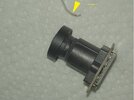
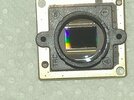
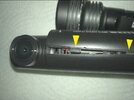
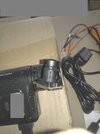
The mechanics of:

refocus (1).jpg

refocus (2).jpg

refocus (3).jpg

refocus (4).jpg

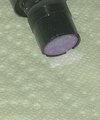
Very tough resin. I guess a UV-hardener. I didn`t want to try a heatgun because of that (no simple loctite/superglue-stuff).

refocus (5).jpg

refocus (6).jpg

refocus (7).jpg

refocus (8).jpg

Attaching of only 10files allowed. Proceed in the next post.
 
Hello.

During removing the IR-cut i noticed the lens can deliver a better focus > sharpness/details then the factory-one. The interested person might take the effort:
Thank you for sharing the access to the lens module for refocusing. I strip the UV glue using a small knife to separate it from the lens holder, then peel away with small screwdriver as you did, all without using a heat gun.

I see you have 2x A139 Pro. Are you planning to use one with the IR-cut filter and one without?
 
You're a brave person. Would be nice if they made the lens focus adjustable without having to break it open.
 
Hello.

TonyM: [...] 2x A139 Pro. Are you planning to use one with the IR-cut filter and one without?

These two are actually in use on a daily basis. The IR for shorter shutter speeds and therefore better motion-freezing because of more light energy reaching the sensor (in part depending on the IR-"weather") and the VIS-one for the corresponding color-information, which in conclusion means: only the IR might have to be (re-)focused to an optimum because this is the device having the most important task of capturing the bones of the world as detailed as possible while the VIS-one "only" has to present the fifty shades of flesh rotting on those bones ... Oo

But: Downside-alarm!: As i wrote on Mr. McCoy´s yt-Panzerhome, the stocklens doesn´t seem to be IR-corrected. When testing with 850, 940 and 1.064nm and a longpass to eleminate vis-light, the deeper you go into the IR the mushier the videomaterial gets, so the focus-points of VIS- and IR begins to drift apart somewhere above ~700nm, i think.

Which doesn´t have any real impact on the use of those (modified) cams in the application described here. Nonetheless i´m searching for an IR-corrected pendant. A ship should be watertight ...

The IR and a tele-lens? Shorter shutter speeds would be welcomed even more.

marcusb: Would be nice if they made the lens focus adjustable without having to break it open.

Indeed. An easier to access lens-head, a lockring-solution instead of glue. But i think, for that sometimes heavily vibrating/bumpy environment the cameras are supposed to work in, they wanted to make it as bomb- and foolproof (and nice) as possible. You will notice for example, when you try to wriggle the lenshead out of the collar it´s sitting in in that pivotable sensor-plastic-housing, that this is quite difficult because it´s a very tight fit, so vibrations from the car cannot build up to some resonate ones and blur the picture because they are working on some slighthly loose (optical) parts. And i think this they did well.

What they did not do well is the poor focusing (on some? cameras). 1.) People pay good money AND this thing is a documentation-device for critical situations, not a toy and for those both reasons the focus for example on my VIS-one is a shame.
 
Great job with the experimentation!

Are you running two cameras simultaneously to show visible light and IR light that?

It's been ages since I played with IR filter removal mods, but IIRC people did sometimes need to adjust focus when shooting in IR given that autofocus was usually tuned to focus on visible light, so it makes sense that you needed to do this. It does make me wonder if the focus issues were IR-specific or just in general. Did you experiment with focus adjustments when shooting in visible light? If so, did it also help?

It also looks like the IR samples have a faster shutter speed. The 70 km/h sign on the right looks better frozen in the IR sample.
 
Hello.

Vortex Radar: It does make me wonder if the focus issues were IR-specific or just in general.

The better sharpness and detail after refocusing refers to visible wavelengths. They are the dominant sharpness-producers (when using this not-IR-corrected stocklens). When you put an IR-longpass in front of the refocused lens (blocks VIS) the videomaterial is getting mushier. So refocusing will be worth an effort even when not planning to get rid of the IR-cut.

Vortex Radar: It also looks like the IR samples have a faster shutter speed. The 70 km/h sign on the right looks better frozen in the IR sample.

Yes, there are two sharpnesses (is that an actual english word oO?) in that picture: 1.) The overall/global "baseline" sharpness of the lens-focus (the same-speed truck as a quasi-stationary object in line with the lens-axis) and the "sharpness" produced by motion-freezing (that sign).

Vortex Radar: Did you experiment with focus adjustments when shooting in visible light? If so, did it also help?

The IR-videomaterial is actually a mix of VIS- and IR-light. Only with an IR-longpass it would be pure IR. So the sharpness in the (refocused) pictures comes from the VIS-light, the (additional) energy (shutter-speeds) from the IR. The IR is basically a ghost-image behind the sharp VIS-(structure-) material. And to also have the IR-part in focus i am looking for an IR-corrected pendant for the stocklens ...
 
When testing with 850, 940 and 1.064nm and a longpass to eleminate vis-light, the deeper you go into the IR the mushier the videomaterial gets, so the focus-points of VIS- and IR begins to drift apart somewhere above ~700nm, i think.

Which doesn´t have any real impact on the use of those (modified) cams in the application described here. Nonetheless i´m searching for an IR-corrected pendant. A ship should be watertight ...

The IR and a tele-lens? Shorter shutter speeds would be welcomed even more.

You might find this older thread to be of interest. With an IR lensed camera that allows one to make fine adjustments for exposure, contrast, saturation, sharpness and adjustments for the specific RGB values it is possible to achieve much of what you are describing without the use of IR correction filters. The increased detail and acuity can be especially apparent with an IR telephoto lens.

Mobius Varifocal Zoom IR

 
What they did not do well is the poor focusing (on some? cameras). 1.) People pay good money AND this thing is a documentation-device for critical situations, not a toy and for those both reasons the focus for example on my VIS-one is a shame.
I agree that quality control could be better, especially on something as critical as lens focus. This applies to all manufacturers, not just Viofo.

The average consumer will not have the tools, skill or patience to refocus the lens properly - and they should not have to do this.
 
Hello Dashmellow,

the mobius is an old friend of mine. Several of them sleeping in some boxes somewhere in the storage. Imagine the A139 with that software-interface ... OO!

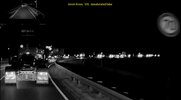
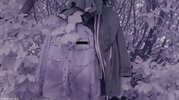
Checking on the IR-reflectivity of different fabrics in comparison to the vegetation:

mobius_IR.jpg
 
I have some times been thinking about, using a dashcam with no IR filter, and then put two 10 W IR lights where fog lights should be on my car.
Just to see if that would make for a good nighttime dashcam.
 
Hello Dashmellow,

the mobius is an old friend of mine. Several of them sleeping in some boxes somewhere in the storage. Imagine the A139 with that software-interface ... OO!

Checking on the IR-reflectivity of different fabrics in comparison to the vegetation:

View attachment 64221

Yes, I wish other cameras offered such fine grained control over the photographic parameters and RGB vlaues. It would allow for vastly improved imaging potential and plate recognition even without removing the IR-cut filter.
If you were a fan of the original Mobiuis the new 2K M1S is worth checking out.
 
Hello Kamkar,

don´t expect too much of 20W-IR-LED lights. Assuming the efficiency of a good LED at ~30%, that will be an actual IR-output of around 6W. 6W in an already IR-light polluted environment of most cars still using incandescent lights which are basically screaming in IR maybe a drop of water on a hot stone. Additionally these 6W have to be spread across the field of view of the dashcam´s lens so that scenery is uniformly illuminated and there are no hotspots which additionally might confuse the cameras metering. And: Your lens has to be an IR-corrected one. Otherwise, the more IR is blasted into the scenery, the mushier the structures get.

When building these lights on your own i would recommend these ex-Ledengin now Osram LZ4-LEDs. Robust and the most output because of the 4 die-core. Additionally the spread of these LEDs fits perfectly to the field of view of the A139 stock-lens. Edge to edge.

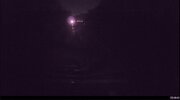
Example: This is an IR-beacon flashing at 10ms with the 940nm-version of that LZ4. That flashing is too fast for the A139 to adjust the shutter. You can see the brightness building up stupidly. Additionally you can see the structure not being in focus because IR is the dominant light in that cave and at that night-time.

dct_240223_05.jpg

dct_240223_06.jpg

dct_240223_07.jpg

dct_240223_08.jpg

This is the same scene with the beacon at full power in continuous-mode and the a139´s shutter having catched up.

dct_240223_09.jpg

For the usage you are thinking about I would recommend the 850nm-version because the sensor is much more sensitive in this wavelength range and you will get about double or more IR-impact than with the 940nm-version using the same electrical input.
 
Hello Kamkar,

this is 1pc. LZ4, 850nm, about 13W electrical input and about 4-6W (depends on the bin) radiant flux. Remember: no IR-correction on that stock-lens.

Site as it is (only that stupid truck-light in the distance):

dct_280223_001.jpg

LZ4 (1pc.) at full power. I used one of these optics on it. LZ4 was placed at fog-lamp position.

dct_280223_002.jpg

Car´s own fog-lamps (incandescent) additionally ON:

dct_280223_003.jpg

Car´s low-beam (driving lights) additionally ON:

dct_280223_004.jpg

So what information is hiding in the (dark of the) pictures?

Site as it is: basically Nothing:

dct_280223_006.jpg

LZ4 only:

dct_280223_005.jpg

Everything ON:

dct_280223_007.jpg

So not much more (overall) information in the pictures with the christmastree fully lit, but, ... the more light, the more sharpness and with sharpnes comes detail, which means ... more information.

I think with 8pcs. LZ4 (2x4) and an IR-corrected lens one could get somewhere. But i wouldn´t mount them on the fog-lamp position but to the lens-axis because one wants the plates to shine (without anyone being able to observe that). In this scenario i would use an underexposing A139-IR which single purpose would be to expose the "burning" plates correctly. For everything else, a second cam would be responsible.

The best way would be not to drive the LZ4s continously but to pulse them. They can be "overdriven" by 5x when pulsing them. But this doesn´t work with the A139 because it is much too slow for adjusting the exposure to the flashes. One would only receive constantly overexposed pictures with maybe a few lucky shots when distance and light-energy would fit.
 
Here's what you need @Müller! :)

It would be interesting to see what results you could actually achieve with one of these. Someone (half seriously) recommended a very similar but much lower powered product when I was experimenting with IR camera lenses and auxiliary IR illumination. Of course, these are really only recommended for off road (or military use) with night vision goggles.

 
Thank you!!!

any tips for the first step? (getting off the plastic casing)
 
Last edited:
Also- I’m going to be trying different lenses, is there a trick to focusing them?
 
Hello Zackw419.

Zackw419: "Any tips for the first step? (getting off the plastic casing)"

Not really. It simply is a bit difficult and you might not pry the oyster open without leaving at least some cosmetic damages on the housing.

You have to (i did it) insert a thin(sharp) tool into the gap of the housing (the bottom with the big radius), then work on it to split it open. I did it with this knife. When i tried to open up the oyster for the first time i didn´t know what´s hiding under the hood. You need some mental strenght in that moment to ignore a potential burning of ~250currency-units with an unlucky slip of some kitchenknife used as a prybar on a fiddly consumerelectronicdevice with unknown entrails. Now that i know, it helps when you apply some pressure to the points where these notches/pawls? can be seen:

dct_020523_001.jpg


But!: the housing is a relatively rigid one (which is a good thing!), so it has to be done carefully but forcefully and forcefully but carefully ... Oo.

On top of that, it´s a good idea to (try to) fixate the oyster to be able to use both hands on the patient but the problem with the oyster is it´s stupid oyster-geometrie with angled surfaces and more or less sexy curves ... ><!

If you cannot fixate it in or with a helpful device, use more hands (!attention!: > massacre-alarm!: multiple hands > knifeshaped "tool" > sweat > small device which doesn´t want to be opened up > force > failure > anger > more force > more sweat > more failure > rage > knife-slipping > silence > bloodfountains > yelling > hysteria > end-of-the-world ...

Don´t let it come to this! ... :)

I did it in my lap. The frontyard of my genitals. Nothing happened. It´s doable. But not easy, no actual trick to advise on (for?) and the possibility of a not-so-nice housing than pryor to the breach is a real one ...

Zackw419: "[...] lenses, is there a trick to focusing them?"

No. No trick either. Just boring and probably time consuming > producing video segment > download from cam > max it on the screen > watch focus position > adjust the lens a bit > produce video segment > download from cam > max it on the screen > watch focus > adj ... and so on and so forth.

You (of course) have to do that with the sensor-module not mounted back into it´s housing. During this procedure, the eye has to just hang out of the head of the patient on it´s optic nerve. Like this:

dct_020523_002.jpg

I really can understand that people don´t want to launch such a nerdy space-program just to get a little bit of a more-on-spot-focus, but i can tell that the result was really! worth it. Maybe i got a potatoe and all the other buyers that ZEISS precision instrument they were expecting but after this torture-tour, watching the crisp/sharp videomaterial the camera is actually able to deliver was such a joy, ... with the topping of shorter shutter-times because of the additional IR-lightenergy now teaming up with VIS and hammering on the sensor together.

Btw.: When first time trying to rotate the stock-lens after removing the glue: I had to use two grippers (in german: Zangen) and apply some unexpected amount of torque to talk the lens into a initial rotational movement (i think a bit of the uv-glue is infitrating the fine lens-thread prior to the hardening process and this residual glue cannot be removed with the main visible part and it´s the one the torque is need for to "break it". After that, the lens can be rotated with two fingers without problems but it sits thight enough in it´s thread that there´s no additional securing needed after hitting the desired focus spot.

Good luck. Report back. Stay away from hospitals ...
 
Last edited:
Hello Zackw419.


Not really. It simply is a bit difficult and you might not pry the oyster open without leaving at least some cosmetic damages on the housing.

You have to (i did it) insert a thin(sharp) tool into the gap of the housing (the bottom with the big radius), then work on it to split it open. I did it with this knife. When i tried to open up the oyster for the first time i didn´t know what´s hiding under the hood. You need some mental strenght in that moment to ignore a potential burning of ~250currency-units with an unlucky slip of some kitchenknife used as a prybar on a fiddly consumerelectronicdevice with unknown entrails. Now that i know, it helps when you apply some pressure to the points where these notches/pawls? can be seen:

View attachment 64929


But!: the housing is a relatively rigid one (which is a good thing!), so it has to be done carefully but forcefully and forcefully but carefully ... Oo.

On top of that, it´s a good idea to (try to) fixate the oyster to be able to use both hands on the patient but the problem with the oyster is it´s stupid oyster-geometrie with angled surfaces and more or less sexy curves ... ><!

If you cannot fixate it in or with a helpful device, use more hands (!attention!: > massacre-alarm!: multiple hands > knifeshaped "tool" > sweat > small device which doesn´t want to be opened up > force > failure > anger > more force > more sweat > more failure > rage > knife-slipping > silence > bloodfountains > yelling > hysteria > end-of-the-world ...

Don´t let it come to this! ... :)

I did it in my lap. The frontyard of my genitals. Nothing happened. It´s doable. But not easy, no actual trick to advise on (for?) and the possibility of a not-so-nice housing than pryor to the breach is a real one ...


No. No trick either. Just boring and probably time consuming > producing video segment > download from cam > max it on the screen > watch focus position > adjust the lens a bit > produce video segment > download from cam > max it on the screen > watch focus > adj ... and so on and so forth.

You (of course) have to do that with the sensor-module not mounted back into it´s housing. During this procedure, the eye has to just hang out of the head of the patient on it´s optic nerve. Like this:

View attachment 64930

I really can understand that people don´t want to launch such a nerdy space-program just to get a little bit of a more-on-spot-focus, but i can tell that the result was really! worth it. Maybe i got a potatoe and all the other buyers that ZEISS precision instrument they were expecting but after this torture-tour, watching the crisp/sharp videomaterial the camera is actually able to deliver was such a joy, ... with the topping of shorter shutter-times because of the additional IR-lightenergy now teaming up with VIS and hammering on the sensor together.

Btw.: When first time trying to rotate the stock-lens after removing the glue: I had to use two grippers (in german: Zangen) and apply some unexpected amount of torque to talk the lens into a initial rotational movement (i think a bit of the uv-glue is infitrating the fine lens-thread prior to the hardening process and this residual glue cannot be removed with the main visible part and it´s the one the torque is need for to "break it". After that, the lens can be rotated with two fingers without problems but it sits thight enough in it´s thread that there´s no additional securing needed after hitting the desired focus spot.

Good luck. Report back. Stay away from hospitals ...
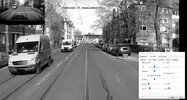
I was trying with various tools but I couldn’t get it to budge…it only seemed to damage the plastic. I guess I’ll keep trying.
 
(i think a bit of the uv-glue is infitrating the fine lens-thread prior to the hardening process and this residual glue cannot be removed with the main visible part and it´s the one the torque is need for to "break it".)
The solution for this problem is to apply some heat with a hair dryer to soften the UV cement. As a UV hardened polymer it will not melt but it can indeed be softened. Of course, always be careful not to overheat the lens/sensor module.
 
Back
Top