Mobius mounting solutions

Would it make sense to make a little wedge about the size of the mobius, and attach it between your headliner and the mobius? You could adjust the vertical angle required for the wedge prior to mounting to determine the correct slope of the wedge.

I've already considered this option. The problem is that the headlining is contoured, and not parallel with the horizon. The camber of the road is also a factor.

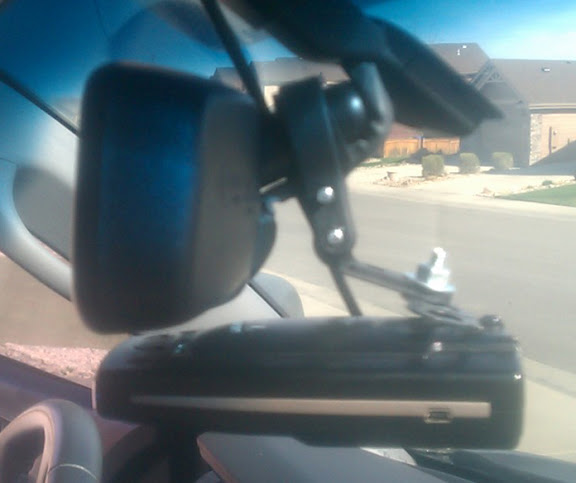
Many would say it doesn't matter if the video is a few degrees off from the horizontal axis? Unfortunately, I do care, and a mount with a ball joint makes it so easy to aim the camera to my preference.

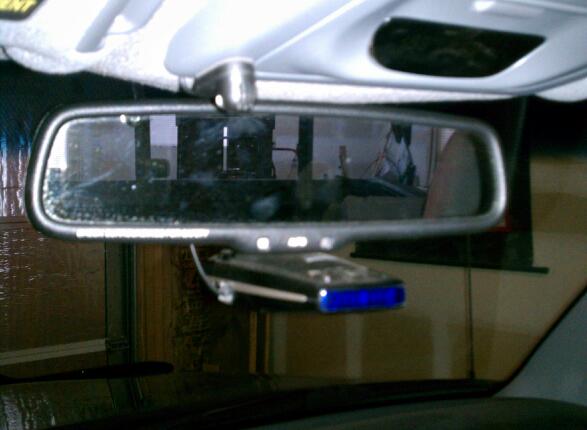
On the downside, the Mobius is no longer as well hidden as it was before.

I suppose that a suitably profiled asymetric wedge could provide the desired aim in both the vertical and the horizontal. With my limited fabrication skills, it may be a while before I make one that gets the angles right.

Sent from my iPad using Tapatalk HD
 
On second thought, your swivel mount looks better anyway!!
 
After successfully using about 3 month DIY magnetic mount on my Panorama2 ( watch here ) , I decided to build similar solution to my Mobius as well for quick mount-dismount.
I was using fridge door seal magnetis stripes, double-sided tape, peace of metal sheet, black matt plasti dip and some simple household tools, thats it.

Below are step by step how I did.
Also including 2 videos. First is about magnetic mount. Second is about how to align Mobius in your car if you have car headunit ( or any other display with AUX IN )


Mobius Magnetic DIY Bracket (1).jpg


Mobius Magnetic DIY Bracket (2).jpg


Mobius Magnetic DIY Bracket (3).jpg


Mobius Magnetic DIY Bracket (4).jpg


Mobius Magnetic DIY Bracket (5).jpg


Mobius Magnetic DIY Bracket (6).jpg


Mobius Magnetic DIY Bracket (7).jpg


Mobius Magnetic DIY Bracket (8).jpg


Mobius Magnetic DIY Bracket (9).jpg
 
Last edited by a moderator:
My elastic ring method is more simple to do and stronger, but the camera insertion into the mount is not so simple because with one hand I need to extend the elastic ring. In my car I can't lose any space between Mobius and mount because my camera is mounted in the top most position on the windshield.

emjoy,
Mtz

Elastic ring is probably the quickest / easiest solution, but as you metnioned, - not that convenient to mount / dismount. Magnetic bracket I made is more complicated ( time consuming ), but give quick mount - dismount, however I am not 100% happy because it's too bulky. It was my quick "on-the-go" project to see result, let's say "beta"-project :). So I can move from there with new ideas ( which already doing ). Hope to finish new bracket by the next week and share ideas.
 
Elastic ring is probably the quickest / easiest solution, but as you metnioned, - not that convenient to mount / dismount. Magnetic bracket I made is more complicated ( time consuming ), but give quick mount - dismount, however I am not 100% happy because it's too bulky. It was my quick "on-the-go" project to see result, let's say "beta"-project :). So I can move from there with new ideas ( which already doing ). Hope to finish new bracket by the next week and share ideas.
I like how the magnetic base (attached to your screen) provides a bit of shading. Did you make that part yourself too?
 
I like how the magnetic base (attached to your screen) provides a bit of shading. Did you make that part yourself too?

Part that attached with double sided tape to windshield is from other diy project of panorama2 i added a link to it and mentioned in video. At time of tests it was temporary solution, but principle is the same. If you watch video you get a clue what I mean.
 
After successfully using about 3 month DIY magnetic mount on my Panorama2 ( watch here ) , I decided to build similar solution to my Mobius as well for quick mount-dismount.
I was using fridge door seal magnetis stripes, double-sided tape, peace of metal sheet, black matt plasti dip and some simple household tools, thats it.

Below are step by step how I did.
Also including 2 videos. First is about magnetic mount. Second is about how to align Mobius in your car if you have car headunit ( or any other display with AUX IN )
...

Even though in beta, really nice job explaining everything! Couple questions.

1. Do you have a video on your hard wire solution mention in video 1 @ 55 seconds in? Or if you saw a video, share that?

2. Once everything is permanent, where are you putting your wire from mobius micro USB plug to whatever power source you are using? I have seen people tuck it in under the roof lining. You seem like a thorough person, so maybe you had some insight on that.

3. The aux in you did with the 2nd video, that is just temporary so you can adjust the camera view, correct? Or is it permanent?

3. Once the camera is mounted, could you turn the camera 90-100 degrees while still mounted? For example if someone walked up to your driver's side (or passenger's side window), you could record that portion? So let's say I am driving with the mobius mounted where you had it (or on the driver's side for an easier reach). I get pulled over. I kill the engine but leave the battery on so the camera is still on. Before anyone could walk up to the window, I turn the camera to point at the driver's side window (the camera is now perpendicular to the mount but still attached to the mount). I have tints so I don't think anyone could see through the back, but even if so, it could look like I was adjusting my rear view mirror.

Thanks for any insight sir (or if anyone else has any insight to these questions!)
 
Last edited by a moderator:
Even though in beta, really nice job explaining everything! Couple questions.

1. Do you have a video on your hard wire solution mention in video 1 @ 55 seconds in? Or if you saw a video, share that?

2. Once everything is permanent, where are you putting your wire from mobius micro USB plug to whatever power source you are using? I have seen people tuck it in under the roof lining. You seem like a thorough person, so maybe you had some insight on that.

3. The aux in you did with the 2nd video, that is just temporary so you can adjust the camera view, correct? Or is it permanent?

3. Once the camera is mounted, could you turn the camera 90-100 degrees while still mounted? For example if someone walked up to your driver's side (or passenger's side window), you could record that portion? So let's say I am driving with the mobius mounted where you had it (or on the driver's side for an easier reach). I get pulled over. I kill the engine but leave the battery on so the camera is still on. Before anyone could walk up to the window, I turn the camera to point at the driver's side window (the camera is now perpendicular to the mount but still attached to the mount). I have tints so I don't think anyone could see through the back, but even if so, it could look like I was adjusting my rear view mirror.

Thanks for any insight sir (or if anyone else has any insight to these questions!)


1.
Have not had time to do this video, but you can have a clue from few other threads:

Wire DashCam - Interior Lights Live Feed = Longer Recordings
Hardwiring my dashcams project - some guidance


2.
Yes, I do hide power cord under ceiling liner, coming out from the centre, above mirror, leaving about 12-15cm lenght ( lenght needed to mobius +4-5cm extra just to have room to "manoeuvre" with mobius when mount-dismount it.

3.
With older firmwares it was not possible to connect AV cable permanently to headunit AUX in for live view and at the same time providing power to the mobius. Isoprop replayed that it can be done with new v0.57 firmware, but still need to do some DIY to the AV cable pins ( in some other thread )

3 ( 4 ), yes, my bracket solution allows to turn mobius to the side, but only to opposite side from the driver, because as you can see: I sit on right side and mobius mounted on the left side of mirror bracket, so I can not turn to drivers side, only to the passenger. I am also working on similar ideas of wuick mount-dismount + option of turning mobius to both sides ( passenger or drivers side ) in case need to record conversation with police etc.
 
Last edited by a moderator:
My Mobius arrived this week and I wasn't satisfied with the original "mini" tape mount, as it doesn't fit very well in my car. I want my dashcam stealth, both from outside and inside, so I had to do some manual work, something similar to one of Mtz's mounts.
I bought one of this (~0.25euro):
01 socket.jpg 02 socket.jpg
and I used the screw and nut form the tape mount:
03 holder split.jpg
The screw is firmly attached to the Mobius base:
04 mobius with screw attached.jpg
So I insert the Mobius under the holder and secure it in position using the nut like this:
05 mobius and holder.jpg
An this is how it looks in the car:
06 in car.jpg 07 drivers view.jpg 08 passengers view.jpg
I have only one relevant picture from the outside:
09 exterior front view.jpg

I'm not very happy with the position as the Mobius is more visible than the 808 #16 which was in the same postion but a little bit higher. However it' not very obvious if you don't look very attentively, so for the moment I'll stick with it.
The camera is powered from the "permanent" + of the interior lamp, which actually is cut off after 20-40 minutes since locking the car. This way I have about half an hour of front parking cam.
 
The camera is powered from the "permanent" + of the interior lamp, which actually is cut off after 20-40 minutes since locking the car. This way I have about half an hour of front parking cam.

That's a handy benefit of using the interior light power.
 
Any of you tried to find a solution to mount the camera with only one move, meaning to have the power somehow integrated in the mounting solution? Like the Mini0801?
I ordered a Mobius and when I will have it in my hands I will start thinking how to do it -> most likely the mount will be a male connector of something and the female connector will be sticked to the camera... let's see when it arrives :)

Yes, this was my nearly 3 month ago idea to do. Now its 90% finished. Will take another 1-2 weeks to complete then will share.
 
3 months and 2 weeks -> big project going on ;)

Waiting to see the results. Can you please describe the connection? I will go this Saturday to some electronics shop and I do not know exactly what to buy... so would be nice to know what is your idea. Initially I was thinking to get the power wires directly from the main board, from the mini-usb pins, but then I said that maybe I want to leave the camera as it is.

Later Edit: ...and how many pins do we need for powering the camera? As far as I can see there should be PIN1 and PIN5 of the mini-usb...
 
Last edited:
3 months and 2 weeks -> big project going on ;)

Waiting to see the results. Can you please describe the connection? I will go this Saturday to some electronics shop and I do not know exactly what to buy... so would be nice to know what is your idea. Initially I was thinking to get the power wires directly from the main board, from the mini-usb pins, but then I said that maybe I want to leave the camera as it is.

Not constantly 3 month. I was talking about idea. I do it on free time from my other doings.
Will post step by step pictures like i did earlier then you see solution. In words it hard to explain.
 
My simple modification to the standard Mobius cradle so I can mount the camera very close to the glass to remove reflections and slide it out of the rear of the cradle. 2 minutes with a round file and a scalpel to re-profile the front locating lugs to ease the camera removal. The suction cup mount will be scrapped as it doesn't allow the camera to be positioned close to the glass at the right angle.

Photo-18-11-2013-17-00-29.jpg Photo-18-11-2013-17-04-09.jpg
 
What if you want to change camera settings? Do you go with your laptop in the car? Or you are using android?
 
Does any of you guys leave your mobius mounted all the time?

When I first bought mine, my idea was to leave the camera mounted permanently, but unfortunately my cars windshield is so transparent (not the only reason), so anywhere I leave it, it's too visible from the outside.
 
Does any of you guys leave your mobius mounted all the time?

When I first bought mine, my idea was to leave the camera mounted permanently, but unfortunately my cars windshield is so transparent, so anywhere I leave it, it's too visible from the outside.
I would not leave any electronics in the window (camera, radar, etc). First off it is a signal for any potential thief just to smash a window, grab it and run off. Additionally, I wouldn't leave any electronic up all the time with the extreme temps that happen inside a car during summer and winter months. Of course that is just me and the area I live in; these points may not apply to you :)

Found this on another forum and thought I would share. Credit goes to Ostrichsak. Although for a radar detector, I find it could be used for the mobius. He uses a bicycle reflector as a mount. Very clever.

I made a bracket for my radar detector to mount to the rear view mirror rather than the stupid windshield brackets w/suction cups. This same device can be used for a wide variety of things such as GPS devices or engine monitor readouts. The cost is anywhere from free to $2.50 depending on if you ride bicycles or not. It's a simple seat post reflector with the reflector removed. There are a couple sizes so pick based on the thickness of your mirror stem then use padded tape to make up the difference. Pretty simple actually. Just gives you a base to mount whatever you need to it and angles perfectly towards the driver which could be a negative for a radar detector since you want them straight but so far I haven't noticed a decrease in sensitivity to distance radar sources in several cars for about a year or so now that I've had these in all of them.

It seems to work best if you remove the plastic wire loom keeper that's on the bottom of the stem, right where the
bracket is. I tried going around the entire thing but it ended up being harder than just popping it off and throwing it in the glovebox since this bracket does plenty good holding that wire loom you see in place. When you go to attach one of these you will see what I'm talking about.
2012-04-05%252015.59.39.jpg

Enjoy!

Here's a picture of the bracket from near the driver's view. This was after I did the mirror relocate bracket so it's higher than stock location but gives you an idea. I also bent the bracket slightly so that the radar detector points front to back better (like it would if it were suction cupped to the windshield) rather than being pointed right at the driver for better detection:
IMG_20120525_104011-1.jpg
 
Yes I leave my Mobius in the car all the time as a rear cam. Been doing so since the end of July without any issues.
I have the windows tinted so it's harder to see it and try to park in the shade when possible in summer. We'll see how it holds up this winter which is fast approaching.
Of course if you live in a very hot climate leaving it in the sun is not a good idea.
 
Back
Top