How the best wire the dashcam on car

RockThinking

Well-Known Member
Manufacturer
Joined
Apr 29, 2013
Messages
888
Reaction score
399
Country
China
Dash Cam
INNOVV C1, C2, C3
We have customers asked to wire the C2 on the car, so do not need the charge.

I'd like to learn what is the best way to do so.
Is there good experience and photos to share?

That would be good that people can follow up the instruction and experience to wire by themselves.

One customers told me that he paid the money for the professional for wire.
But I think the guys made mistake, camera does not work, I guess that wire mixed.
 

i watched this video. i bought a $3 light up voltage meter just like the one in this video after guessing which fuses were permanent or ignition power did not work. i had a lot of time wasted until i bought that little light up voltage reader.

i previously looked at other cameras with hard wiring kits and originally i did not think i would like the power magic pro since it still requires the cig adaptor but now i actually like it. the fact that i could pull out my blackvue cable and plug in a usb adaptor i could have other usb devices charging or powered on while my car is off.

i assume the innov powers via usb?

i have never installed anything like this in my car before and that video helped me. my prior experience with cars has only been replacing fuses, head lights, brake pads (and that was with someone guiding me), and thats about it. oh once i also replaced a window motor so maybe im a little more skilled then the average person but i sure as hell am not a car mechanic or expert.
 
Last edited:
INNOVV powers via USB cable and other DashCam cable.

As you mentioned, it would be a challenge for the average person to do so. and the so call the expert make the wrong connection indeed. :confused:
 
I cringe when I see this guys videos, wrapping wire around the leg of the fuse is about as rough as it gets
haha well thats pretty much what i did. I suppose i should use a fuse tap like others. but hey it works.

Rock, does INNOVV have any plans to have it's own device such as the power magic pro?
 
haha well thats pretty much what i did. I suppose i should use a fuse tap like others. but hey it works.

Rock, does INNOVV have any plans to have it's own device such as the power magic pro?

We do not have such plan as wiring such device always requires the professional knowledge, we do not recommend customers do alone.
 
Hard Wire kits like that are (for cars or bikes) the way forward.
There are versions with a much smaller "box" available too.

Here's a picture of the one that came with my current cam' for Rock.
DSCF0001.JPG
They sent me some spare wiring sets too.
The cameras are these http://www.dogcamsport.co.uk/roadhawk-ride.html

A lot of bikers fit a separate auxiliary fuse box to power accessories. Most have a "key-switched" and permanent supply.

OK - Electrics do not worry me.
 
Last edited:
Hard Wire kits like that are (for cars or bikes) the way forward.
There are versions with a much smaller "box" available too.

Does that terminate with a USB socket? - Nice top quality caliper BTW :)

OK - Electrics do not worry me.
Me too, electrics fine - electronics :eek:
That video of the cowboy wrapping wire round a fuse leg made me cringe - was he supposed to be a professional?

Frank
 
:oops:
Does that terminate with a USB socket? - Nice top quality caliper BTW :)


Me too, electrics fine - electronics :eek:
That video of the cowboy wrapping wire round a fuse leg made me cringe - was he supposed to be a professional?

Frank
OLD Calliper - probably 1981-ish. Still prefer it to a digital - even if it means reading glasses.:oops:

The wiring kit is a set of 4 bits. A mini-USB for camera - extension lead and then two connectivity options USB or 12V (with inline fuse). The joints are waterproof. http://www.dogcamsport.co.uk/wiring-kit-for-roadhawk-ride.html

Obviously designed for their camera. Was more than enough without the extension lead and the bike is HUGE - Triumph Rocket III

cable_set.jpg
 
I'm the one who was having a problem. The professional did in fact screw up. It took 5 attempts to find the problem lol, and it was very simple. The negative wire that needed to be grounded didn't have a connection for some reason. But the guy didn't know, because even without negative cable properly connected, the light on the camera would still light up, but the camera just wouldn't charge... So we used a different bolt in the car instead and it worked right away. It's actually not hard to do it yourself. The easiest way is to add a positive cable from the battery and feed it through the firewall. After that you simply open up the charger supplied with the camera, attach the positive cable to the middle of the charger and negative to the side of the charger and you're done! Now simply plug your USB charging wire for the camera to the charger and you're done!
Another way is to open up the wires above your footrest and find one which has constant power even when the car is off. That way you don't need an extra wire from the battery.
 
Most auto-mobile fuseboxes have "test" connectors. An Earth - a switched feed and a live feed. Mine even has one that switches OFF with the ignition ON.
 
My 4 wheel transport is a Peugeot Boxer campervan so photos of my fusebox & wiring would not be of much help to car owners. Other owners of Boxer vans perhaps?

Frank
 
My 4 wheel transport is a Peugeot Boxer campervan so photos of my fusebox & wiring would not be of much help to car owners. Other owners of Boxer vans perhaps? Frank
And we have a Citroen and an OLD Land Rover. The fuse boxes are all different.

But I'll try to do something to give folk an idea using one of the bikes and LandRover. Probably Sunday though - OK?. These are the vehicles where I hope ONE DAY to mount C3's.
 
And we have a Citroen and an OLD Land Rover. The fuse boxes are all different.

But I'll try to do something to give folk an idea using one of the bikes and LandRover. Probably Sunday though - OK?. These are the vehicles where I hope ONE DAY to mount C3's.

That kind of information would be very helpful, the photos will lead more discussion, it will be resource for people to learn.
 
@barbagris and @Boxerman , @thebotan

Would you please take photos and make a clear instruction on how to connect?

That would be helpful.
My daily 4 wheeled transport is a campervan based on a Peugeot Boxer, so this may not be of much use to car drivers.

When I fitted my first dashcam (Mobius) it was mounted on the top of and in the centre of the dashboard. I also have a Garmin satnav mounted on the dash top in front of the driving position.
p7020611.jpg


I didn't want any more wires on show than necessary and as I had recently done some work on the heater/demister I ran the wire for the Mobius from the under dash area through the demister vents.

It wasn't possible to do this for the Garmin as the supply cable incorporates a wireless traffic alert unit and is very thick. The wire for this device is led to one side and down the side of the fascia to the under dash area.
As I wanted to use the 12v to USB power adaptors (cigarette lighter plugs) which came with the cam & satnav, I purchased a double cigarette lighter socket extension similar to this (the wires on mine were longer):
socket10.jpg

I removed the plug and after measuring the required lengths, fitted a ring terminal to the '-' wires and a lucar connector to the '+' ones (two wires to each terminal).
The fusebox on my van is in the glove compartment and after removing two screws, can be lifted up to access the terminals at the back.
fbox10.jpg

I chose to use the heated rear window fuse as it comes live with the ign. and my van doesn't have heated windows. The ring terminals were connected to earth using a handy screw into the metal bodywork.

I now had two ign controlled 12v 'cigarette lighter' sockets out of sight behind the dash, the satnav plugged into one and the dashcam into the other. If I change either of my devices at a later date, it's a simple matter to swap the power supplies to the ones which come with the new ones.
I recently replaced the Mobius with a Mini 0803, which is mounted at the top of the windscreen, the supply wire for this is clipped to the top of the screen using stickyback cable clips and then run down the side of the passenger 'A' pillar behind the trim to the under dash area where it plugs into the socket that the Mobius once used.

Frank
 
Last edited:
I have not forgotten my promise - But it's turned out to be a bad week. My "free" time has been diverted to fixing my wife's car.
 
I have not forgotten my promise - But it's turned out to be a bad week. My "free" time has been diverted to fixing my wife's car.

Do not worry, before you can have more time with us on the forum, you need to the better take care of your wife and her car. ;)
 
you need to the better take care of your wife and her car. ;)
Ah so you've met my wife then. :eek:
Anyway here are my thoughts.

For example - This is the fusebox on a 1979 Moto-Guzzi.
It's a simple choice of fuse as ALL fuses are switched.
If not then buy a CHEAP multimeter (eBay has loads in the USD20 range) and check fuse by fuse until you find a fuse that is only live with the ignition on.
imo you should not even go near electrics without one.
DSCF0001.JPG
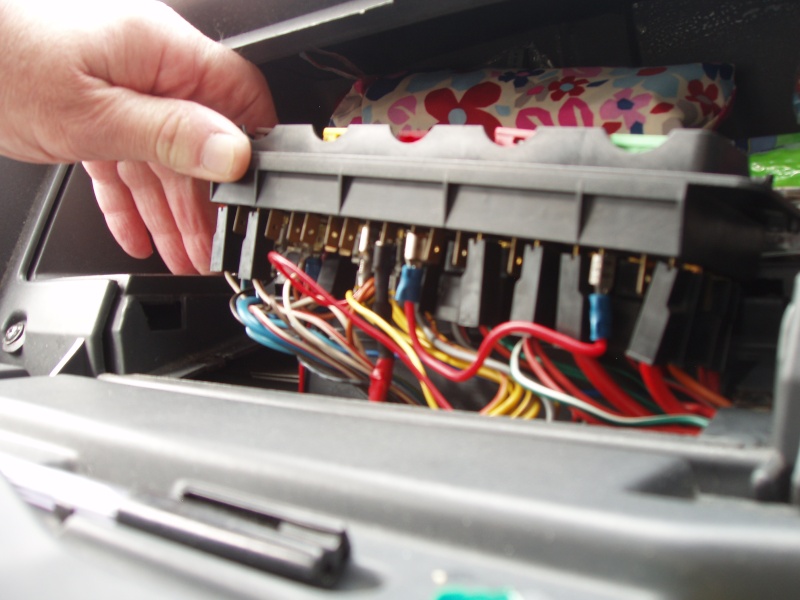
It's not THAT EASY to see but basically there are some FASTON tyre blades that will take a standard 1/4" faston female terminal.
If there are none free (and in this case there are none) then there are solutions - don't panic.
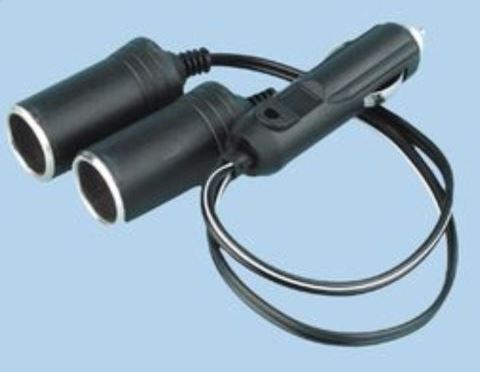
There are piggy back faston adapters and terminals.
DSCF0003.JPG
Which type you choose may depend on availability and space.

You can always simply tap into the wire too.
Personally I don't like this idea but sometimes needs must.
I particularly HATE this type of tap - I've 100's that came with all sorts of accessories. All go into the "I hope I'll never need this" parts bin.
DSCF0005.JPG

Better imo are the taps from posi-lock http://www.posi-lock.com/posiplug.html

Also imo if you're planning on mounting a number of accessories it's FAR BETTER to add a specific accessories fuse box.
I make up my own accessories boxes but the PC8 from EasternBeaver are highly rated and come complete with all fittings (including the posi-tap)
http://www.easternbeaver.com/Main/Wiring_Kits/Fuseboxes/PC-8/pc-8.html

I have used a fair few hardwire 12V->USB adapers - here's one with a mini-USB (and 90º adapter) that was rewired with ring terminals to fit my fuseboxes.
DSCF0004.JPG

But we'd have to wait for RockThinking to prepare one due to the non standard plug - My eyes are not up to soldering micro-USB connectors.

If this all seems beyond you. Find an auto electrician or a friend who REALLY knows - invite him/her to lunch or for a beer.

PS - Land-Rover photos later this week.
 
Last edited:
Back
Top