LOW LIGHT COMPARISON
I would like to remind everyone these silly experiments I do in my garage are NOT the final judge of image quality.
I perform these tests for three reasons.
1.) To satisfy my selfish curiosity how different dash cams compare to each other with controlled lighting conditions.
Since 2019 I’ve uploaded the test footage of every dash cam I’ve ever tested to my second YouTube Channel, and organized them into Playlists so I can easily compare new models with old, and image quality firmware updates.
2.) Before I install a new dash cam in my car to gather “driving” test footage I perform basic tests like checking focus, low light sensitivity, HDR performance, audio test, etc.
3.) It’s much quicker, easier, and cheaper than driving around burning gas in my car that gets 9 MPG on city streets.
I earn zero dollars testing dash cams.
My YouTube Channel is not monetized.
I am not an Amazon Associate.
I am not an Affiliate for any retailer, or manufacturer.
I actually lose money on this hobby, especially buying test equipment.
After a dash cam passes my preliminary “garage” testing, only then will I install it in my car.
If a dash cam can’t make it past my garage gauntlet because image quality is just plain bad, or other critical hardware / software flaws I will not waste my gas, and I send it back to the manufacturer.
DNFers (did not finish) include;
BlackVue DR970X 2-CH
BlackVue DR900X Plus 2-CH
Thinkware U3000 1-CH
FineVu GX 1000 2-CH
Vantrue E1 1-CH
Vantrue S1 Pro 2-CH (pending)
On with the games.
For this low light sensitivity test I place the camera test rig on top of my car 5ft high in the center of my 20ft x 20ft two car garage.
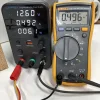
I have six 4ft LED shop lights mounted on the 8ft ceiling, (5000 lumen / 5000K color temp).
I have a Streamlight Stinger LED flashlight hanging from the ceiling with a diffuser 5ft behind the test rig in an attempt to evenly distribute the beam pattern.
The flashlight has 3 power modes HIGH/MED/LOW.
I use the LOW setting rated at 100 lumen for this test.
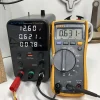
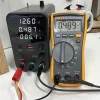
The test starts with both light sources illuminated.
Then I turn off all 6 shop lights leaving the flashlight as the only source of light.
This simulates extremely poor lighting conditions, and acts as a “stress test” to see how the cameras react.
Cameras on the rig;
A229 Pro 3-CH ..(IMX678) + (IMX675) + (IMX307)
A229 Plus 3-CH (IMX675) + (IMX675) + (IMX307)
A139 Pro 1-CH ..(IMX678)
A119 Mini 2 ……(IMX675)
Camera Settings;
Bitrate: …..Maximum
HDR: ……..On
IR LEDs: …Off
CPL Filter: Off
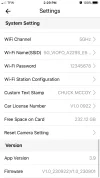
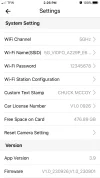
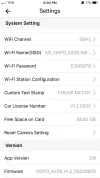
Camera Firmware;
A229 Pro Front: ..V1.0 0925
A229 Pro Rear: …V1.0 0901
A229 Plus Front: .V1.0 0922
A229 Plus Rear: ..V1.0 0901
A139 Pro: ………..V1.1 0629
A119 Mini 2: ……..V1.0 0912
After watching the recorded footage, and comparing screenshots side by side I’ve noticed five things.
1.) The A229 Pro Front camera has been greatly improved over the A139 Pro Front camera.
2.) The A229 Plus Front camera appears to have better light sensitivity, and a brighter exposure than the A229 Pro Front Camera.
However, you will see in the next post, this brighter exposure is detrimental to HDR performance, and objects illuminated under direct lighting will become overexposed, and illegible.
3.) The A229 Pro Front camera is no match for the A119 Mini 2, in terms of light sensitivity, and clarity.
Will the A119 Mini 2 maintain its supremacy over the A229 Pro Front camera in the next HDR test?
4.) The Rear & Interior cameras of the A229 Pro & A229 Plus have identical image quality.
However, you may notice the one of the Rear cameras has a slightly soft focus.
Can you spot it?
5.) The “lowly” STARVIS 1 (IMX307) image sensor of the A229 Pro & A229 Plus pales in comparison with the newer STARVIS 2’s.
But, stay tuned for the next HDR Test, and I will show you something interesting.
Here is the test footage I took the screenshots from.
If you notice the downward rolling bars in the video, that is my LED shop lights not playing well with my city’s electrical grid.
During peak usage hours I get “60Hz hum bars”.
Tune in next time, same Bat-Time same Bat-Channel.