Gibson99
Well-Known Member
- Joined
- Jun 20, 2014
- Messages
- 9,293
- Reaction score
- 8,079
- Location
- Houston, we've had a problem, Texas
- Country
- United States
- Dash Cam
- Yes
I purchased a Blacksys CF-100 with 2 cameras and GPS and a battery discharge prevention kit to install into my wife's 2008 Toyota Sienna minivan. The camera/gps was purchased through amazon for $139 with free shipping, and the battery kit was via newegg for $35, also free ship. both arrived within 2 days via USPS. This dual camera setup is replacing the single-channel A118. Here's a comparison pic.
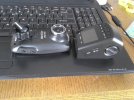
They're both about the same width and height (A118 may be 1 cm shorter), but the A118 is noticeably thicker. However, because it mounts directly to the glass, I find that the A118 was much easier to install. Also, having all the wires come out the top of the A118 instead of the sides of the CF-100 meant that everything was much more tidy. To keep the wiring on the CF-100 neat, I had to sort of twist the rear camera wiring around and over to the right, where the power and GPS cables came out, so I could bundle the three wires together and feed them up into the headliner. Right now I have the three wires sort of loosely gathered together, coming straight up from the mirror's arm up into the headliner. I may try to find some small flat conduit to cover them and keep them together, to clean up the look a bit, but for now, it's fine.
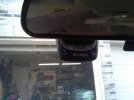
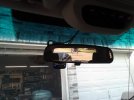
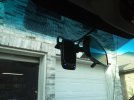
Aiming the camera: my solution for the lack of screen was to turn on the camera, wait for it to start recording, then hold it up in a few potential mounting locations, then say out loud where it was, and how it was aimed, so that would be recorded in the video. Then I'd turn it off and pop the SD card into my laptop (sitting in the passenger seat) to see what worked. I had to try that about 3 times before I found the right spot. I wanted to mount it with the sticky pad up in the painted black dots on the windshield, but because of the steep angle of this windshield, that actually put the lens of the camera hanging BEHIND the rearview mirror, so that the lens was actually looking into the mirror glass! In the end I found a place that makes the camera hang in front of the mirror, and mounted it so that the blue LEDs and emergency button are just visible below the bottom of the mirror from the driver's position. Photo of completed install is in the next post.
I wanted to run the cable for the rear camera down along the carpet, tucked under the door sill trim so that it wouldn't be anywhere near the 3-row side curtain airbags, but the included USB cable was about 8 feet too short for that, and I didn't want to have to buy an extension cable. In the end I had to take apart a lot more trim to get it into the headliner, away from the curtain airbags. Even running thru the headliner, the cable was just BARELY long enough - i have about 3 inches of slack on each end. Yikes! Thankfully, I was able to run the cable through the OEM cable protection "hose" in the hinge in the back hatch, so that it's still water-tight, and I didn't have to drill any holes. I did this by taping the USB cable to a flat blade screwdriver, disconnecting both ends of the boot/hose from the body and door, then shoving the wire through. The camera is attached to the plastic trim around the back glass, so it goes up and down along with the hatch itself. this keeps it out of the way for loading/unloading cargo, and gives the best view out the back. I tried mounting it to the plastic trim at the back end of the headliner so I didn't have to deal with running it thru that hose, but the door comes down too far, and it blocked the top half of the video - rendering the rear camera almost completely useless.
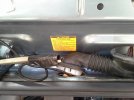
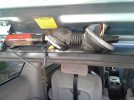
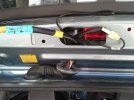
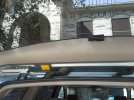
The adhesive that came on the rear cam is clear 3m but it didn't work for me. It would have been fine if i was attaching it to glass, or if there hadn't been a lip on the plastic mounting bracket. I ended up sanding down the lip on the mounting bracket so i could press the foam tape I used down into the textured plastic trim above the back window. I probably could have also done something with magnets like I've seen others do, but i don't need to remove the rear camera, and opening and closing the back hatch may have messed with the aim of the camera, so I just used foam tape. Here's the rear cam's lip before and after sanding:
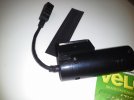
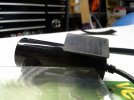
The front cam came with a piece of gray 3m adhesive which worked fine but it's highly visible from the outside since I had to mount it below the dotted area of the windshield. Funny part is that the hardwire kit came with a piece of clear 3m adhesive that was just slightly smaller than the gray tape for the front cam. I used the clear tape on the front camera and secured the hardwire kit with zipties like I usually secure wiring inside the dash. Tape never seems to work very long inside the dash for me, even on brand new cars. Zip-ties on the other hand, basically NEVER fall, so I don't have to worry about wiring suddenly falling down into the pedals. And besides - I was already using zip-ties to secure the excess wiring anyway, so what's one more to secure the box itself?
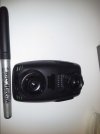
I used a permanent marker to black out the chrome trim on the front lens, as well as the logos and parking mode led. I used the BIC brand one in the picture, because it seems to go on thicker than a Sharpie. Shiny things are just a big invitation to thieves. I disabled the parking mode LED in settings, but it's still white even when it's off. I also used the marker to cover up the rear blue LEDs since they're too bright, especially at night. You can still tell whether they're on, but now they aren't another advertisement to thieves at night (or even during the day). Stock, the blue lights were OK during the day - nowhere near as distracting as the ones in my F70 (partially because the LEDs on the CF-100 don't flash), but at night they're pretty annoying, so I used the marker to blacken them as well. Now they're barely visible during the day, and are tolerable at night. Even if I wasn't concerned about theft, I would have blacked out the blue LEDs on the back. The flash from the camera actually makes the marker stand out. In natural light, it's all just black. The chrome ring is still shiny since it's not textured like the camera body, but it's basically invisible from outside the car unless you know right where to look.
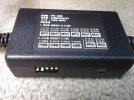
The hardwire/battery protector kit is also obviously made in Korea since there's only Korean writing on it - no English. It came in a plain white box with no manufacturer info, and the small sticker with part number said OjoCam. It had a single piece of paper with well-written English instructions on it, but even without that, the markings on the box were enough for me to guess and set things how I wanted them: cutoff at 12.4v, and don't use a timeout of 24, 36 or 48 hours - just keep running till you hit 12.4v. Well, I got a chance to test it during the install. My test light said the 12v constant wire I'd tapped into was hot, but the green status LED on the hardwire kit would shut off when i turned off the key. I got out my handy dandy fluke meter and found that the battery was actually giving 12.47 volts. I set it to 12.2 instead of 12.4 and hey, now it stays on when i turn off the key.
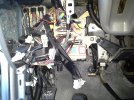
Bonus material: I've been inside plenty of dashboards over my years installing accessories in different vehicles, ranging from stereos, DVDs, alarms, autodimming mirrors, side signal mirrors, etc etc... and I've never seen a rat's nest of wires like what there is on the driver's side of the 2004-2010 Toyota Sienna. This isn't even the engine/trans computer - that's behind the glovebox, and it actually has LESS wiring than this. This mess all has to do with interior/exterior lighting, climate control (3-zone heat/aircon), power sliding doors, power rear hatch, seats, mirrors, windows, etc - basically all the stuff you don't NEED to be able to drive the vehicle. one of the fuseboxes is located on the bottom of this mess and is accessible through the footwell.

They're both about the same width and height (A118 may be 1 cm shorter), but the A118 is noticeably thicker. However, because it mounts directly to the glass, I find that the A118 was much easier to install. Also, having all the wires come out the top of the A118 instead of the sides of the CF-100 meant that everything was much more tidy. To keep the wiring on the CF-100 neat, I had to sort of twist the rear camera wiring around and over to the right, where the power and GPS cables came out, so I could bundle the three wires together and feed them up into the headliner. Right now I have the three wires sort of loosely gathered together, coming straight up from the mirror's arm up into the headliner. I may try to find some small flat conduit to cover them and keep them together, to clean up the look a bit, but for now, it's fine.
Aiming the camera: my solution for the lack of screen was to turn on the camera, wait for it to start recording, then hold it up in a few potential mounting locations, then say out loud where it was, and how it was aimed, so that would be recorded in the video. Then I'd turn it off and pop the SD card into my laptop (sitting in the passenger seat) to see what worked. I had to try that about 3 times before I found the right spot. I wanted to mount it with the sticky pad up in the painted black dots on the windshield, but because of the steep angle of this windshield, that actually put the lens of the camera hanging BEHIND the rearview mirror, so that the lens was actually looking into the mirror glass! In the end I found a place that makes the camera hang in front of the mirror, and mounted it so that the blue LEDs and emergency button are just visible below the bottom of the mirror from the driver's position. Photo of completed install is in the next post.
I wanted to run the cable for the rear camera down along the carpet, tucked under the door sill trim so that it wouldn't be anywhere near the 3-row side curtain airbags, but the included USB cable was about 8 feet too short for that, and I didn't want to have to buy an extension cable. In the end I had to take apart a lot more trim to get it into the headliner, away from the curtain airbags. Even running thru the headliner, the cable was just BARELY long enough - i have about 3 inches of slack on each end. Yikes! Thankfully, I was able to run the cable through the OEM cable protection "hose" in the hinge in the back hatch, so that it's still water-tight, and I didn't have to drill any holes. I did this by taping the USB cable to a flat blade screwdriver, disconnecting both ends of the boot/hose from the body and door, then shoving the wire through. The camera is attached to the plastic trim around the back glass, so it goes up and down along with the hatch itself. this keeps it out of the way for loading/unloading cargo, and gives the best view out the back. I tried mounting it to the plastic trim at the back end of the headliner so I didn't have to deal with running it thru that hose, but the door comes down too far, and it blocked the top half of the video - rendering the rear camera almost completely useless.


The adhesive that came on the rear cam is clear 3m but it didn't work for me. It would have been fine if i was attaching it to glass, or if there hadn't been a lip on the plastic mounting bracket. I ended up sanding down the lip on the mounting bracket so i could press the foam tape I used down into the textured plastic trim above the back window. I probably could have also done something with magnets like I've seen others do, but i don't need to remove the rear camera, and opening and closing the back hatch may have messed with the aim of the camera, so I just used foam tape. Here's the rear cam's lip before and after sanding:


The front cam came with a piece of gray 3m adhesive which worked fine but it's highly visible from the outside since I had to mount it below the dotted area of the windshield. Funny part is that the hardwire kit came with a piece of clear 3m adhesive that was just slightly smaller than the gray tape for the front cam. I used the clear tape on the front camera and secured the hardwire kit with zipties like I usually secure wiring inside the dash. Tape never seems to work very long inside the dash for me, even on brand new cars. Zip-ties on the other hand, basically NEVER fall, so I don't have to worry about wiring suddenly falling down into the pedals. And besides - I was already using zip-ties to secure the excess wiring anyway, so what's one more to secure the box itself?
I used a permanent marker to black out the chrome trim on the front lens, as well as the logos and parking mode led. I used the BIC brand one in the picture, because it seems to go on thicker than a Sharpie. Shiny things are just a big invitation to thieves. I disabled the parking mode LED in settings, but it's still white even when it's off. I also used the marker to cover up the rear blue LEDs since they're too bright, especially at night. You can still tell whether they're on, but now they aren't another advertisement to thieves at night (or even during the day). Stock, the blue lights were OK during the day - nowhere near as distracting as the ones in my F70 (partially because the LEDs on the CF-100 don't flash), but at night they're pretty annoying, so I used the marker to blacken them as well. Now they're barely visible during the day, and are tolerable at night. Even if I wasn't concerned about theft, I would have blacked out the blue LEDs on the back. The flash from the camera actually makes the marker stand out. In natural light, it's all just black. The chrome ring is still shiny since it's not textured like the camera body, but it's basically invisible from outside the car unless you know right where to look.

The hardwire/battery protector kit is also obviously made in Korea since there's only Korean writing on it - no English. It came in a plain white box with no manufacturer info, and the small sticker with part number said OjoCam. It had a single piece of paper with well-written English instructions on it, but even without that, the markings on the box were enough for me to guess and set things how I wanted them: cutoff at 12.4v, and don't use a timeout of 24, 36 or 48 hours - just keep running till you hit 12.4v. Well, I got a chance to test it during the install. My test light said the 12v constant wire I'd tapped into was hot, but the green status LED on the hardwire kit would shut off when i turned off the key. I got out my handy dandy fluke meter and found that the battery was actually giving 12.47 volts. I set it to 12.2 instead of 12.4 and hey, now it stays on when i turn off the key.

Bonus material: I've been inside plenty of dashboards over my years installing accessories in different vehicles, ranging from stereos, DVDs, alarms, autodimming mirrors, side signal mirrors, etc etc... and I've never seen a rat's nest of wires like what there is on the driver's side of the 2004-2010 Toyota Sienna. This isn't even the engine/trans computer - that's behind the glovebox, and it actually has LESS wiring than this. This mess all has to do with interior/exterior lighting, climate control (3-zone heat/aircon), power sliding doors, power rear hatch, seats, mirrors, windows, etc - basically all the stuff you don't NEED to be able to drive the vehicle. one of the fuseboxes is located on the bottom of this mess and is accessible through the footwell.

Last edited:

