RavenManiac's Mini 0806 Programmable Timer Project

will do, once I get some spare time and the Mrs lets me near the car for a period of time without her using it I will get it installed, once I get a box for it next time I go past electronics store.
 
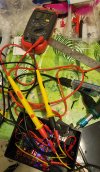
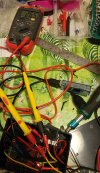
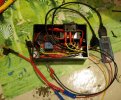
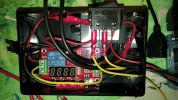
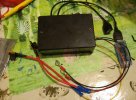
Wired up my own version! Haven't put it in the car yet but used some test leads to hook it up to an AC-DC adapter and it seems to work fine. Thanks to both RavenMaster and Erkme73 for all the detailed information in these threads.

Quite similar to the RavenMaster's design.
  • I've added a switch to turn the whole thing on and off,
  • I'm using a 12V->5V with a dual USB output instead of a lighter socket.
  • I used an opaque box because I don't want my car to be destroyed in a controlled explosion one day.
  • Like the OP I kept the quick disconnects in and kept the ground for the converter separate to the ground for the relay so I can bypass the relay if need be.
I wasn't really planning on putting both the relay and the converter in to the box but I didn't realise how small the relay was when I bought the box, so they both fit. I also forgot to buy anything to attach stuff to the project box, the relay is 'loose' but I managed to find a couple of rubber screws to hold the converter in which basically holds everything in place.

The manual posted by erkme73 is essential: https://dashcamtalk.com/forum/threa...lay-shutdown-circuit.12845/page-2#post-167721

I also measured the power drain from the relay with nothing attached, i.e. when the car is just sitting there and the camera's have turned off.
  • With the lights on: 8-9mA
  • With the lights off (power save mode): 2-3mA
I'd be happy to have the LEDs off permanently but every time it loses the main power (which shouldn't happen unless I use the switch) it starts up again with the LEDs on. I don't think 9mA is a problem anyway.. (is it??) :D
edit: I think I might drill a hole through the lid so I can poke a ****tail stick (toothpick... filter...) in there to turn power save back on if I ever do flick the switch..

.20160417_001726.jpg 20160417_001736.jpg

20160417_002624.jpg 20160417_002735.jpg 20160417_002911.jpg
 
Last edited:
Congratulations! Very nice work. I especially like the addition of the switch.
I really appreciate all the time and effort you all have put into breaking down this process in simplest terms. I was just curious to see if you ever completed your project, and if so, can we see the setup? Also, if you have been using this setup consistently, do you have any additional advice you may find pertinent that you didn't foresee before the start of this project? I'm attempting to take on this project tomorrow, and I know nothing about any of this stuff, so we'll see how this turns out. Thankfully, I have this thread to help me out, so I'm hoping I make it out alive. Thanks again for sharing the process.


Edit: Two days later, and everything is working great! Just simply followed the instructions that RavenManiac and erkme73 have provided and set the timer as outlined in the updated manual, which was provided in erkme73's thread, and it's working flawlessly.
 
Last edited:
Back
Top