Dashcamera CPL lens filter Manual adjustment ( How to adjust DIY )

as @Nigel suggested this is probably a better guide as they're more consistent, PC monitors can vary perhaps depending on their intended usage

Yeah, if person doesn't know what angle his PC / laptop monitor is polarized or if it is not polarized at 45 degree, then this "guide" would be difficult to use.
Best for them is to use TV. Hope all TVs these days are vertically polarized ?

I have added this info into my 1st post.
 
Last edited:
Yeah, if person doesn't know what angle his PC / laptop monitor is polarized or if it is not polarized at 45 degree, then this "guide" would be difficult to use.
Best for them is to use TV. Hope all TVs these days are vertically polarized ?

I have added this info into my 1st post.
As far as I know, all TVs are vertically polarised so that you can see them through polarised glasses, including sunglasses. There is no good reason why a TV would be at any other angle.

Even if you know your monitor is 45 degrees polarised, it is still not a good guide since it could be 45 clockwise or 45 anticlockwise - there is no good reason for choosing one over the other so I guess some are one way and some the other!
 
  • Like
Reactions: Mtz
I'm not so sure about the TV test. Getting different results depending on the TV I tried the test with. I assumed I started with a correctly aligned CPL based on my test with a Dell 22" LCD monitor (LED backlit) where a 45 degree angle clockwise blocked out the display.

On a 7 year old Samsung 32" LCD TV (CFL backlit), when the SG9665GC CPL is vertical, the display is blocked out.

On a 4 year old LG 55" 3D LCD TV (LED backlit), there was no angle where the CPL blocked out the display. Turning in different directions, the display sometimes looked more yellowish, but I could still see thru the lens at all angles.

I don't think the type of backlighting matters, but I think on 3D TVs, there's some special coating on the display to make the 3D effects work and I don't know if there's any guideline to follow for these type of displays.
 
As far as I know, all TVs are vertically polarised so that you can see them through polarised glasses, including sunglasses. There is no good reason why a TV would be at any other angle.

Even if you know your monitor is 45 degrees polarised, it is still not a good guide since it could be 45 clockwise or 45 anticlockwise - there is no good reason for choosing one over the other so I guess some are one way and some the other!

I agree with your point and I am glad you brought up differences that may accrue using different PC monitors. For me, for CPL filter manufacturer and maybe for some others this technique may work ( thats why I have added annotation into YT video and edited 1st post ), but for most people it will be risky to relay on. So the best is to relay on TV.

P.S. - you said you also have AOC but its vertically polarized. Do you have same model 2434pw ? I so, I wonder why mine is 45 and yours is not. I bought it from UK.
 
that may well have something to do with the 3D function, I have a bunch of different monitors as well as one 3D model, will have to have a look at each and see what sort of variation there is
 
P.S. - you said you also have AOC but its vertically polarized. Do you have same model 2434pw ? I so, I wonder why mine is 45 and yours is not. I bought it from UK.

even if they were the same model they still may not have the same panel in them, components can change during the life of a product, panel shortages are very common in the industry
 
that may well have something to do with the 3D function, I have a bunch of different monitors as well as one 3D model, will have to have a look at each and see what sort of variation there is
I guess a 3D TV is both horizontal and vertical since the 3D glasses use horizontal for the left eye image and vertical for the right eye image, or is it the other way around!
 
P.S. - you said you also have AOC but its vertically polarized. Do you have same model 2434pw ? I so, I wonder why mine is 45 and yours is not. I bought it from UK.
It's an AOC 2369VM IPS monitor so will be a very different panel to yours.
 
Will the next generation CPL filter for the SG9665GC be less complicated for focusing and mounting, for those of us who are technologically challenged?
 
All this discussion about variables from monitor to monitor, and TV to TV makes it seem like the only sure-fire way to check orientation is via an "in-vehicle reflection reduction" method. Now all that needs to be done is come up with an easily repeatable methodology. :eek:
 
All this discussion about variables from monitor to monitor, and TV to TV makes it seem like the only sure-fire way to check orientation is via an "in-vehicle reflection reduction" method. Now all that needs to be done is come up with an easily repeatable methodology. :eek:
With that, I graciously withdraw from this conversation ;)
 
Will the next generation CPL filter for the SG9665GC be less complicated for focusing and mounting, for those of us who are technologically challenged?

the problem is only that some of them have shifted during transport, going forward once they are set they're going to be glued in place so I guess it will become less complicated
 
All this discussion about variables from monitor to monitor, and TV to TV makes it seem like the only sure-fire way to check orientation is via an "in-vehicle reflection reduction" method. Now all that needs to be done is come up with an easily repeatable methodology. :eek:
Seems a bit strange to reply to my own post but I believe I've come up with an inexpensive, repeatable, and easy method for orientating a CPL 'in-vehicle'.

Print this image on white paper, place it on the dash of the vehicle, view the reflection through the CPL and rotate the CPL until you see the fewest number of squares in the reflection - the CPL is now properly oriented for maximum reflection reduction.

I just tested this in my garage with the overhead lights (it's dark out at the moment) using various CPLs and sunglasses and it worked for all of them.

CPL_Test-1.jpg
 
I remember Nigel telling me how to align/test my CPL filter to my mini 0806 with my LED TV (the TV happens to be a 3D TV if it makes any difference) and have this clip of doing it if its of help to anyone


what helps me is that the mini 0806 has AV OUT so I connected it up to my ICE HU in the car, and can see what the DVR captures on a 7” screen which makes it easier to try to correct the CPL

here is me testing the AV OUT, but at the time the testing was for a different reason


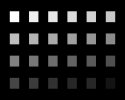
at the same time if its of help to anyone I came across this grey scale JPG file on my laptop, full size is A4

 
Print this image on white paper, place it on the dash of the vehicle, view the reflection through the CPL and rotate the CPL until you see the fewest number of squares in the reflection - the CPL is now properly oriented for maximum reflection reduction.
at the same time if its of help to anyone I came across this grey scale JPG file on my laptop, full size is A4
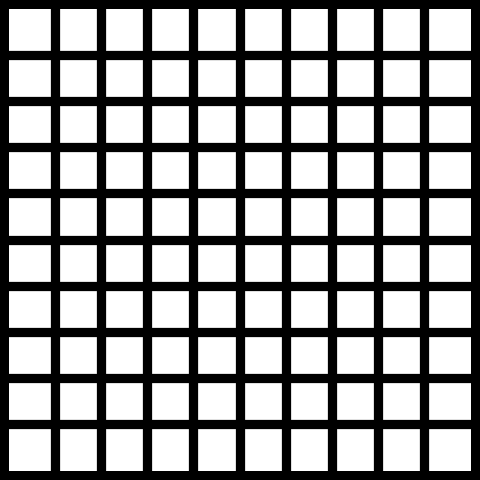
Wouldn't be better to print many white points (squares) on a black grid (to be more visible on the small screen of the dashcam) ? I don't know how the dark square will help the CPL calibration ? Moreover, this calibration also depends on how the light reflects on the dashboard at that particular moment of time.
 
Wouldn't be better to print many white points (squares) on a black grid...
I'm pretty sure that's what the one I provided is, and in a somewhat different format @mollydog as well.

...Moreover, this calibration also depends on how the light reflects on the dashboard at that particular moment of time.
The performance of any polarizing filter is affected by the light during normal use as well - no way to have one that is totally effective in removing all reflections under all conditions. That's just the way it is.
 
I'm pretty sure that's what the one I provided is, and in a somewhat different format @mollydog as well.
It also has completely black squares; I was think at something as:
Hermann%20Grid.png

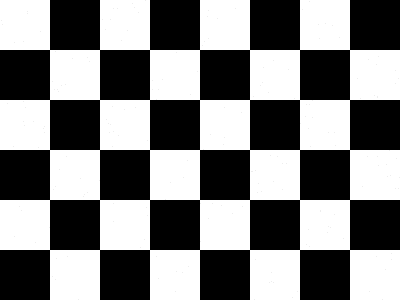
or, why not, this one:
checkerboard.png
 
The one I did is a 'grey scale' of sorts to make it easier to determine the point at which optimum reflection reduction is achieved as the darker squares will disappear leaving only the lighter ones visible. Once the filter orientation is 'over adjusted' they will start reappearing.

The 'black squares' are really just black areas to separate the various lighter ones.
 
Last edited:
I only found this grey scale JPG file, the other day, I made it for another project some time back,and as most people use A4 size paper I up scaled it to A4 and posted it here in the hope some might find it useful

never was made for checking reflections using a CPL filter on a DVR, in fact a bit of white paper the size of a packet of cigarettes should be more than good enough for that, but thought it a shame not to post it if someone could make use of it

since I first started using CPL filter on my then Blackvue DR500, I’ve used white paper no bigger than a packet of cigarettes or the back of my iPhone to let me know if I had the CPL somewhere near to getting rid of most reflections,

true, like most things involving photography, using the CPL filter is a compromise and won’t be effective 100% of the time unless you adjust it as you move directions or as the sun moves round,

once set I’d say maybe 50% or less of the time it’ll eliminating some if not most of the reflections but it’ll 100% of the time absurd one to two stops of light received by the sensor
 
I think my CPL was out . Using niko's chart on my Mac my filter went dark at the 45%. To see if my Mac was vertical or 45% I used my polarised sun glasses and they went dark on the horizontal and light on the 45% so I assume the mac polarisation is vertical, If so then my filter was not correct . I have turned it so that it is now dark on the horizontal. On my TV the filter now goes a light blue colour in the vertical and a light brown colour in the horizontal. Hoping I have got it right . Tried the white paper on the dash trick but found it awkward to turn the lens. One thing I have noticed and I don't know if only I have the problem, is I just need to have the lens point up a slight bit more, at the moment I am showing too much dash for my liking. Even though my screen is well raked and I have used the thin mount, with the filter on I can't go up any higher with the lens as it touches the glass. Crazy as it sounds with the filter up the other way lens pointing out more at the bottom, (opposite to what is recomended ) I can adjust slightly higher. Edit, Just found out the lens pushed in a bit further so will try it again, will still be close to the screen though.
 
Last edited:
Back
Top