For few month ( almost from day one I got SG9665GC ) I wanted to make a CPL lens filter for it, I have tried few stock CPL lens filters ( from Mini 0806, mobile phones CPL lens filters etc ) but I have faced few challenges due to limited space that can be used for this project.
I was not able to use CPL filter from mobile phones or the one from Mini 0806 directly even if just sticking with thin double sided tape to the base of dashcam camera, - they caused vignetting. And the second challenge - I was not able to adjust the vertical angle of the lens, due to CPL was "hitting" car windscreen due to CPL lens filter 3-4mm metal frame.
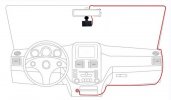
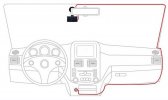
My goal was to make CPL lens filter ultra-slim, just wide enough to barely cover lens FOV area without going too much outside of the lens body and at the same time be able to rotate, and also be able to remove when needed.
I know this might not be a perfect project or acceptable for mass-production and not suitable for everyone's needs, but at least I have achieved all my goals and it works for me.
So this is the best I was able "to create" with materials I had in my hand. It's just a quick raw DIY I have made "on the go". The next one would look slightly better.
This is just to give an idea for those who also want to try something similar, or it might give other ideas to go from here further.
I have used
- a mobile phone clip-on CPL lens filter
- key-ring
- neodymium magnets
- thin 3M double sided tape
- permanent marker
View attachment 12900
Yellow triangle on CPL fitler glass is a temporary sticker just to know which side is front, while working on the project.
View attachment 12901
View attachment 12902
Key-ring need to be cut and slightly squeezed the way it creates a spring-tension over the CPL lens glass edge. You may use a thin layer of nail polisher or glue between key-ring and glass. I did not use glue yet, key-chain ring spring-tension worked fine for now.
View attachment 12903
Using thin 3M double-sided tape to attach neodymium magnets to the lens holder body. This is just a temporary solution. For proper job need to glue them with super-glue.
View attachment 12904
Painted front part of the key-ring with black colour permanent marker, so I can identify which side is front and which is back.
To be honest, within few days of use, marker starting coming off. I was thinking to make some marks on front area of key-ring with mini file.
Also painted shiny neodymium magnets to look more stealthy.
View attachment 12905
View attachment 12906
View attachment 12907


")