I am trying to hardwire a Cellink Neo (in honda crv 2014) with an add-a-fuse which is rated at 9 amps (using 20 amp fuse). I have to use an occupied fuse slot, as no empty slots are ignition activated. I was wondering if this is too much of a load on the fuse buss to piggy back? Someone mentioned in here that for example a device rated for 5amps might use a 7.5amp fuse and the fuse wiring might be rated for 10 amps. Is this true? If so then adding an additional 9 amps could be dangerous right? Would it be safer to piggy back off a 20 amp slot? Perhaps the higher the rating, the more safety buffer they add to the wiring. any insight is appreciated, thanks!
Hi
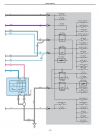
I have posted many replies as to the correct way to fit a fuse tap. First of all check to see if you have a spare fuse location in the fusebox this would be the best option as it is unlikely that the vehicle's fusebox is fully used. The add a fuse is used to add a second connection on the live side only. As for what size fuse to tap into it is more important that the fuse you are intending to use is not safety related for example use cigar lighter - heated rear screen. Use the recommended hard wire kit. This method it is simple and correct, use the correct fuse for the camera, find a fuse of the same or slightly higher size.
Remove the fuse.
With a simple tester find the live side.
Plug in the add a fuse with the red wire on the opposite side away from the live side.
Replace the original fuse, note this may now have to be replaced with a mini fuse as long as it is rated the same amperage as the original.
Now this is important for determining that it is correctly fitted.
The original circuit should work as before.
Now test the red wire on the add a fuse it should be dead - no current. If this is the case the add a fuse is correctly fitted.
The red wire should only be live when the second fuse is added, this is the live side starting point of whatever you wish to add. As for worrying about overloading the circuit this happens when you do not use the method I have just described. My way you are making two circuits independently fused the only thing shared with the original fuse is the live feed for the fuse.
It is important to use fuses of the same or similar ratings don't be put off by this because you are creating a new circuit. Should you fit lager rated fuses than what is recommended that will be the start of your troubles to come and dangerous.
Best ofmluck
")