Blackvue DR650GW-2CH _ (Custom firmware)

I got error of version mismatch in my sdcard after I change some setting in web interface.
from the log file info, it seems like the kernel recognize device model is DR550 where Config files defines it as DR650. And then conflict.

===================================
I just get this error temp fix by using version.bin file from DR550 2.002E stock FW. This will cheat software config certification but lost the new features from DR650, like speed limit alarm, ect.(I don't really need those feature, so never mind, lol)
 

Attachments

  • 20100601.log.txt
    606 bytes · Views: 5
Last edited:
so what are the risks with the custom firmware? i was watching the 15mbps and it seemed laggy, but the 12mbps did not. is that the actual recording or just my computer being slow?
 
af2m3.jpg


translation from Russian to make you this hard? to help Google translate
http://car-dvr.info/forum - Russian website, if you are interested, use the translator, we are not obliged to do the translation.

!!! Attention! Please will not ask questions regarding:
Wi-Fi will be determined as DR550!
In some places, too, will be seen as 550 (can fix yourself)
Can copy this link (will be on the video in the bottom.corner) DR650GW-2CH/FHD-HD
 
Can someone who has purchased the DR650 custom firmware (1.5) please help me. I don't understand the instructions in "Google Translated Russian to English". I don't want to brick my BlackVue.
I just need to know the absolute basics of how to install the ENGLISH version of the firmware, hopefully that's what I downloaded. I have donated to alexsoll and received the firmware with his blessings, but need an actual HOW-TO that isn't mangled by a translator.

Thank you!

Extract the zip file you download and Copy the folder "system", then overwrite it to the same folder you have on the SD card
 
Extract the zip file you download and Copy the folder "system", then overwrite it to the same folder you have on the SD card

If that's all there is to it, why are there images of running a config command over wifi in the browser window? "Enabling registration"? Are you leaving anything out?
 
If that's all there is to it, why are there images of running a config command over wifi in the browser window? "Enabling registration"? Are you leaving anything out?
That's what you will do after installing custom FW. the custom FW setting is based on Web-interface. While your pc/mobile/laptop is connected to you DVR, open a browser(Chrome recommended) and type 192.168.8.1 to go into custom FW setting.
 
Disclaimer: I am not a representative of Blackvue nor the team who has developed the custom firmware. I take no responsibility for damage caused by attempts to modify the dash camera using any methods below. These are the tools and methods I employed in modifying my own camera

1.0 What you need
1.1. DR650GW-2CH with v1.03 installed
1.2. Micro SD card ( from the dash camera)
1.3. Micro SD card to USB adaptor
1.4. A laptop with wireless WIFI adaptor
1.5. A copy of the v1.03 OFFICIAL Blackvue code for DR650GW-2CH
1.6. The Alexsoll custom firmware.

2.0 Prepare the SD card for installation
2.1. Remove your Micro SD card from Dash CAM
2.2. Connect SD card to PC / laptop
2.3. Format your Micro SD, ideally as exFAT.
2.4. Install the Blackvue folder from v1.03
2.5. Delete contents in "SYSTEM" folder on SD card
2.6. Copy custom Firmare to SD card
2.7. Safely eject remove SD card from PC / laptop

3.0 Update the Blackvue
3.1. Install SD card to the camera and power on
3.2. Software will update automatically and you will get audio feedback
3.3. Upgrade complete after reboot

4.0 Your not done yet!
4.1. Turn on the Blackvue WIFI hotspot
4.2. Using a laptop connect to the Blackvue wireless (it will now be called "DR550GW-2CH")
4.3. In Firefox / Chrome or IE browse to 192.168.8.1
4.4. Look at the reported time, it will be set to Moscow (we fix later in this post so ignore for moment)
4.5. Go through each tab and familiarise yourself with the interfaces
4.6. The most important tab is the Setup / Config tab (NOTE need to confirm tab name)

NOTE the camera name is now a 550, change this as you prefer.
I use bottom box for Car registration and the top box I do not know what it does yet, but I added the cameras correct model number


4.7. Open the CUSTOM section and set your new bit-rates. I use 15 front and 4 rear
4.8. Select load ISP
4.9. Save changes, camera may reboot
4.10. Once rebooted reconnect and browse back to same page

4.11. Open the ISP settings and tick the top box to enable and also the MANUAL button

NOTE The settings on sliders are already preset to optimal by Alexsoll and team
Save changes (this will improve night time video quality)


5.0 Time to fix the Time
5.1. Power off camera safely
5.2. Remove SD card and insert to PC / laptop
5.3. Open My Computer in Windows and open the SD card
5.4. Delete all contents in the folders RECORD and SYSTEM
5.5. Open the BLACKVUE viewing software
5.6. Open SETTINGS and select correct time zone and press SAVE & CLOSE

NOTE the software may show the correct time zone as it reads it from your computer. What the above steps do is it saves that information to your SD card to give instruction to the Camera


5.7. In settings change the WIFI SSID and passcode to something you will recognise and remember
NOTE the reason is when I tried to connect from iPhone app using the set SSID and password it would not connect. Only way round was to change the SSID and the passcode. This step is important to the next section as you need the phone app for quick verification.

5.8. Remove safely the SD CARD from computer and install to CAM

6.0 Let's check the results
6.1. You will need your android or iPhone with the Blackvue app installed and your laptop again
6.2. Turn on Blackvue WIFI
6.3. Connect to WIFI from phone
6.4. Connect via phone app
6.5. Open LIVE view
6.6. Check the time stamp
NOTE if time still wrong, then you must wait for the GPS to lock

6.7. Disconnect WIFI
6.8. Go for test drive

7.0 Nice cup of tea and a movie
7.1. Take card from Dashcam and insert to PC
7.2. Open the SD card in "MY COMPUTER" and browse to the "RECORD" folder
7.3. Find a FRONT camera file, it will have a letter combination with NF in the filename
NOTE NF = Normal Front, NR = Normal Rear, PF / PR = Parking front/rear and EF / ER = Event Front / Rear

7.4. Right-click file and select properties, then open the DETAILS tab
7.5. Check the DATA RATE = approximately 15000Kbps, confirms new bit-rate we set.
7.6. Do same step as 7.4. for the NR file and check the DATA RATE = approximately 4000Kbps

8.0 If you format your SD card after upgrade
General maintenance of your SD card is you should format it to keep it in good condition at least once a week. Doing a format of your card will restore the Moscow timezone back to your camera. To fix this repeat the steps in section 5.0


Hopefully this should setup your now modified Blackvue DR650 with the custom firmware and also have the recording information correct for quality and also local time.

If there is anything I missed please let me know and I will edit it in to the post. If this proves useful for all then I may open it as a new thread and ask Moderators to STICKY the post to the forum for future users.
 
Last edited:
Nice detailed how to great job... i did not realise that you had to format SD cards as much as once a week wow, maybe thats why so may people have recording issues as well.
 
Thanks Alan, all of this is swell, but I've been able to piece all of that together already. I guess I'm doing that part correct, but this doesn't answer why I can't access http://192.168.8.1/Config/upgrade.cgi. I get the 1.1 CGI not compliant error, even if I type in the filename incorrectly on purpose, so I'm presuming that upgrade.cgi is not present. Indeed, there is no upgrade.cgi in that folder before I upgrade the firmware, nor found in the custom firmware.

I'm still unsure where upgrade.cgi comes from. I've read that you have to copy upgrade.cgi to the Config folder, but I don't see this file in the custom DR650GW-2CH firmware (1.5)... so, where do I get upgrade.cgi?

Also, you say to just browse to 192.168.6.1, but if I browse just to this path all it does is say "BlackVue". I assume you mean to browse to http://192.168.8.1/Config/upgrade.cgi.

This seems like it should be so easy, but it's just not working with anyone's instructions. There has to be a missing piece somewhere.

Disclaimer: I am not a representative of Blackvue nor the team who has developed the custom firmware. I take no responsibility for damage caused by attempts to modify the dash camera using any methods below. These are the tools and methods I employed in modifying my own camera

1.0 What you need
1.1. DR650GW-2CH with v1.03 installed
1.2. Micro SD card ( from the dash camera)
1.3. Micro SD card to USB adaptor
1.4. A laptop with wireless WIFI adaptor
1.5. A copy of the v1.03 OFFICIAL Blackvue code for DR650GW-2CH
1.6. The Alexsoll custom firmware.

2.0 Prepare the SD card for installation
2.1. Remove your Micro SD card from Dash CAM
2.2. Connect SD card to PC / laptop
2.3. Format your Micro SD, ideally as exFAT.
2.4. Install the Blackvue folder from v1.03
2.5. Delete contents in "SYSTEM" folder on SD card
2.6. Copy custom Firmare to SD card
2.7. Safely eject remove SD card from PC / laptop

3.0 Update the Blackvue
3.1. Install SD card to the camera and power on
3.2. Software will update automatically and you will get audio feedback
3.3. Upgrade complete after reboot

4.0 Your not done yet!
4.1. Turn on the Blackvue WIFI hotspot
4.2. Using a laptop connect to the Blackvue wireless (it will now be called "DR550GW-2CH")
4.3. In Firefox / Chrome or IE browse to 192.168.8.1
4.4. Look at the reported time, it will be set to Moscow (we fix later in this post so ignore for moment)
4.5. Go through each tab and familiarise yourself with the interfaces
4.6. The most important tab is the Setup / Config tab (NOTE need to confirm tab name)

NOTE the camera name is now a 550, change this as you prefer.
I use bottom box for Car registration and the top box I do not know what it does yet, but I added the cameras correct model number


4.7. Open the CUSTOM section and set your new bit-rates. I use 15 front and 4 rear
4.8. Select load ISP
4.9. Save changes, camera may reboot
4.10. Once rebooted reconnect and browse back to same page

4.11. Open the ISP settings and tick the top box to enable and also the MANUAL button

NOTE The settings on sliders are already preset to optimal by Alexsoll and team
Save changes (this will improve night time video quality)


5.0 Time to fix the Time
5.1. Power off camera safely
5.2. Remove SD card and insert to PC / laptop
5.3. Open My Computer in Windows and open the SD card
5.4. Delete all contents in the folders RECORD and SYSTEM
5.5. Open the BLACKVUE viewing software
5.6. Open SETTINGS and select correct time zone and press SAVE & CLOSE

NOTE the software may show the correct time zone as it reads it from your computer. What the above steps do is it saves that information to your SD card to give instruction to the Camera


5.7. In settings change the WIFI SSID and passcode to something you will recognise and remember
NOTE the reason is when I tried to connect from iPhone app using the set SSID and password it would not connect. Only way round was to change the SSID and the passcode. This step is important to the next section as you need the phone app for quick verification.

5.8. Remove safely the SD CARD from computer and install to CAM

6.0 Let's check the results
6.1. You will need your android or iPhone with the Blackvue app installed and your laptop again
6.2. Turn on Blackvue WIFI
6.3. Connect to WIFI from phone
6.4. Connect via phone app
6.5. Open LIVE view
6.6. Check the time stamp
NOTE if time still wrong, then you must wait for the GPS to lock

6.7. Disconnect WIFI
6.8. Go for test drive

7.0 Nice cup of tea and a movie
7.1. Take card from Dashcam and insert to PC
7.2. Open the SD card in "MY COMPUTER" and browse to the "RECORD" folder
7.3. Find a FRONT camera file, it will have a letter combination with NF in the filename
NOTE NF = Normal Front, NR = Normal Rear, PF / PR = Parking front/rear and EF / ER = Event Front / Rear

7.4. Right-click file and select properties, then open the DETAILS tab
7.5. Check the DATA RATE = approximately 15000Kbps, confirms new bit-rate we set.
7.6. Do same step as 7.4. for the NR file and check the DATA RATE = approximately 4000Kbps

8.0 If you format your SD card after upgrade
General maintenance of your SD card is you should format it to keep it in good condition at least once a week. Doing a format of your card will restore the Moscow timezone back to your camera. To fix this repeat the steps in section 5.0


Hopefully this should setup your now modified Blackvue DR650 with the custom firmware and also have the recording information correct for quality and also local time.

If there is anything I missed please let me know and I will edit it in to the post. If this proves useful for all then I may open it as a new thread and ask Moderators to STICKY the post to the forum for future users.
 
Thanks Alan, all of this is swell, but I've been able to piece all of that together already. I guess I'm doing that part correct, but this doesn't answer why I can't access http://192.168.8.1/Config/upgrade.cgi. I get the 1.1 CGI not compliant error, even if I type in the filename incorrectly on purpose, so I'm presuming that upgrade.cgi is not present. Indeed, there is no upgrade.cgi in that folder before I upgrade the firmware, nor found in the custom firmware.

I'm still unsure where upgrade.cgi comes from. I've read that you have to copy upgrade.cgi to the Config folder, but I don't see this file in the custom DR650GW-2CH firmware (1.5)... so, where do I get upgrade.cgi?

Also, you say to just browse to 192.168.6.1, but if I browse just to this path all it does is say "BlackVue". I assume you mean to browse to http://192.168.8.1/Config/upgrade.cgi.

This seems like it should be so easy, but it's just not working with anyone's instructions. There has to be a missing piece somewhere.

1.Where the heck do you find the instruction from? http://192.168.8.1/Config/upgrade.cgi. THAT IS FOR DR550 old custom FW install
2.NOT 192.168.6.1 IS 192.168.8.1 You need to be connected to DR650 WIFI first
 
Hello Hritzee,

Yoho2ca is correct you do not have to, nor do you need to, run the command http://192.168.8.1/Config/upgrade.cgi. Hence my post does not mention this instruction.

You must have been reading old instructions to the older models. Also note Alexsoll's does post in DR650 custom firmware sections links to the DR550 custom firmware because he is trying to explain key features he has already written in the past, for example how to set the ISP or to correct the wrong time settings.

If you are not very technically minded my recommendation is to ignore any instructions except for those I wrote above. I have successfully upgrade two (2) Blackvue DR650GW-2CH Dashcams doing the above.


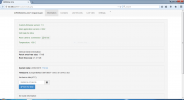
If you have followed all my instructions to the letter at the very start then after the upgrade you should have the following WEBPAGE (file attached = Front Screen.PNG) when you type in 192.168.8.1
 

Attachments

  • Front Screen.PNG
    Front Screen.PNG
    64.4 KB · Views: 47
Last edited:
Also per your post if you get the attached image (Not Upgraded.PNG), then you have not upgraded the camera. This screenshot was taken from Firefox web browser from my DR650GW-2CH that has not been modified.
 

Attachments

  • Not Upgraded.PNG
    Not Upgraded.PNG
    55.6 KB · Views: 22
I meant to write dot 8.

I thought I got those instructions from the download link itself!

http://car-dvr.info/forum/index.php?topic=877.0

Can't access that link right now, not on the computer with my saved password.

Of course I'm connected to the dash cam wifi.
1.Where the heck do you find the instruction from? http://192.168.8.1/Config/upgrade.cgi. THAT IS FOR DR550 old custom FW install
2.NOT 192.168.6.1 IS 192.168.8.1 You need to be connected to DR650 WIFI first
 
Thank you for all the great support. Wish Alex wrote as articulately as you. If what you say is true it appears I am not upgraded. No clue why though, I have followed all of these steps 3 times now. Upgrade completes, but page still looks like the original blackvue page.

Ps. I am pretty technical. I stare at a screen 12 hours a day solving technical problems and streamlining work flow processes for enterprise level companies by reviewing processes, writing code, and refining others'. I can fully explain the OSI model, have been building networks for almost 20 years, worked in tech support for 5 years, and spent my prepubescent teen years hacking and rooting boxes to build bot nets just to take over IRC channels. Still, at 33 years old, I've finally met my match with DR650RW custom dash cam software. Life can be cruel.
Hello Hritzee,

Yoho2ca is correct you do not have to, nor do you need to, run the command http://192.168.8.1/Config/upgrade.cgi. Hence my post does not mention this instruction.

You must have been reading old instructions to the older models. Also note Alexsoll's does post in DR650 custom firmware sections links to the DR550 custom firmware because he is trying to explain key features he has already written in the past, for example how to set the ISP or to correct the wrong time settings.

If you are not very technically minded my recommendation is to ignore any instructions except for those I wrote above. I have successfully upgrade two (2) Blackvue DR650GW-2CH Dashcams doing the above.

If you have followed all my instructions to the letter at the very start then after the upgrade you should have the following WEBPAGE (file attached = Front Screen.PNG) when you type in 192.168.8.1
 
Just to satisfy my curiosity, was your camera loaded from factory with v1.00? If yes, had you upgraded it to v1.03 before you attempted to install Alexsoll's firmware? I think Alex's code requires this as the base version to upgrade from.

My understanding is once you have the cam at v1.03 you have to delete the System folder and the contents of the Record folder (I think the GPS logs may interfere). Then place Alex's System folder into the SD card. I just want to make sure you are doing it that way and not just loading Alex's firmware into a blank Micro SD card.
 

Alex, this was the correct answer. Thank you!

Going to just http://192.168.8.1 just shows the word BlackVue in black text.
Going to http://192.168.8.1:8080/custom/index.php was all I needed to do. Looks like I was indeed upgraded all along.

Now, a couple questions.
#1. Why is this nowhere in the instructions? Like, how about where you offer the firmware for download officially, here: http://car-dvr.info/forum/index.php?topic=877.0
#2. Where did other people learn this? Can you link me to where you found this information?
#2. I changed Wifi to 802.11N. My Wifi Rate now shows no speed. It just says "Wifi". Is this a known bug?
#3. When I do liveview, it's extremely slow. Is this expected or do I need to lower my bit rates? I'm currently doing front:12, rear:6.
#4. Is there a preferred way to do a Wifi Speed test now that I'm connected to the blackvue over 802.11N?
 
1. The Russians are doing to Russian, English to yourself (I'm not a translator, I badly know English)
2. ---
3. "Wifi" without numbers - set up correct
4. front:12, rear:6. - this is the maximum value for the memory card kit
5.
af9OS.jpg


Back
Top