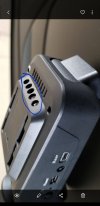
Zenfox T3 insides

Yeah I saw that from the main thread. Looks a bit extreme, the plastic housing is really thick and I was quite nervous about drilling holes because I had to push hard to get the drill bit to bite and when it goes thru, I have no idea if it'll break something on the other side. So I stopped at 5 holes around the bottom curve, avoiding the WiFi antenna patch.

This only goes to show how hot that camera is getting. The very reason it's overheating is poor cooling and ventilation. Resulting in the camera shutting down.

Poor Design. Zenfox didn't care to hear any of our thoughts after we kept pointing out critical flaw after critical flaw. Instead, he high tailed it to redit and other mediums where he'd get kiss ass reviews. Then has gone on to sell the camera.

I hope the post production models are better, otherwise there are going to be a lot of angry customers!
 
Well we're not seeing them flooding in here to say they got conned yet. So either:
1) He's not actually sold very many units, maybe the potential buyers searched about it and found this forum and decided not to buy.
2) He's actually fixed the problem.
3) Nobody used it with parking mode because it's no longer marketed as such so the complaints rate is much lower?
4) The selling price is too high and even if it's problem-free, very few people would pay for unknown brand at that price.
 
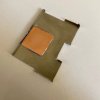
So anyway the 0.8mm 20x20mm shims arrived and here it is with some thermal paste applied very thinly (and the other side on the SoC). A dab of superglue at the tip of a toothpick, and let it sit for 20 minutes.

photo_2020-11-05_17-41-47.jpg

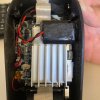
And then the EMI can goes on, and heatsink given the same treatment. The supercap is stuck to the side and heatsink using acrylic double sided tape. Notice I've pushed it to one side, hopefully allowing more airflow through the heatsink fins. Also allowed a small gap between heatsink fins and supercap, again in the interest of permitting convection airflow.

photo_2020-11-05_17-41-44.jpg

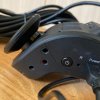
Four holes around this side, two holes on the other side avoiding the WiFi antenna patch. Hopefully this will be the intake, as hot air leaves the body from above. Not exactly the most handy with a power drill, but I guess better than not trying :/

photo_2020-11-05_17-41-37.jpg

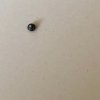
In the process of closing it back, I managed to somehow break the head off a screw. Must have overtightened it, but I've never had this happen before. Most of the time I break the thread. Not very confidence-inspiring now is it? Location is the left side screw next to the indoor cam when viewed from the screen side.

photo_2020-11-05_17-41-31.jpg

From here on, it's testing and more testing I guess. For now leaving it to run indoors and let's see if it'll start beeping after a few hours or something. If it passes 24 hours, I'll proceed to find a new spot to mount it in one of the cars.
 
@richx Your design and workmanship seem good, and testing will tell, but I still see this cam as a lost cause :( The broken screw is odd, but being a low-torque application there's probably near-zero QC in their manufacture other than a quick visual check for major errors such as missing threads from broken tooling. I've experienced similar breakage a few times on trying to remove screws but only once on installing them.

I will always believe that overheat protection for dashcams is an inherently flawed concept. The correct approach is to build them well enough so that even if recording stops, the cam survives and will work again once it's cooled down. I have experienced numerous times where a cam stopped recording due to high heat, but I've never had one permanently fail from it including a cheap $26 LiPo-based cam. If it can be done at that price level then it should certainly be possible at nearly ten times the price :cautious:

Without reliability any dashcam is worthless regardless of whatever else it does.

Phil
 
In the process of closing it back, I managed to somehow break the head off a screw. Must have overtightened it, but I've never had this happen before. Most of the time I break the thread. Not very confidence-inspiring now is it? Location is the left side screw next to the indoor cam when viewed from the screen side.
Note that a correctly designed and manufactured screw/bolt should break the head off before stripping the threads. That way, if you overtighten it then you know it has been over tightened and it can easily be replaced because the threads are still in good condition. Otherwise it can easily be left in an unsafe condition with no visible way of checking.

You probably over tightened it by a large amount.
 
If it can be done at that price level then it should certainly be possible at nearly ten times the price :cautious:

Totally agree with you. Good thing I didn't pay my own money for this (and I think none of us in here did as well). However, the planet lover environmentalist in me would not have this end up in the garbage landfill just like that. Energy and raw materials have been consumed to manufacture and transport this. If someone else can put this to good use as a regular driving camera, why not. So far it's been running for 4 hour straight without any issues. I think tomorrow I can mount it in a car and let it run. In fact if it's a hot day I probably don't have to install this properly : planning to just leave it on the dashboard of my car parked outside, hook it up to a 10,000 mAh USB power bank (that's the biggest I've got) and just let it run until it stops or until the battery runs out. Maybe pop by every 30-45 mins to check on it.

You probably over tightened it by a large amount.

Indeed. I thought it wasn't biting, as in it went in wrong so I jiggled it a bit and turned a few more times. Then to my biggest surprise the head broke off.
 
Indeed. I thought it wasn't biting, as in it went in wrong so I jiggled it a bit and turned a few more times. Then to my biggest surprise the head broke off.
Always start off backwards until you feel it fall into the thread, then it always goes into the original thread. You only need to tighten it until it is holding the case together with a plastic thread, it will not unscrew itself if you don't torque it up.
 
So anyway the 0.8mm 20x20mm shims arrived and here it is with some thermal paste applied very thinly (and the other side on the SoC). A dab of superglue at the tip of a toothpick, and let it sit for 20 minutes.

View attachment 53991

And then the EMI can goes on, and heatsink given the same treatment. The supercap is stuck to the side and heatsink using acrylic double sided tape. Notice I've pushed it to one side, hopefully allowing more airflow through the heatsink fins. Also allowed a small gap between heatsink fins and supercap, again in the interest of permitting convection airflow.

View attachment 53992

Four holes around this side, two holes on the other side avoiding the WiFi antenna patch. Hopefully this will be the intake, as hot air leaves the body from above. Not exactly the most handy with a power drill, but I guess better than not trying :/

View attachment 53993

In the process of closing it back, I managed to somehow break the head off a screw. Must have overtightened it, but I've never had this happen before. Most of the time I break the thread. Not very confidence-inspiring now is it? Location is the left side screw next to the indoor cam when viewed from the screen side.

View attachment 53994

From here on, it's testing and more testing I guess. For now leaving it to run indoors and let's see if it'll start beeping after a few hours or something. If it passes 24 hours, I'll proceed to find a new spot to mount it in one of the cars.
Now that you drilled larger holes at the lower end, (which is good) it would be good to drill some at the top to help improve the convection effect air flow.
Here is a picture of mine showing where I drilled several holes in which seemed to help to extract some of the heat.
Just make sure you drill those while the unit is disassembled to avoid damaging the heatsink.

Screenshot_20201105-102154_Gallery.jpg
 
@EGS wow those are really clean drill holes. I think I'm going to struggle with that angle, not having a proper work bench / G clamp, etc to work with. I'll test it out and see how it goes, when the dashcam is in the appropriate angle like when it's installed on the windscreen, it does feel like it's evacuating lots of heat through the side vent (opposite the ports). But I also feel a fair bit of heat accumulation in the GPS chip area, so let's see how it goes once I try testing it in-car.
 
@EGS wow those are really clean drill holes. I think I'm going to struggle with that angle, not having a proper work bench / G clamp, etc to work with. I'll test it out and see how it goes, when the dashcam is in the appropriate angle like when it's installed on the windscreen, it does feel like it's evacuating lots of heat through the side vent (opposite the ports). But I also feel a fair bit of heat accumulation in the GPS chip area, so let's see how it goes once I try testing it in-car.
Thanks. I didn't use any clamps or a proper work bench. I made some pencil marks first for equal spacing, then started with one of the smallest drill bits and worked my way up. It is easier if you have a battery powered drill where you can control the speed. Drilling at a slower speeds gives you better results.
 
After about two months of testing, it seems to be pretty reliable. I've not had the interior cam flake out during a drive. So far I've clocked about 800 km. So I decided it's time to take it to the next step of testing, I installed a Viofo HK3ACC kit in this car, replacing old Viofo 2-wire hardwire power supply. I've tested it twice now, 1 fps parking mode with 6 hours timer. It seems to be able to finish all 6 hours without flaking out. I'll start and stop the car once today maybe around noon and let the parking mode run itself in the middle of the day. If this is stable, it's time to move on to low bit rate mode but I might need larger than 64GB to hold all that.

@hoyhoy your friend worked on his unit yet?

PS: Irritatingly the Viofo HK3 mini USB bend direction is wrong, so I had to loop in through the front of the mount to go up towards the headliner again. Ah well.
That's good!
Mine became fairly reliable as well after my mods but I had to take it off to allow some room for a new test unit from another manufacturer. I will try to do something with it later on.
How much modification have you done to it so far? also, what kind of temperatures are you exposing it to while testing it?
 
@EGS the modifications were as detailed in post #23 above. I did not drill any additional holes as you had suggested in post #28, thinking of saving that as follow-up action only if current mods were insufficient. The unit still gets very hot from the outside, but it kept ticking still.

First round ambient (under shade) outdoor temp peaked at 35 degrees, I didn't put a temperature logger inside the car while it was going on but the car was parked fully under the sky with a small tree giving some shade during parts of the day. After opening the door and starting up the car, the indoor thermometer read 42 degrees before quickly dropping to 37 (with one door open). Can assume the windscreen area will be 50 or close to.

Second round wasn't as hot, peaked at about 32 degrees with most of the day hovering around 30 degrees with overcast skies, so nothing much to take note of.

Today is peaking around 33 degrees but clear skies, so it should be a lot hotter inside the car.
 
After about two months of testing, it seems to be pretty reliable. I've not had the interior cam flake out during a drive. So far I've clocked about 800 km. So I decided it's time to take it to the next step of testing, I installed a Viofo HK3ACC kit in this car, replacing old Viofo 2-wire hardwire power supply. I've tested it twice now, 1 fps parking mode with 6 hours timer. It seems to be able to finish all 6 hours without flaking out. I'll start and stop the car once today maybe around noon and let the parking mode run itself in the middle of the day. If this is stable, it's time to move on to low bit rate mode but I might need larger than 64GB to hold all that.

@hoyhoy your friend worked on his unit yet?

PS: Irritatingly the Viofo HK3 mini USB bend direction is wrong, so I had to loop in through the front of the mount to go up towards the headliner again. Ah well.

Try low bitrate parking mode and the thing will go ape-sh1t and die. Overheats. First interior, then whole camera shuts down and beeps. Going to order a Viofo A139 most likely to swap out for this unit.
 
Third run oddly went up till 5 hours before the car battery threshold was broken I guess. No indoor cam flaking out. So far so good but I think I need to charge up the car a bit before next test with low bitrate.

More odd, is that the camera didn't boot up when I started the car. Could it be the power supply once cut off, didn't respond to the ACC line? Maybe I have a faulty HK3ACC. Need to observe this further. Didn't happen in the first two rounds of parking testing. I had to unplug the power connector and plug it in, then the camera booted up.

The Zenfox T3 interior camera (under the newest firmware) was set to disable in order to lesson the amount of heat. With the original firmware, when the camera overheated, all three cameras shut down. With the new firmware, the interior camera shuts down first, in an attempt to prevent the rear and front from shutting down. It's a bandaid patch, because under low bitrate parking mode, all cameras end up shutting down on a hot day. Poor ventilation, heatsink, etc.

The HK3 works perfect. Will transition the camera from driving mode to park mode. Red = Battery Yellow = Accessory Black = Ground. My camera goes into parking mode without any issue. It's set to low bitrate.

Wifi fried itself on the camera, so if I try to enable, it freezes unit. These cameras are made poorly. At least the sample models.
 
hand samples are never as good as production models, that goes for any brand

Agreed although I doubt the Zenfox production flaws were corrected in product level models. Nothing to indicate otherwise.
 
Agreed although I doubt the Zenfox production flaws were corrected in product level models. Nothing to indicate otherwise.
You keep saying that without any evidence to support it!

The whole point of pre-production builds is to sort out the problems so that the production units are good ;)
 
Agreed although I doubt the Zenfox production flaws were corrected in product level models. Nothing to indicate otherwise.
not something you could say one way or the other without seeing a production version, I think this model is a hard sell due to the unusual design so it may never get any love, if they can't sell in volume they generally lose interest in making further improvements and just move onto something else, perhaps it was interesting at first due to no other 3 channel options but the A139 is a much better form factor and is more likely to pickup any sales that this model would have got due to being 3 channel, the market for 3 channel perhaps isn't big enough to warrant both and for the majority the Viofo is going to be a better option I would think
 
Thread starter Similar threads Forum Replies Date
sendoh_dash Zenfox 3
rcg530 Zenfox 12
kamkar Zenfox 7
R Zenfox 4
Nigel Zenfox 4
Back
Top