OP
OP
- Joined
- Nov 1, 2013
- Messages
- 547
- Reaction score
- 222
- Location
- Dayton Nevada & Calgary Alberta
- Country
- United States
- Dash Cam
- Lukasdirect.com Street Guardian BulletHD Calgarydashcam.com
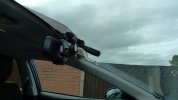
I had asked questions before getting the unit installed regarding using an Add-A-Cicuit as that is what seemed to be the thing to do. We were going to use a 3 amp Add-A-Circuit. Installer realized the the power assy cable. already has 2-amp fuses on each of the power leads (continuous and ACC). We did not use an Add-A-Circuit, I was not watching the installer connect the power leads to the fuse panel so don't know exactly what he did there.
Yes this is correct. You can wrap the leads around the fuse blades as shown in the lukas manual.. There is a 2amp fuse on both the battery and acc lines on the Lukas continues power kit. However we caution against and do not recommend installing and power cable this way. Someone can easily wrap the leads wires around a fuse blade and not take in to account that if any part of the leads wires touches the other side of the fuse, you are effectively defeating the purpose of the fuse you are tapping. Your camera will be fine if anything happens, however you vehicle electrical components may not be.
We always advise using a fuse tap for at home hardwire installs because it eliminates this risk. Yes the Lukas hardwire kit has its own 2AMP fuses, and the fuse tap will be adding a additional fuse that is not needed. Its best to play it safe, and double fuse it. You could fuse it with a 15 amp. Does not matter. There is still a 2 amp fuse. However its probably best to use a two amp fuse in your add-a-fuse adapter. Better safe then sorry.


") Lukas was built for this.
Lukas was built for this.