Re: Custom Firmware Thread: *RELEASED* Ver 1.1.1aE [DR500GW-
RAGY said:
Hi
I did as instructed, but my Blackvue just record as normal after my SD card is initialised. I wonder what did I do wrongly.
#==============================================================================#
#================== AvE (ave123)& Car-DVR Team 2012-2013 ===================#
#==============================================================================#
#============================
http://www.car-dvr.info ============================#
#==============================================================================#
#=====
team@car-dvr.info |
cardvr.team@gmail.com |
dr500gw@gmail.com ======#
#==============================================================================#
# Documentation for a distribution of a custom firmware of the BlackVue #
# DR500GW-HD WiFi car DVR #
#==============================================================================#
# install_en-v1.1.1a.txt #
#==============================================================================#
# Custom firmware installation instructions #
#==============================================================================#
Before installing or updating a firmware make sure that you read and
understood a documentation supplied with a distribution of a custom
firmware you received.
Given file is a part of the documentation (ref.
about_en-v1.0.txt and
info_en-v1.1.1a.txt)
Firmware updating procedure is supplemented with explanatory voice messages and
LED indication.
#==============================================================================#
# Current version of a custom firmware update tracks #
#==============================================================================#
1. Stock firmware:
1.002K -----> 1.003K -----> custom-1.1.1a
1.003K, 1.005K -----> custom-1.1.1a
1.005R -----> custom-1.1.1a
1.003E, 1.005E -----> custom-1.1.1a
2. Custom firmware
Everything from above -----> 1.003K -----> custom-1.1.1a
custom-1.0.1...1.0.2 ------> 1.003K -----> custom-1.1.1a
custom-1.0.3a -----> 1.003K -----> custom-1.1.1a
custom-1.0.3a -----> custom-1.0.3b -----> custom-1.1.1a
custom-1.0.3b -----> custom-1.1.1a
custom-1.0.5 -----> custom-1.1.1a
custom-1.0.5a -----> custom-1.1.1a
custom-1.1.0S -----> custom-1.1.1a
custom-1.1.0S1 -----> custom-1.1.1a
custom-1.1.1S -----> custom-1.1.1a
#==============================================================================#
# Custom firmware installation procedure #
#==============================================================================#
0. Make sure that you are about of installing a version of a custom firmware
that is suitable to be installed over a version of your current firmware (by
a verification with a documentation, checking a current version of the firmware,
and/or asking for help from a supplier of the custom firmware).
1. Perform formatting of your Micro-SD card (e.g. with Windows GUI version
of the fat32format or SD Formatter). (Note 1).
2. Extract BlackVue folder from the archive (SD-card-ave-vX.X.XX.rar) you
received to a hard disk of your PC.
3. Make sure that a required time zone file is placed inside the
\\BlackVue\citytime
directory (ref. info_en-v1.1.1a.txt)
4. Check that correct settings are specified in files located in
\\BlackVue\Config
directory (or just leave them as they are if you are not aware of details;
default settings are suitable for majority of cases).
5. Copy BlackVue directory from the hard disk to the recently formatted Micro-SD
card.
6. Insert the Micro-SD card into your DR500GW-HD.
7. Connect the DR500GW-HD to a power source, and power it on - this will start
an updating procedure (make sure that power source is stable and power is
ensured until the end of the updating procedure).
8. Wait until the end of the updating procedure. The DR500GW-HD may restart
several times; it may take some minutes. Do not interrupt the updating
procedure, and do not disconnect the power source (e.g. do not stop your
car engine in case you perform an update in your car). Hear a message
informing you of a functioning of the DR500GW-HD – this will end the
updating procedure.
9. Confirm a functionality of the DR500GW-HD through BlackVue application by
checking a live video (Live View menu option; make sure that Wi-Fi of the
DR500GW-HD is switched on in order to be able to establish a connection).
10. Use the DR500GW-HD as it is intended to.
#==============================================================================#
# Remarks #
#==============================================================================#
1) All files located in a given directory as well as the directory itself:
\\Blackvue\System\upgrade
are required for a proper firmware updating procedure. Inside the upgrade
directory software images are located, for example:
cramfsImage_DR500GW
patch_DR500GW.bin
as well as files with check sums of those images (of the same name files
having the SUE extension).
Filenames of given files are fixed, and checked when they are recorded into
a memory of the car DVR. All files located in the upgrade directory
that have matched names are recorded into co-named partitions of the
car DVR memory.
In case the specified upgrade directory is absent on the Micro-SD card,
firmware update will not happen.
Make sure before a beginning of a firmware updating procedure that specified
files and the directory are located on your Micro-SD card, which you are
planning to start updating from. Availability of other directories and files
is not necessary. When updating procedure is completed, the entire upgrade
directory is deleted along with its content.
2) Availability of the
\\BlackVue\System\upgrade
directory is not required for a typical functionality of the car DVR; in case
the directory is located on the Micro-SD card, one of the following happened:
2.1) either it is possible to place a patch-file
emergency.sh
into the directory for obtaining info on crashes and errors of the car DVR;
2.2) or firmware images are located in the directory – those that will be
recorded into the car DVR memory.
3) When you need to roll back to a stock firmware, do the following:
3.1) Make sure that
\\BlackVue\System
directory is located on the Micro-SD card along with files from the custom
firmware distribution.
3.2) Into the directory
\\BlackVue\System\upgrade
copy files (images) of the stock firmware (cramfsImage_DR500GW,
patch_DR500GW.bin, and uImage_DR500GW files).
3.3) After a reboot of the car DVR, a firmware updating procedure will
start; and after a next reboot you will get a stock firmware.
4) Into the directory
\\BlackVue\System\upgrade
it is permitted to copy selected but not all images of a firmware – only
those that are available will be copied into co-named partitions of the
car DVR memory.
5) In case of placing stock firmware files into the
\\BlackVue\System\upgrade
directory, an automated updating procedure will start and all custom changes
and modifications will be lost – the car DVR will return to a stock state.
6)
!!!!!!!!!!!!!!!!!!!!!!!!!!!!!!!!!!!!!!!!!!!!!!!!!!!!!!!!!!!!!!!!!!!!!!!!!!!!!!!!
!!!!!!!!!!!!!!!!!!!!!!!!!!!!!!!!!!!!!!!!!!!!!!!!!!!!!!!!!!!!!!!!!!!!!!!!!!!!!!!!
!!! IN CASE YOU MANAGE INSERT A MICRO-SD CARD !!!
!!! WITH A STOCK FIRMWARE DISTRIBUTION AND !!!
!!! \\BLACKVUE\SYSTEM DIRECTORY where STOCK !!!
!!! FILES are placed but not CUSTOM FIRMWARE !!!
!!! files, everything may end up extremely bad. !!!
!!! It is PROHIBITED to do so! !!!
!!!!!!!!!!!!!!!!!!!!!!!!!!!!!!!!!!!!!!!!!!!!!!!!!!!!!!!!!!!!!!!!!!!!!!!!!!!!!!!!
!!!!!!!!!!!!!!!!!!!!!!!!!!!!!!!!!!!!!!!!!!!!!!!!!!!!!!!!!!!!!!!!!!!!!!!!!!!!!!!!
7) In case you got a wrong time zone after updating to a custom firmware, it is
necessary to check whether a proper time zone file is located in
\\BlackVue\Config
directory – the file, which is relevant to your time zone.
8) In case you got a wrong date, time, or wrong GPS coordinates are recorded,
it is necessary to REMOVE ALL FILES from
\\BLACKVUE\RECORD
directory !!!!!
E.g. switch the car DVR off, remove a Micro-SD card, insert it into your
computer, and delete all the files from
\\BlackVue\Record
directory. (It is also possible to format the card, just make sure to place
your time zone file into the citytime directory!).
Upon a first reboot when GPS will enter into a working mode (blue LED is
permanently on), you must see a PROPER TIME and DATE.
9) During the update, some messages about missing files may occur. Those
are info-messages; they just indicate that those parts of a firmware will
not be recorded into the car DVR memory, nothing more.
10) In case you hear special diagnostic error messages, or firmware updating
will end with error message, it is advised to apply for a service, or
help from our team. A message may indicate that an inner memory of the car
DVR is corrupted.
It is difficult to suggest something remotely based on content of those
error messages due to a heterogeneity of errors and reasons yielded to those.
A case when recording error occurred is an exception. Such error with a high
probability may be fixed by a procedure of an emergency recovery of the
software partition - which is described in a given document.
#==============================================================================#
# Car DVR boot and LED indication during an updating procedure #
#==============================================================================#
1) During a firmware update while recording into flash memory happened,
a recording LED emits a red light.
2) When one of firmware files is not found, a short-term blue light is
blinking; this is duplicated by a voice message.
3) When updating is done, just before a reboot, a short-term winking of
both LEDs is happened.
4) After that the recording LED emits a green light.
5) At a moment of a CPU reset, all LEDs are off.
Additional remark to p.4. – With a purpose of controlling a reboot process
of the car DVR, and to be able to know when built-in ionistor is discharged
during the hang on, starting from v1003 of a custom firmware a green light
indication is launched. When the car DVR hangs, one needs to disconnect
a power source, wait until ionistor is discharged – at that moment the green
LED goes off - and then reconnect the power supply. The car DVR will boot
into an operational mode.
#==============================================================================#
# Possible problems - when car DVR does not boot #
#==============================================================================#
1) Both LEDs are off – check a power source.
2) Blue light is on – at least boot loader, and possibly a core of the system
started.
3) Green light is on – car DVR operating system started at least partially;
Pittasoft software did not launch.
A reason for that may be relevant to a firmware problem, improper firmware
update, or errors of a NAND flash memory of the car DVR.
4) BOTH LEDs are ON – car DVR turned into a BRICK. In other words even boot
loader does not start.
Recovery procedures in case of situations described in p.p. 2 and 3 are
already developed by our team; fixing of the NAND flash memory and system
recovery procedures are developed too. Those procedures require a connection
of the car DVR to a PC via a UART port, and relevant technical skills.
#==============================================================================#
# Car DVR operational modes – advanced user section #
#==============================================================================#
The following car DVR operational modes are available:
1) Generic mode. In this mode an availability of the same name check-sum
files having the SUE extension is checked. When file is absent, or check sum
check is not passed, then given firmware image (either all of them that
are not confirmed, or just one) are not recorded into the car DVR.
2) Update mode without a summation check. This mode is supplemented with a
special voice message. All the files located in the
\\BlackVue\System\upgrade
folder having required fixed names (e.g. patch_DR500GW.bin, boot_DR500GW,
uImage_DR500GW, cramfsImage_DR500GW) will be recorded into the car DVR into
corresponding partitions. Check sums are not taken into account, the
SUMMATION CHECK IS NOT PERFORMED; thus it is very important that for every
file its name would exactly correspond to its content, otherwise an updating
procedure will turn the car DVR to be out of service.
To enable such the mode one needs to place to the root of a Micro-SD
card a file of any content, but having the following name:
_MAGIC_ (word MAGIC, surrounded with two underline symbols !).
3) Software partition emergency recovery mode. In this mode a partition
with Pittasoft’s software, voice files, and Micro-SD card image, is entirely
rewritten. For that, the patch_DR500GW.bin file containing an image of the
partition has to be located on a Micro-SD card in the following directory:
\\BlackVue\System\upgrade
To enable such the mode one needs to place to the root of a Micro-SD
card a file of any content, but having the following name:
_REPAIR_NAND_ (words REPAIR and NAND, surrounded with underline
symbols !).
4) Configuration files saving mode. In this mode an entire content of the
\\BlackVue\Config
directory along with a time zone file located in the citytime directory
on a Micro-SD card are recorded into a NAND flash memory of the car DVR.
When a Micro-SD card is formatted by means of the car DVR (long pressing
of the Wi-Fi button), those configuration files are recorded back to the
Micro-SD card.
To enable such the mode one needs to place to the root of a Micro-SD
card a file of any content, but having the following name:
_SAVECFG_ (word SAVECFG, surrounded with two underline symbols !).
Upon reboot of the car DVR, configuration files will be saved into it,
and the _SAVECFG_ file will be deleted.
5) Fast boot mode (FAST). In this mode, it is not possible to perform
an update of the car DVR; all possible checks are disabled; Wi-Fi is
off; but the car DVR boots at the fastest speed.
To enable such the mode one needs to place to the root of a Micro-SD
card a file of any content, but having the following name:
_FAST_ (word FAST, surrounded with two underline symbols !).
5.1) As it is not possible to update a firmware in the FAST mode,
one must delete the _FAST_ file from the root of a Micro-SD in order
to be able to perform an update.
5.2) In the FAST mode the car DVR ALWAYS starts with default video
settings (e.g. stock settings by Pittasoft).
6) Emergency mode (debugging).
When the
\\BlackVue\System\upgrade
directory is located on the Micro-SD card, and the
emergency.sh
file is located in that directory, the car DVR will boot into the emergency
mode. An appropriate voice message is given upon a boot; updating procedure
is not launched even though firmware images are located in a given directory.
A given script is launched just before the car DVR software starts. When all
the commands of the emergency.sh script are executed, the car DVR software
starts.
Please, consult with our team as for usage of special means of the emergency
mode when it is required.
#==============================================================================#
# Notes #
#==============================================================================#
(1)
http://www.ridgecrop.demon.co.uk/index. ... format.htm
https://www.sdcard.org/downloads/formatter_4/
 blackvue_dr500gw-hd_heat_problem_70_degrees_celsius.jpg48.6 KB · Views: 245
 blackvue_dr500gw-hd_heat_problem_71_degrees_celsius.jpg96.7 KB · Views: 244
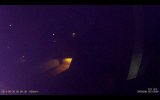 blackvue_dr500gw-hd_heat_problem_whole_sensor_heated.jpg232.2 KB · Views: 244
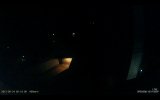 blackvue_dr500gw-hd_heat_problem_72_degrees_celsius.jpg122.4 KB · Views: 244
 dr500gw-hd_heat_problems.jpg278.5 KB · Views: 245